-7-
ASSEMBLY INSTRUCTIONS
1. Uncrate the stove and remove packing materials
and protective poly bag. (save cardboard box
for further assembly.)
2. Remove parts from inside of stove. Parts include:
one feed door, four legs, hardware pack, ue
collar, hearth plate, and bottom air channel.
3. Place attened carton on oor and carefully
turn stove over onto carton.
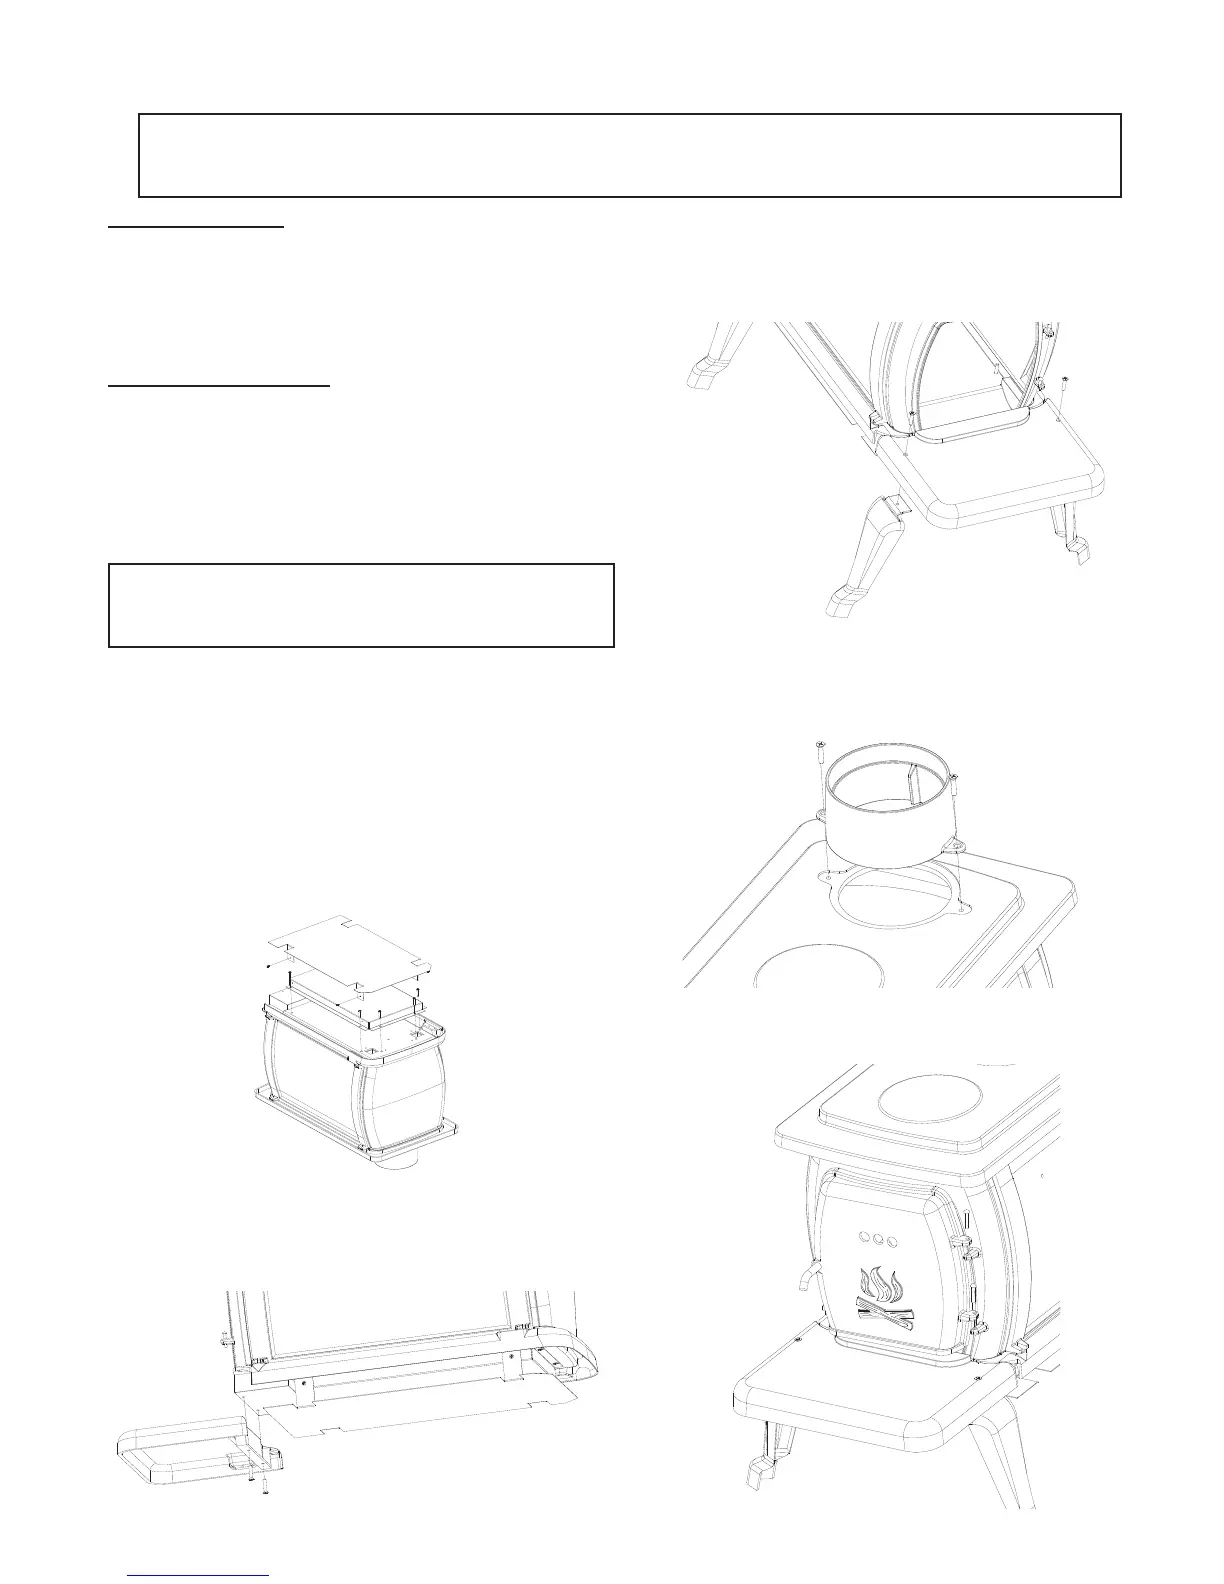
4. Assemble the heat shield with the four (4) sheet
screws.
REQUIRED MATERIALS
Note: the following items are not included with your
stove
Flooring protector as specied
Chimney Connector
1/2" Sheet Metal Screws
Chimney
Furnace Cement
REQUIRED TOOLS
• Safety Glasses
• Hearth Gloves
• Pencil
• 6' Folding Ruler or
Tape Measure
• Tin Snips
• Drill
• 1/8" dia. Drill Bit
• Adjustable Wrench
• (Sheet Metal Screws)
• #2 philips screw driver
CAUTION: Stove is heavy. Make sure you have
adequate help and use proper lifting techniques
whenever moving stove.
6. Attach the front legs to hearth with two (2) 1/4-20
x 1-3/4 screws.
7. Attach the rear legs to base of stove with two (2)
1/4-20 x 1-3/4 screws.
8. Carefully lift stove upright and place in desired
location (see "Installation" instructions for properly
locating stove.)
5. Attach bottom air channel to the stove with six
(6) 1/4-20 X 3/8" bolts.
6. Attach hearth to bottom of stove with two (2)
1/4-20 x 1-3/16 screws.
9. Lower feed door into position while aligning hinge
pins.
NOTICE: United States Stove Company grants no warranty, stated or implied, for the installation or
maintenance of your wood stove and assumes no responsibility of any incidental or consequential
damages.