Part No 1118382 5 Leg Extensions and
Wheeled Walker Accessories
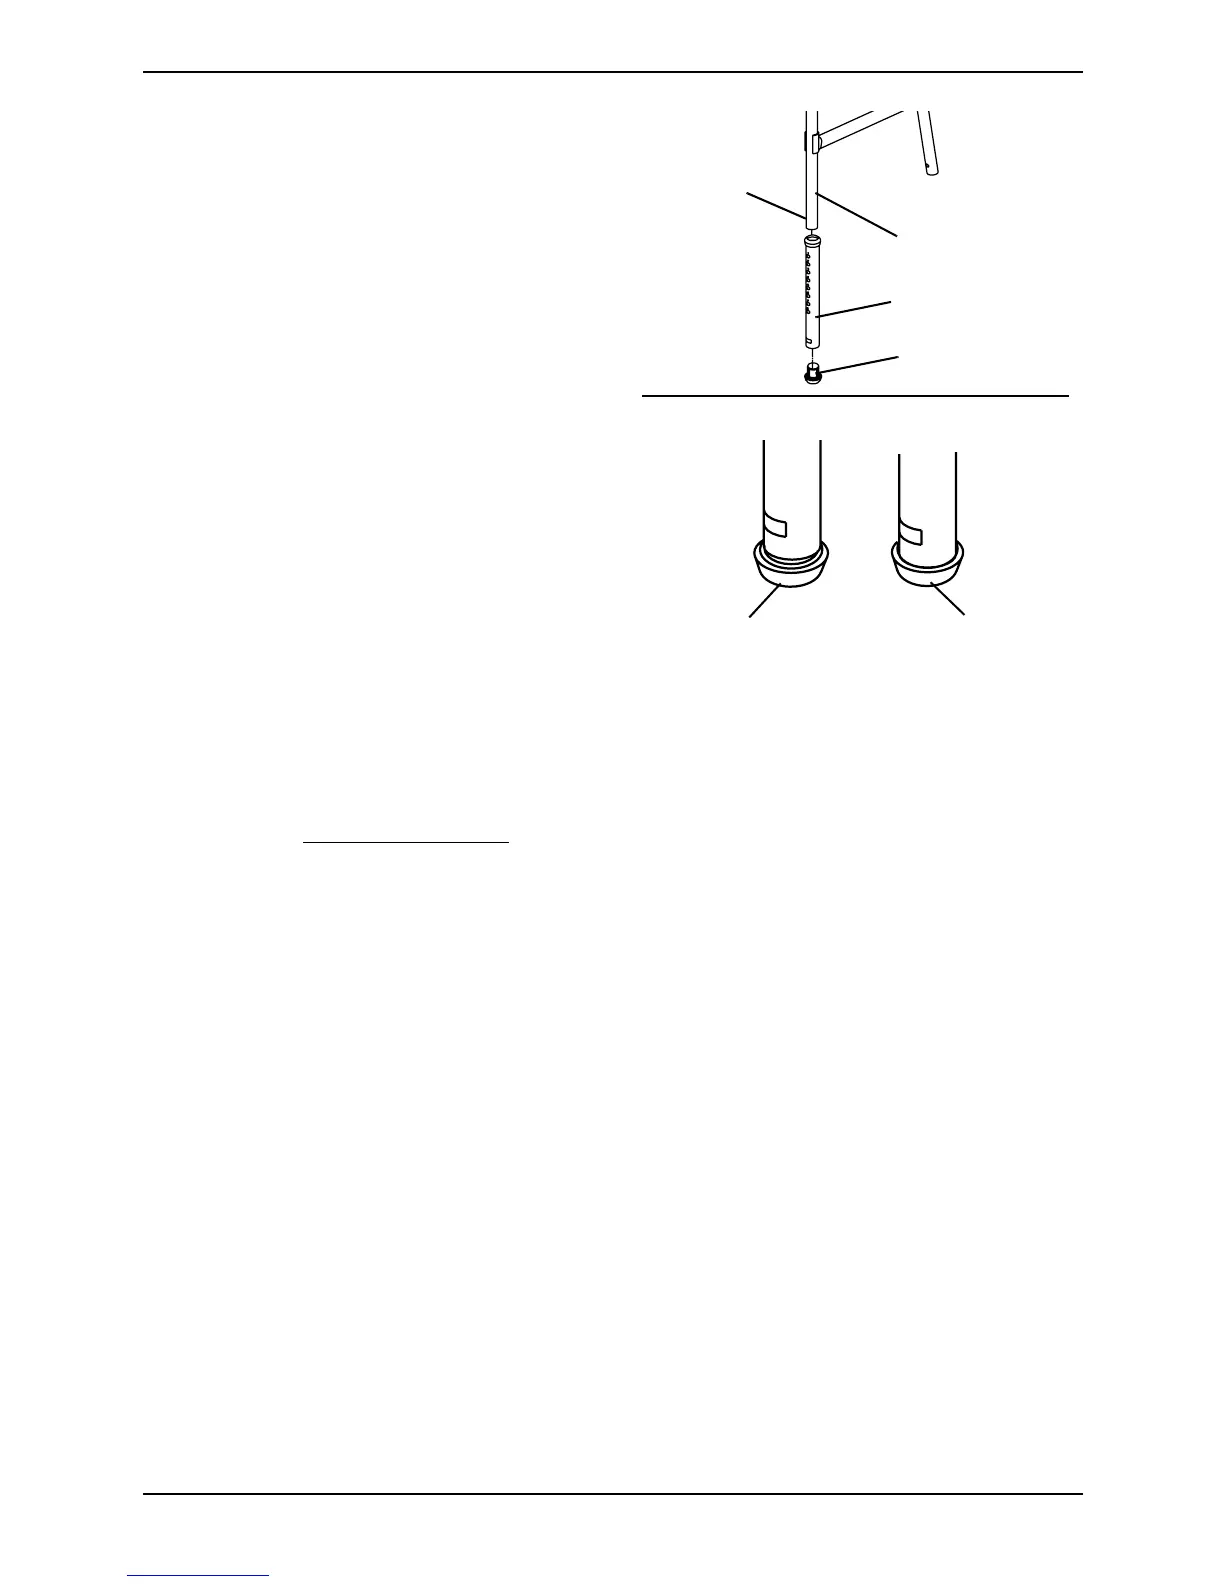
NOTE:Whenproperlyinstalled,thetubeedge
willrestinsidethetopedgeofthenewglidetip.
Ifthetubeedgeisvisible,thetipisnotproperly
installed.
3. Insertthenewglidetipfirmlyintothe
legextension.
4. Ensurethenewglidetipisproperly
installedasshowninDetailʺAʺof
FIGURE 3.Ifnecessary,tapnewglide
tipintoposition.
5. Pressthesna pbuttonandinstalltheleg
extensionwithnewglidetipontothe
walkerframeleg.Ensurethat thesnap
buttonofeachlegfullyprotrudes
throughthedesiredadjustmentholeand
legsareadjustedsothewalkersitslev el.
6. RepeatSTEPS1‐5onremainingrearleg
extension.
FIGURE 3 Installing the Glide Tip
Replacing Fixed Wheels/Swivel Casters
NOTE:Forthisprocedure,refertoFIGURE 4onpage6.
NOTE:RefertoInstallationWarningonpage 2.
Fixed Wheels - Model Nos. 6270 and 6271
1. Positiononewrenchonthehexscrewandremovethelocknutbyusingtheother
wrenchandturningcounterclockwise.
2. Removethewashers,wheel,bushingandhexscrewthatsecurethewheeltotheleg
extension.
3. Inspectwashers,bushingandhexscrewforwearand/ordamageandreplaceif
necessary.
4. Toinstallnew
wheel,reverseSTEPS1‐2.
Swivel Casters - Model Nos. 6273 and 6267
1. Griplegtubeandusingthecrescentwrench,applytohexnut.
2. Loosenswivelcasterandunscrewfromswivelcasterhousing.
3. Inspectswivelcasterhousingandlegtubeforanydamage.Ifdamaged,replace
immediately.
4. Insertnewswivelcasterbyscrewingitintoswivelcasterhousingandtighteningwith
thecrescentwrench.
DETAIL “A”
Glide Tip
Properly Installed
Glide Tip
Improperly Installed
Leg Tube
Glide Tip
Walker
Frame Leg
Snap
Button