13
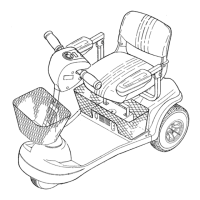
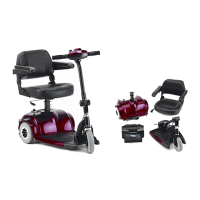
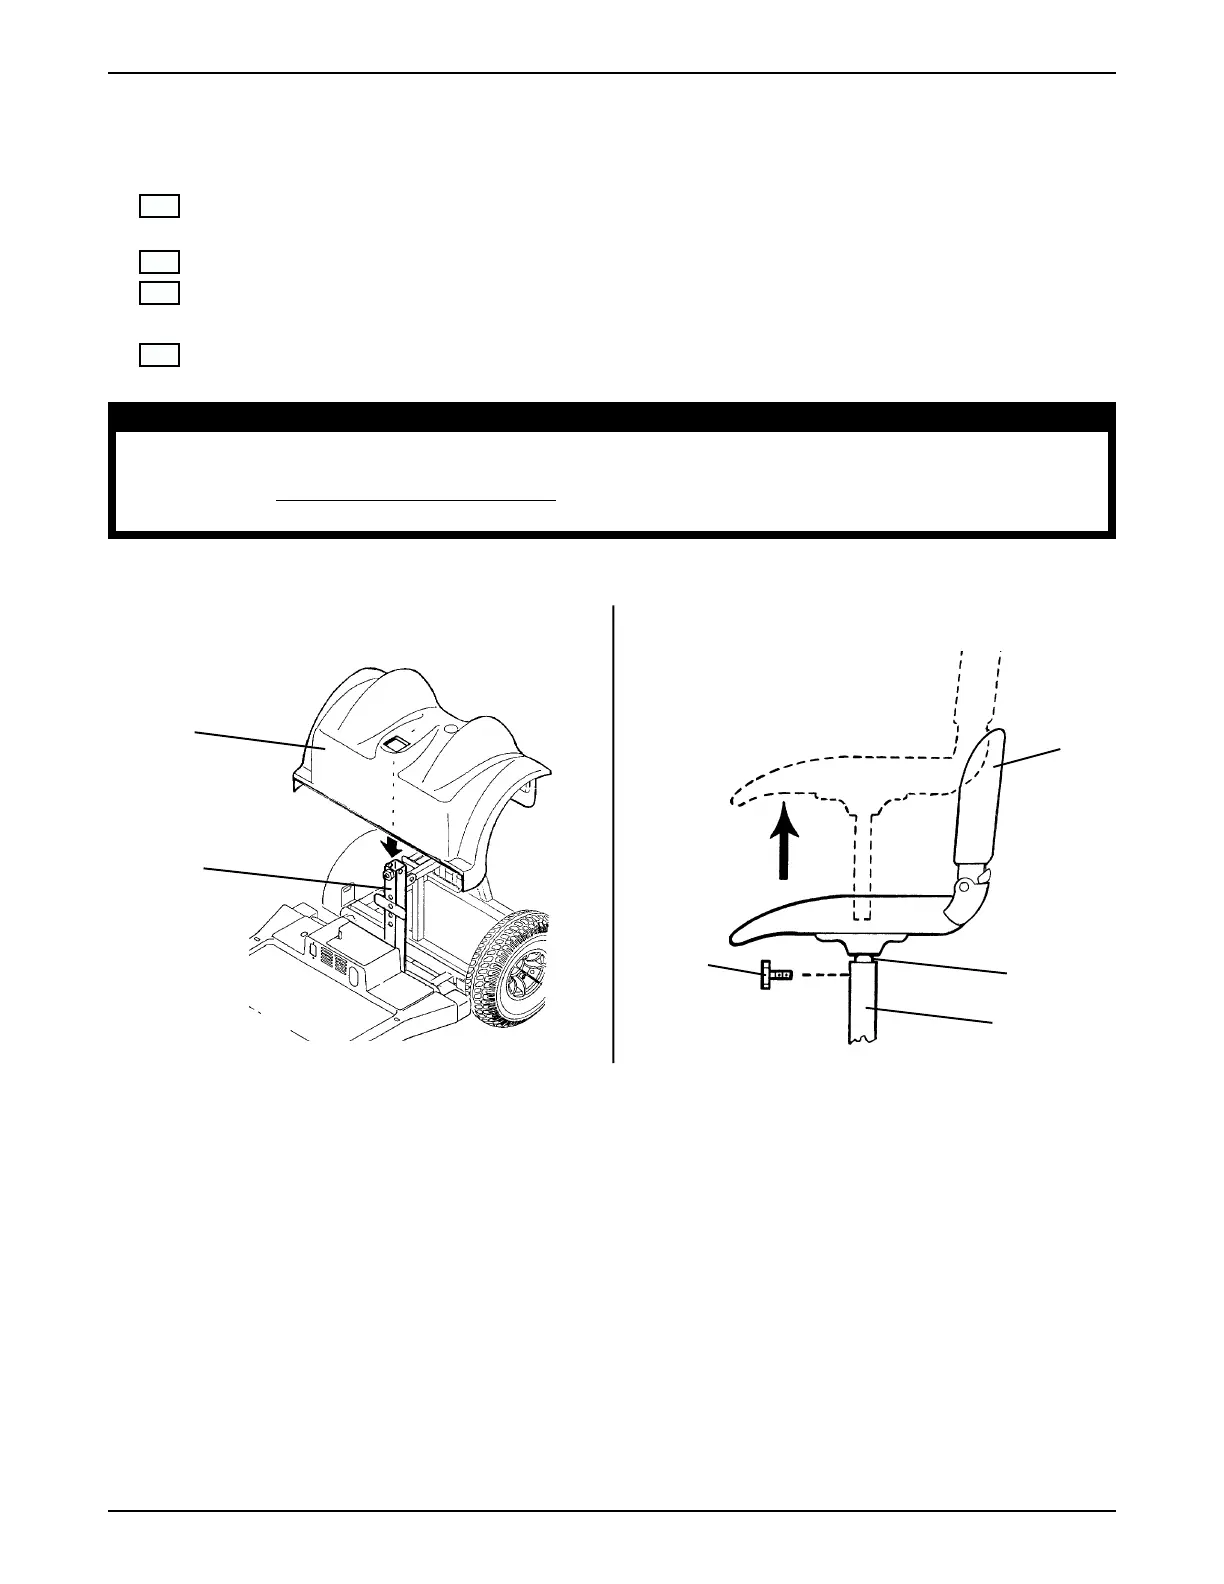
F. REASSEMBLY OF THE REAR SHROUD AND SEAT (FIGURE 15)
Check Box When
Completed
1. Check to ensure the wiring harness in NOT covering the "VELCRO
®
like" strip on TOP of the rear
frame assembly.
2. Place the rear shroud over the frame post (DETAIL "A" of FIGURE 15).
3. Pick up the seat assembly and place the seat post into the frame post and lower the seat into position
(DETAIL "B" of FIGURE 15)
4. Screw the stability knob into the hole located on the FRONT of the frame post, Hand tighten ONLY
(DETAIL "B" of FIGURE 15)
WARNING
The stability knob is designed to prevent the seat from "wiggling" back and forth. DO NOT use the
stability knob to adjust the seat height as it will NOT support the weight of the seat/user. To adjust the seat
height, refer to
ADJUSTING THE SEAT HEIGHT in PROCEDURE 5 of the Owner's Manual, part number
1090132. Otherwise, injury or damage may occur.
NOTE: Refer to the PROCEDURE 5 of the Owner's Manual, part number 1090132, for proper seat
adjustments.
VELCRO
®
is a registered trademark of Velcro Industries B.V.
FIGURE 15 - REASSEMBLY OF THE REAR SHROUD AND SEAT
Seat
DETAIL "B"DETAIL "A"
Seat Post
Frame Post
Stability
Knob
Rear
Shroud
Frame
Support
REASSEMBLY OF THE REAR SHROUD AND SEAT

 Loading...