Orion
9.
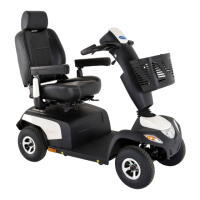
Removeglass(1).
10.Replacelightbulbs(2).
11.Installpartsinreverseorder .
12.Testfunction.
4.8Wheels
4.8.1Replacingwheelsuspension
CAUTION!
Riskofaccident
Accidentalrollingcanleadtoaccidents.
–Securemobilitydeviceagainstrollingaway.
Whendisassembling,notepositionofsmallparts
suchasscrewsandwashers.Putsmallpartsdown
sothattheycanbereassembledinrightsequence.
•10mmwrench
•12mmwrench
•13mmwrench
•32mmwrench
•Phillipsscrewdriver
•Supportingwoodenblock
1.Removeseat.
2.Removeshroud.
3.
DisconnectbatterycableA.
4.Removefrontsteering:
•3–wheelversion
–Dismantlechassisandsteeringcolumn.See4.8.5
Replacingsteeringcolumn,page22.
•4–wheelversion
–Dismantlesteeringlinkandcouplingrod.See
4.9.3Replacingsteeringlink/couplingrod,page
26.
5.
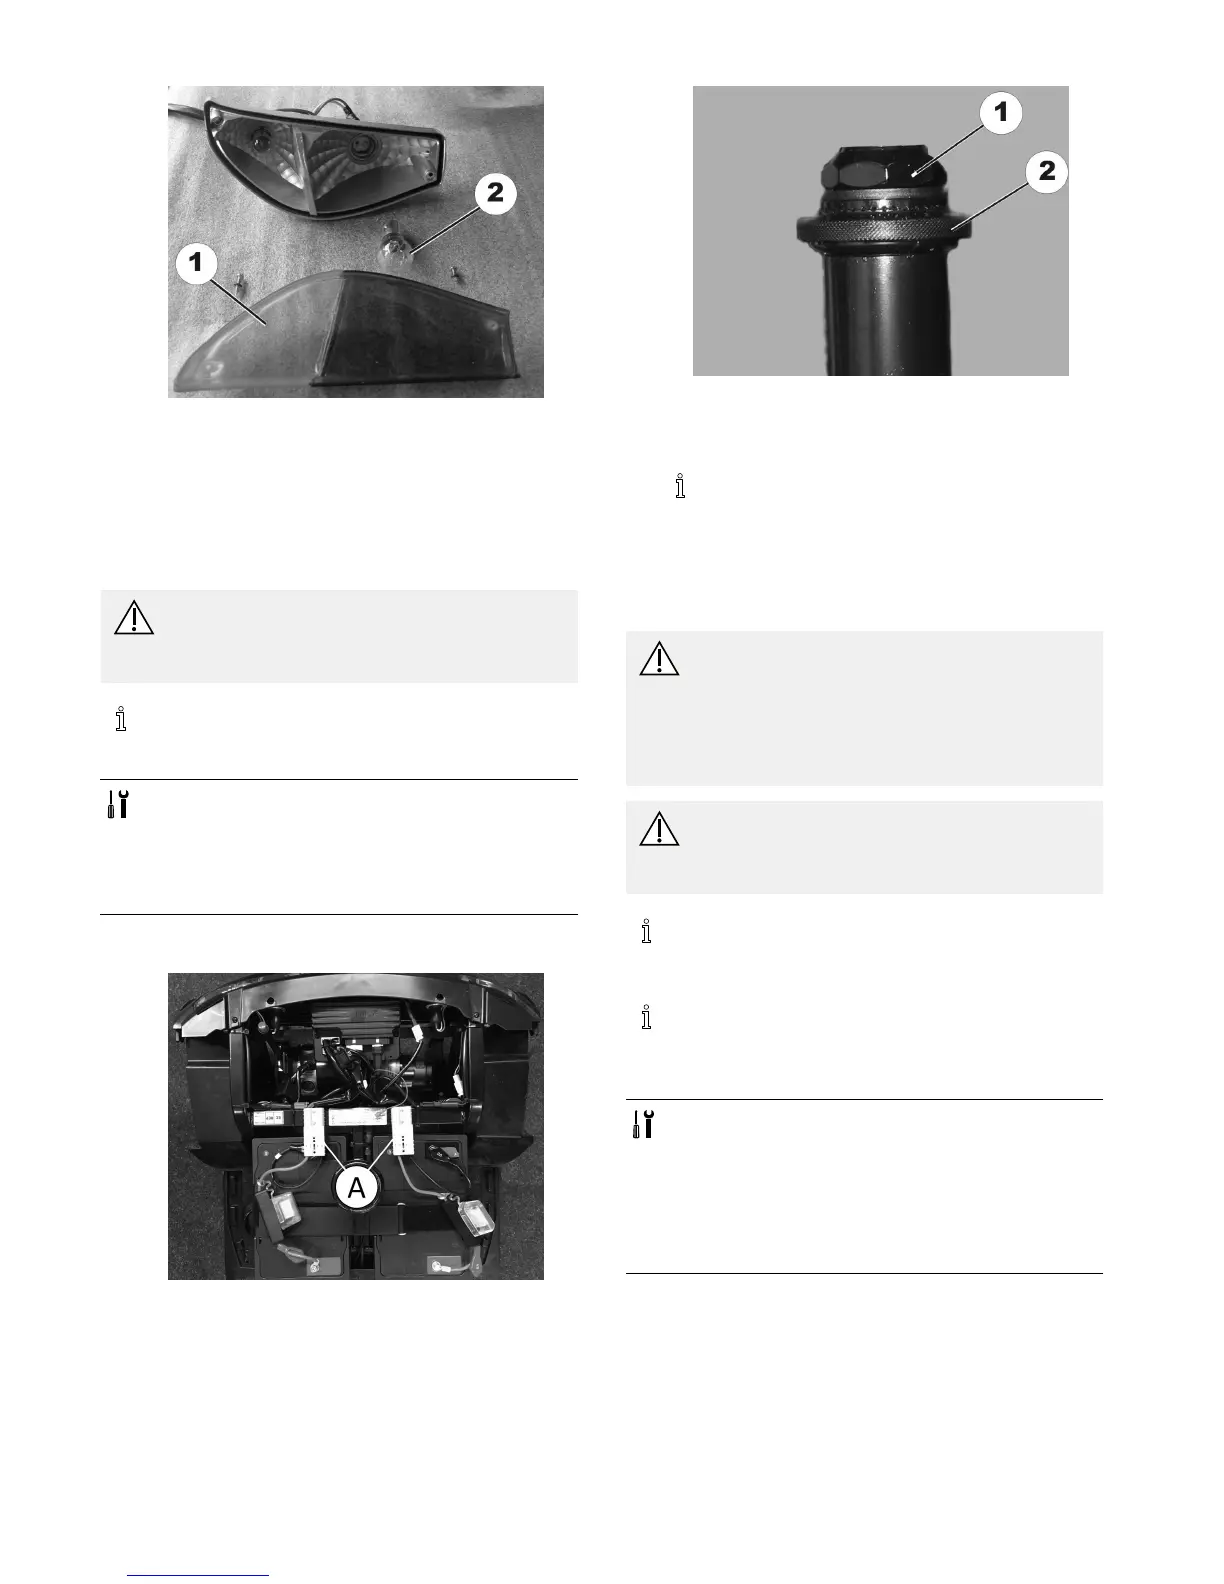
Loosenwheelsuspensionscrew(1).
6.Loosenscrew(2).
7.Replacewheelsuspension.
8.Installpartsinreverseorder.
Tightenscrew(1)to25Nm.
9.Adjustcamber.See4.9.3Replacingsteeringlink/coupling
rod,page26.
10.Testfunction(trialrun).
4.8.2Replacingshockabsorber
CAUTION!
Riskofaccident
Whenparkingmobilitydeviceonantitippersitis
nolongerslowedbymotorbrake.Themobility
devicecanrollawayoutofcontrol.
–Placemobilitydevicerearframeonasupporting
woodenblockbeforeyouremovewheels.
CAUTION!
Riskofaccident
Accidentalrollingcanleadtoaccidents.
–Securethescooteragainstrollingaway.
Whendisassembling,notepositionofsmallparts
suchasscrewsandwashers.Putsmallpartsdown
sothattheycanbereassembledinrightsequence.
Drivemotorneedstoberemovedbeforeyoucan
replaceleft-handshockabsorber.Ifright-handshock
absorberistobereplaced,youdonotneedto
removedrivemotor.
•10mmwrench
•17mmwrench
•Obliquepliers
•Rubberhammer
•Phillipsscrewdriver
•5mmAllenkeys(2x)
•Supportingwoodenblock
Replacingrearshockabsorber
1.Removewheel.Seeusermanual.
2.Removemudguard.See4.10.1Replacingdriveunit,
page27
.
201608032-A