Do you have a question about the Invacare Platinum 10 and is the answer not in the manual?
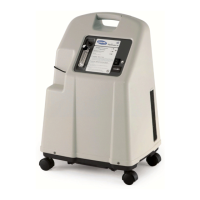
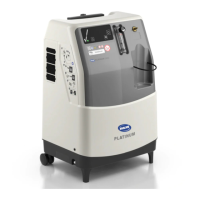
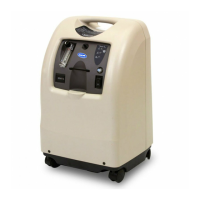
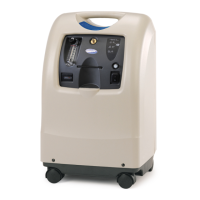
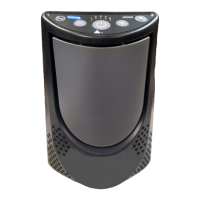
Front view component identification and labeling.
Top view component identification and labeling.
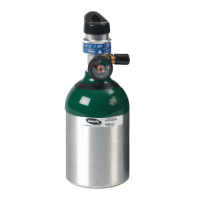
Listing of optional accessories not visually depicted.
Essential safety precautions for operating the oxygen concentrator.
Guidelines for safe and effective routine maintenance.
Information on potential interference from electronic devices.
Steps to minimize risks of burns, electrocution, fire, or injury.
Procedure to verify the functionality of the power loss alarm.
Describes the step-by-step process of the concentrator's operation.
Details the ceramic zirconia sensor and its operating sequence.
Instructions for safely removing the outer cabinet assembly.
Procedure for cleaning the unit's main air intake filters.
Steps to check and replace the HEPA filter for optimal performance.
Instructions for replacing the filter that protects the compressor.
Procedure for replacing the exhaust components on specific models.
Steps for replacing the muffler that regulates exhaust sound.
Instructions for cleaning the heat exchanger to maintain efficiency.
Detailed steps for removing and installing the main compressor unit.
Procedures for replacing the capacitor in 5-liter and 10-liter models.
Guide for rebuilding specific Thomas compressor models using a kit.
Instructions for disassembling the compressor and removing its heads.
Steps for removing and replacing the cooling fan.
Procedure for removing and installing the connecting rod and eccentric parts.
Steps for removing and replacing the piston cup during rebuilding.
Procedure for removing and cleaning O-rings and valve keeper strips.
Steps for removing exhaust valve components during rebuilding.
Procedure for removing and installing the compressor gasket.
Comprehensive guide for reassembling the compressor after disassembly.
Instructions for rebuilding the Gast compressor used in Platinum XL models.
Steps to remove the compressor's head covers and valve plates.
Procedures for removing head cover gaskets, O-rings, and valves.
Specific steps for removing O-rings from the valve plate assembly.
Instructions for removing intake valves from the valve plate.
Guide for installing new intake and exhaust valves with limiters.
Steps to remove the retainer plate, cups, and cylinders from the piston rod.
Guide for installing new retainer plates, cups, and cylinders onto the piston.
Instructions for installing new head cover and O-ring gaskets on the valve plates.
Steps for installing the compressor head cover onto the valve plate assembly.
Procedure for replacing the Pressure Equalization (P.E.) valve.
Instructions for replacing the sieve beds in pairs for optimal performance.
Guide for installing new check valves, ensuring correct orientation.
Steps for removing and installing the pressure regulator.
Procedure for setting the correct output pressure for the regulator.
Instructions for replacing the heat exchanger unit.
Steps for safely removing the main control panel assembly.
Guide for replacing the fan that cools the unit's internal components.
Detailed instructions for replacing the main printed circuit board.
Steps for replacing the unit's power transformer.
Instructions for replacing the main power switch.
Procedure for replacing the flowmeter assembly.
Steps for replacing the hour meter.
Instructions for replacing the 4-way valve assembly.
Procedure for replacing the manifold assembly on older models.
Procedure for replacing the manifold assembly on newer models.
Steps for replacing internal parts of the pilot valve.
Explains the indicator lights and alarms for the SensO2 system.
Explanation of indicator lights for LX models without O2 sensor.
Procedure for timing the P.E. valve shifts for optimal performance.
Steps for manually adjusting the unit's timing settings.
Method for checking all connections for leaks using a solution.
Tests for Power Loss, Low Pressure, Time-Out, High Pressure, Oxygen Sensor, P.E. Valve Coil alarms.
Instructions for installing a kit to check sieve bed pressures.
| Weight | 54 lb (24.5 kg) |
|---|---|
| Electrical Requirements | 120 VAC, 60 Hz |
| Operating Temperature | 55°F to 90°F (12.8°C to 32.2°C) |
| Operating Humidity | 15% to 95% |
| Alarms | Power Failure, High/Low Pressure, Low Oxygen Concentration |