2-9
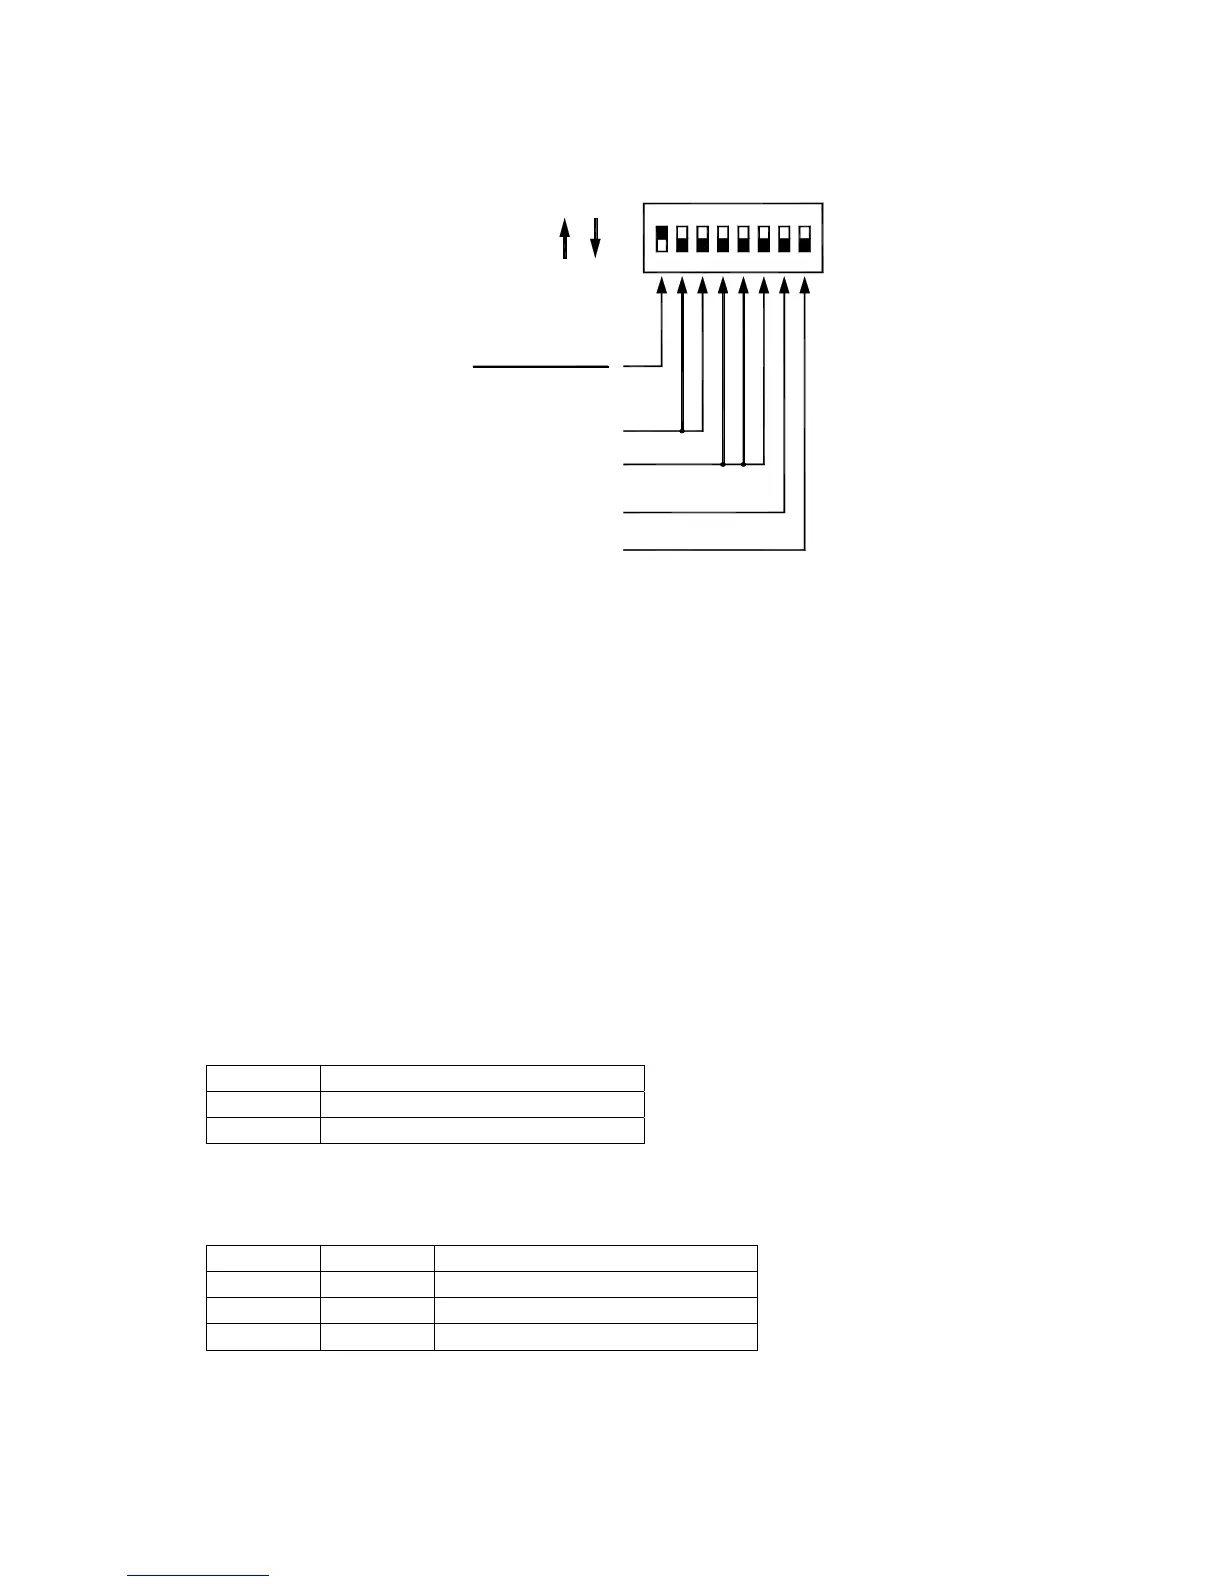
User Define LVD/LVR (8)
LVD / LVR (4,5,6)
System Voltage (2,3)
Control Mode (1)
DC Load Control
OFF
ON
DIP
ON
87
6
5
4321
Auto / M anual LVR (7)
Load Control DIP Switch Functions
※ As shown in the diagram, all the positions are in the “OFF” position except switch
number 1, which is in the “ON” position.
NOTE: The DIP switches should be changed only when there is no power to the controller.
Turn off disconnect switches and remove power to the controller before changing a DIP
switch. A fault will be indicated if a switch is changed with the controller powered.
CAUTION 1: The SunStar is shipped with all the switches in the “OFF” position.
Each switch position must be confirmed during installation. A wrong
setting could cause damage to the load or other system components.
CAUTION 2: To configure your SunStar for the Load Control you require, follow the
DIP switch adjustments described below. Before changing any switch,
make sure the BCD switch is placed at number 0 for the SunStar
settings. To change a switch from OFF to ON, slide the switch up toward
the top of the controller. Make sure each switch is fully in the ON or
OFF position.
DIP Switch Number 1-Control Mode: Load Control
Switch 1 Control Mode
ON Load control mode
OFF Solar charging mode
For the load control mode, move the DIP switch to the ON position.
DIP Switch Number 2, 3-System Voltage
Switch 2 Switch 3 System Voltage
OFF OFF 48V system
ON OFF 24V system
OFF ON 12V system
 Loading...