5
iOptron Corp. | 6E Gill Street | Woburn, MA 01801 USA | (781) 569-0200 | Toll Free (866) 399-4587 | www.iOptron.com
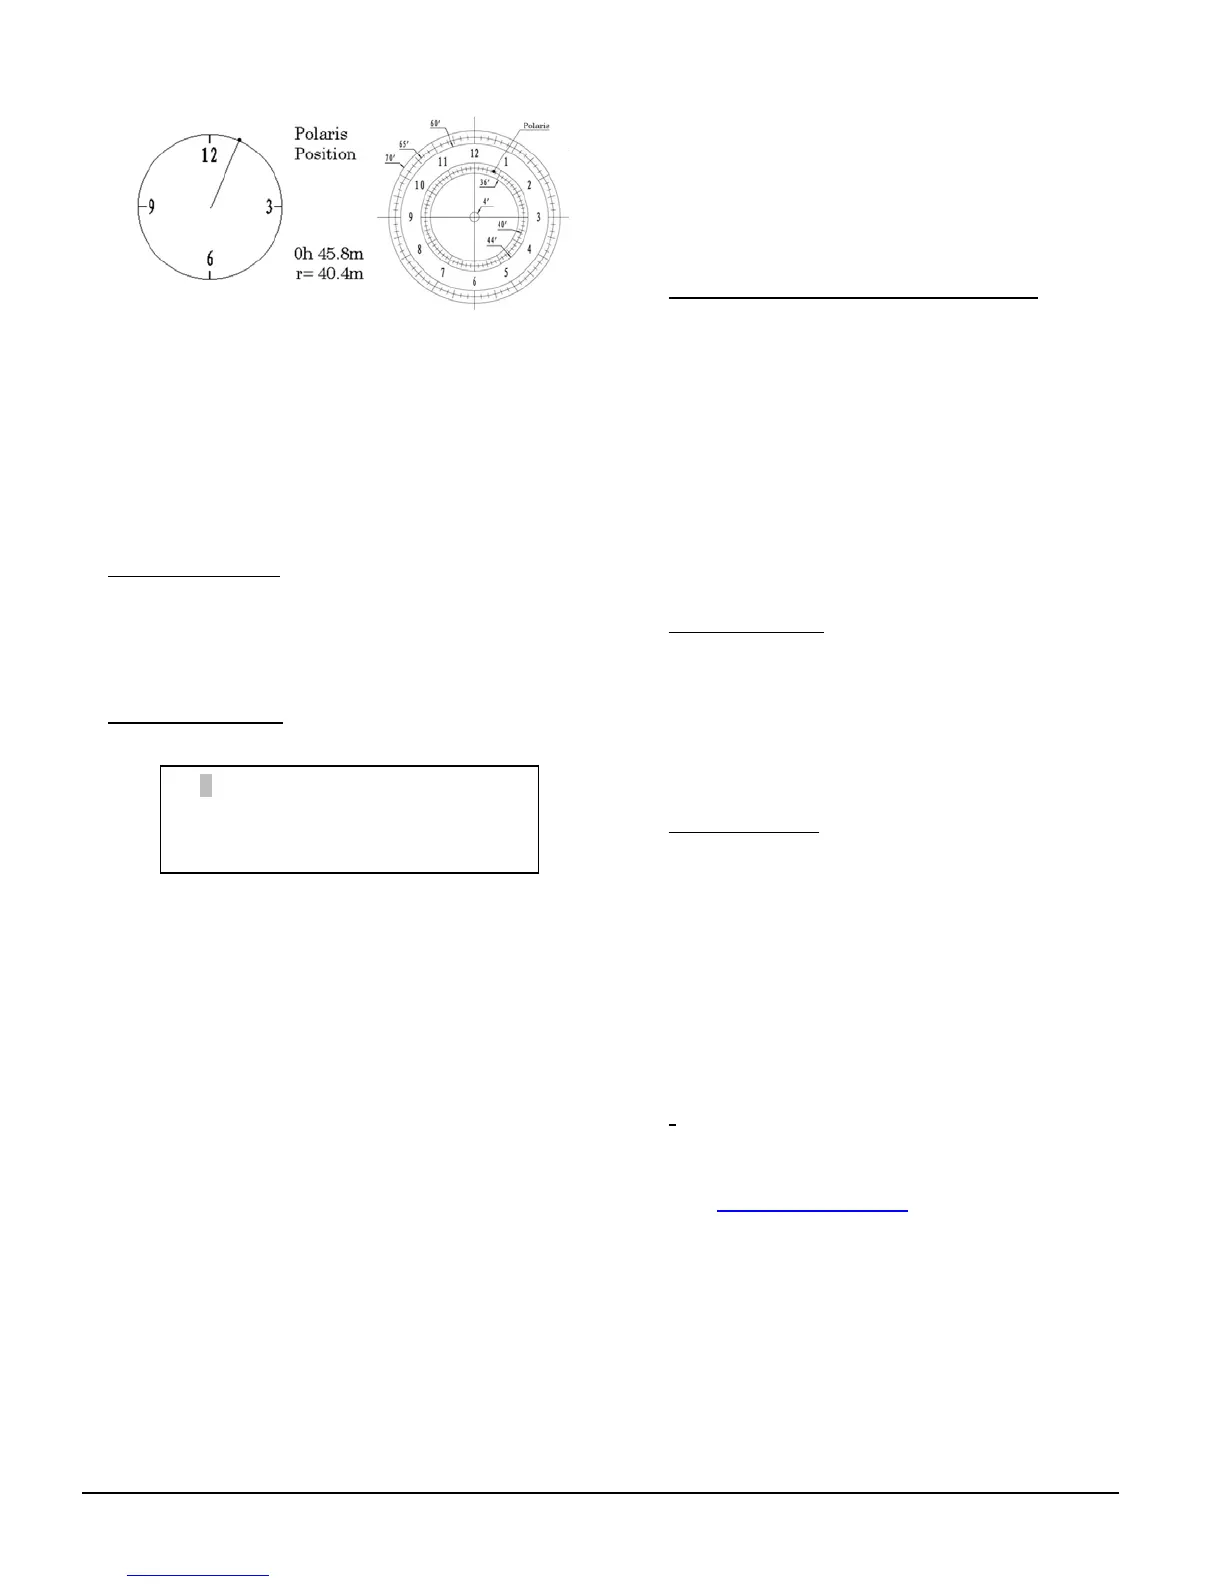
(3) Use the Azimuth and Latitude Adj. Knobs to
adjust the mount in both directions and put the
Polaris in the location on the Polar Scope Dial
(same as indicated on the HC LCD), as shown in
therightsideoftheabovefigures.
BrightStarPolarAlignment
When the pole
star is not in sight, refer to online
InstructionManualforBrightStarPolarAlignment.
12. Manual Operation: The mount can now be used to
observeastronomicalobjectswiththeHC.Usearrow
keys(►,◄,▼,and▲)topointthetelescopetothe
desired object.Use the number keys to change the
slewingspeed.PressSTOP/0buttontostarttracking.
13. Set Up Controller:Press the MENU button; then
“Settings”=>“SetTime&Site”.
Enter the current date or waiting for the GPS
connected to the satellites.Enter the time zone
offsettotheUTC;forexamples:
Bostonis“UTC‐300minutes”
LosAngelesis“UTC‐480minutes”
Romeis“UTC+060minutes”
Sydneyis“UTC+600minutes”
ToggletheDaylightSavingTime(DST)betweenN(No)
andY(Yes)usingarrowkey.Movethecursortothe
endofscreentoselecttheNorthernorSouthern
Hemisphere.
[TIPS:All time zones in N. America are “UTC‐XXX
minutes”.
Latitudeandlongitudecoordinatescanbe
obtained from GPS‐equipped devices (navigator,
phone), or from internet, if you are entering them
manually.“W/E” = western/eastern hemisphere;
“N/S” = northern/southern hemisphere; and “d” =
degree;“m”=minute; and“s”=second.Usearrow
andnumberkeystoenterlocationinformation.]
14. Zero Position and One Star Alignment: The default
mount power on position is not necessary the zero
positionforCEM25/CEM25EC,especiallyitisthefirst
time to use the mount or just performed firmware
upgrade. Set the Zero Position by press MENU =>
“Zero Position”=>“Set Zero Position”.Youshould
make sure the mount is
at ZERO position by press
MENU => “Zero Position” => “Goto Zero Position”
whenthe mountispoweredon. Perform a One Star
Align to correct the Zero Position discrepancy. To
furtherimprovethe GOTOaccuracy,refertothefull
User’sManualformoredetails.
15. Go to an Object:ThemountisnowreadyforGOTO
andtrackingtargets.PressMENU,selectandENTER
“Select and Slew”. Se lect a category (for example,
“SolarSystem”),thenselectanobjectofinterest(for
example, “Moon”).Press ENTER and the telescope
will slew to the object and automatically start
tracking.
16. Sync to Target: If the object is not in the center of
the eyepiece, use this function to center and
synchronize the object to improve local GOTO
accuracy.Press MENU and select and ENTER “ Sync
to Target”. Use arrow keys center the object in
eyepiece.Press ENTER again to complete this
function.
[TIP:“Sync to Target” can only function after a
“Select and Slew” operation.This is most useful
whenlookingforfaintobjectsnearabrightstar.]
[
TIP:Afterslewingtoanobject,alistofnearbybright
object(s)canbedisplayedbypressing“?”button.]
Use support@ioptron.com
for technical supports.
2013-04-01 12:01:36
UTC -300 Minute(s)
W071d08m50s DST: Y
N42d30m32s Northern
 Loading...


