4
iOptron Corp. | 6E Gill Street | Woburn, MA 01801 USA | (781) 569-0200 | Toll Free (866) 399-4587 | www.iOptron.com
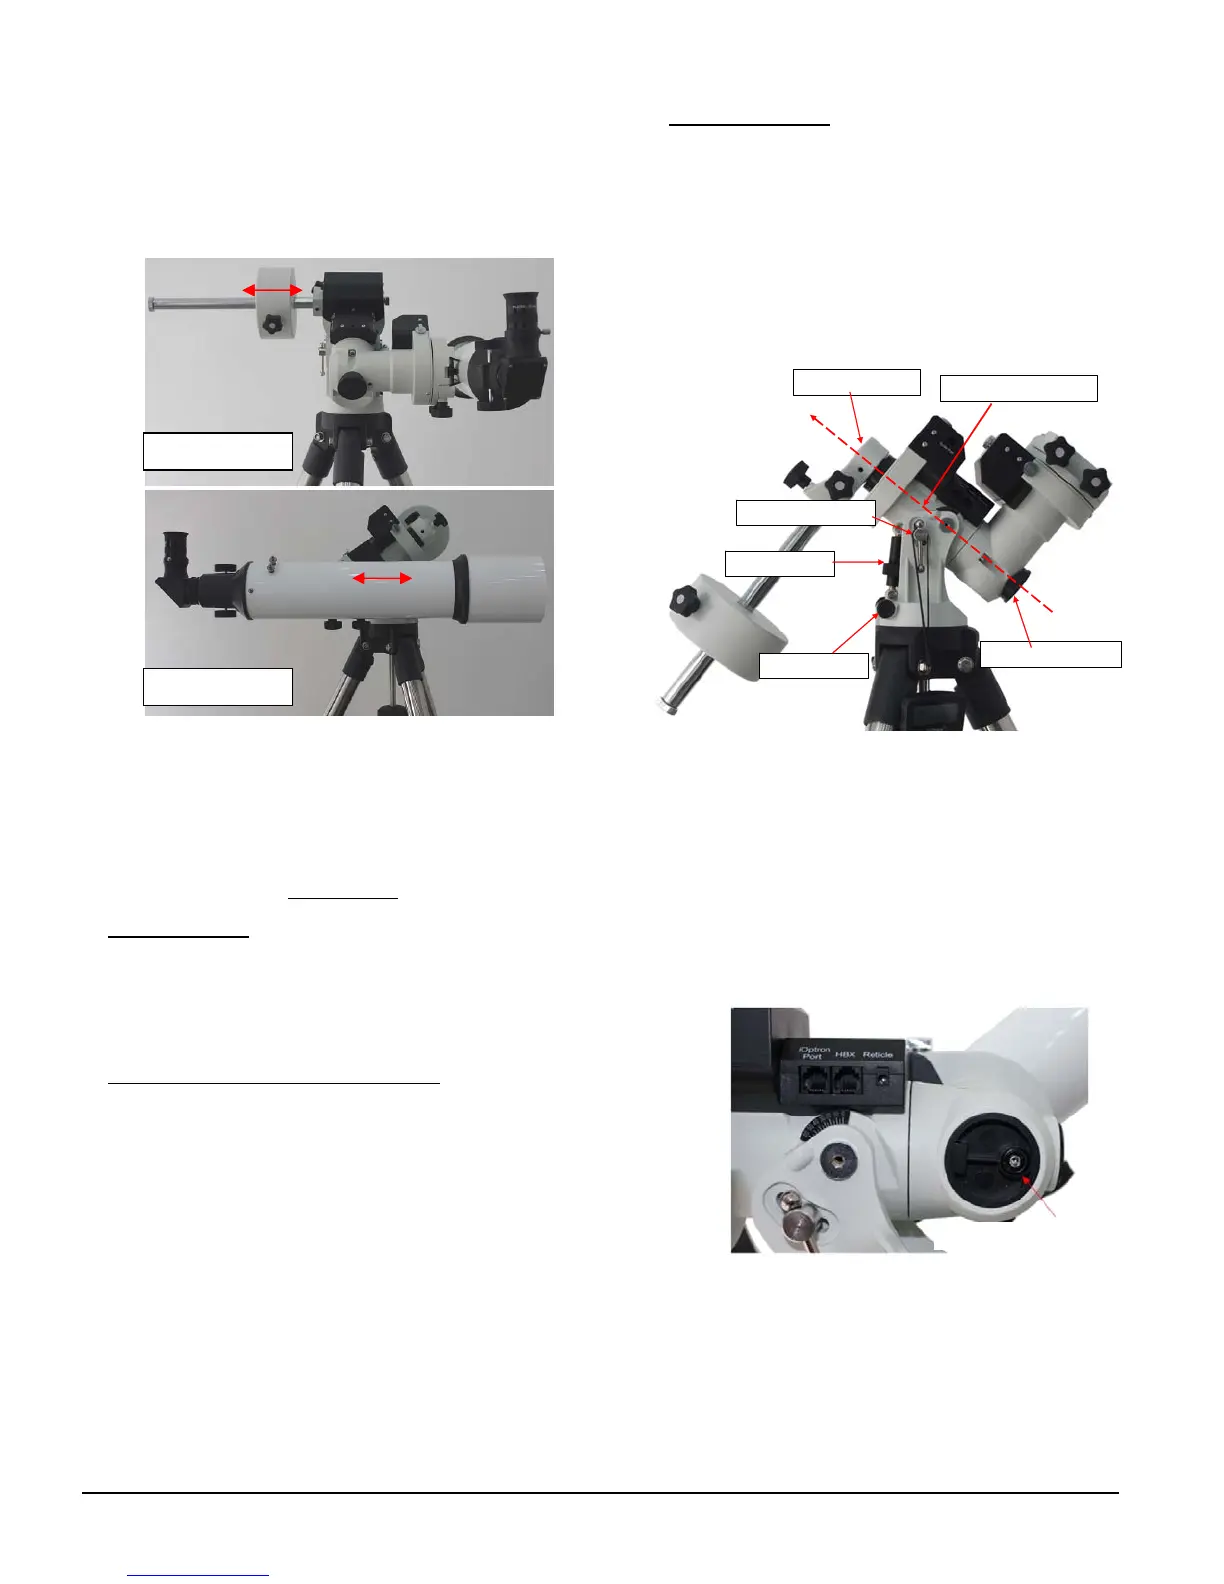
thescopewithaccessoriesbackandforth(seepho tos
below).
Only balance one axis at a time and start with the
DECaxisfirst.Doublecheckthemounttomakesure
boththeRAandDECaxesarebalanced.
Return the mount to Zero Position after balancing;
i.e.,CWShaftpointstoground,andtelescopetipisat
itshighestposition.
TurnGearSwitchKnobby90°toLOCKpositiontore‐
engagethewormtothewormwheel.Retightenthe
TensionAdjusterasthelaststep
tolockthe.
9. ConnectCables:UsetheshortstraightRJ11cableto
connect the DEC Control Unit to the Main Control
Unit.ConnecttheGo2Nova
®
8408HandControllerto
theHCportonthemainunit.Plugina12VDCpower
supplytothePOWERsocket.
10. Setting Tension Adjuster Position: Set both Gear
Switches to LOCK positions after balancing the
mount.FullyscrewintheTensionAdjuster.Turnthe
mountpoweron.Press#9buttononhandcontroller
to change the slew speed to MAX. Press the arrow
button to check the gear meshing. If the mount
motor has “grinding”
sound (which is not harmful)
while slewing, the Tension Adjuster is too tight.
Release1/8to1/4turnandcheckitagain.If thereis
excessplayineitherRAorDEC axis,oreventhegear
is skipping, the gear and worm is not meshed
properly. Turn the Tension
Adjuster more clockwise.
You may need to readjust the Tension Adjuster for
differentpayload.
11. Polar Alignment:Remove both Polar Scope and
Polar axis covers.Look through the polar scope to
locate Polaris (or Sigma Octantis at southern
hemisphere).Slightly loosen the Tripod Center Rod
Knob. Use the two Azimuth Adjustment Knobs to
center the pole star in the azimuth direction,
followedbytighteningtheCenterRod
Knob.Slightly
loosen 2 Latitude Locking T‐bolts, use the Latitude
AdjustmentKnobtoadjustthelatitude.Tighten the
2lockingT‐bolts.
Polar Axis Cover
Polar Scope Cover
Polar Axis (R.A. axis)
Azi. Adj. Knob
Lat. Adj. Knob
Lat. Locking T-bolt
QuickPolarAlignment
Fastandaccuratepolaralignment can be performed
withiOptron’sAccuAlign
TM
PolarScope.
(1) Connect the Polar Scope illumination LED to the
Reticlesocketlocatedonthemaincontrolboard.
Turn the mount power on. Use the Hand
Controller (“MENU” => “Settings” => “Set
EyepieceLight”)tosetilluminationintensity.
Polar Scope LED
(2) Use the Hand Controller (MENU => “Align” =>
“Pole Star Position”) to display the Polaris
Position on the LCD screen, as indicated in the
left side of the figure below.For example, June
22,2014,20:19:42inBoston,US(altN42°30’32”
and long W71°08’50”), 300 min
behind UT, the
PolarisPositionis0h45.8mand40.4m.
R.A. balance
DEC balance
 Loading...


