3
iOptron Corp. | 6E Gill Street | Woburn, MA 01801 USA | (781) 569-0200 | Toll Free (866) 399-4587 | www.iOptron.com
Adjust the tripod le gs to level the mount using the
LevelBubble.
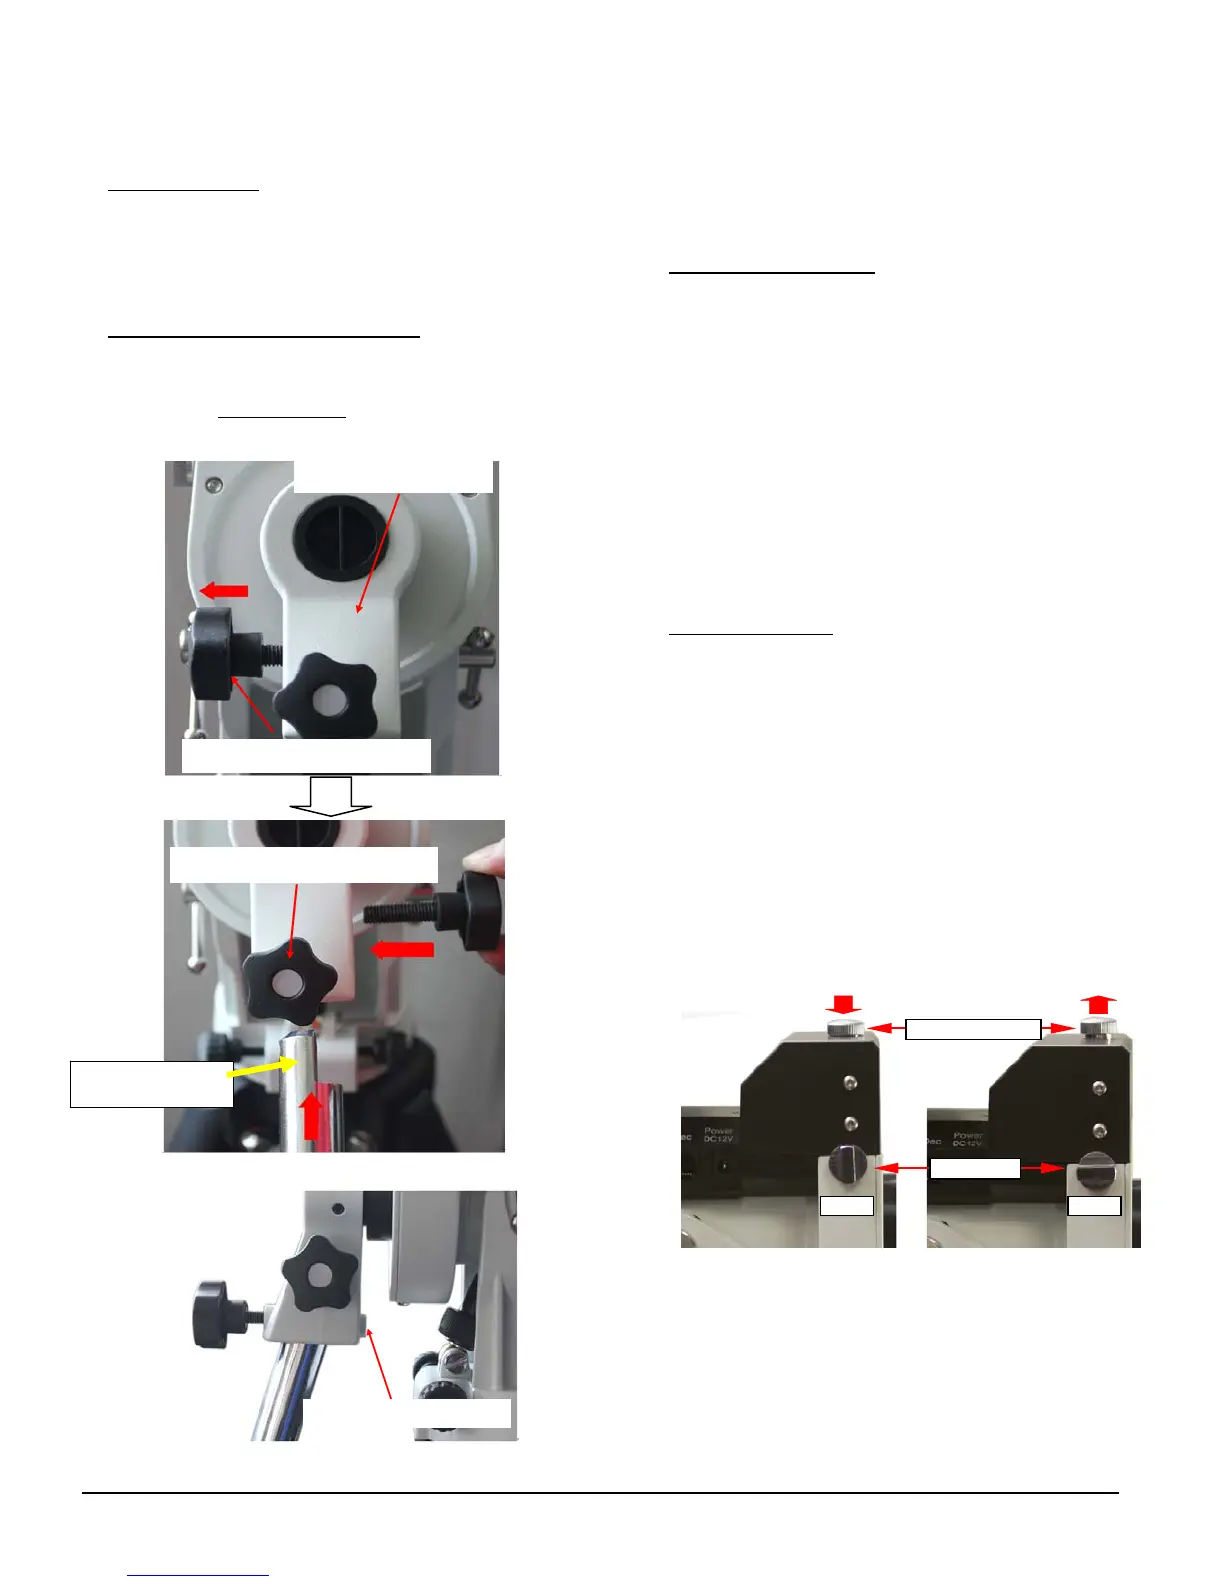
5. Adjust Latitude:Loosen the 2 Latitude Locking T‐
bolts.TurnLatitudeAdj.Knobtoadjustthe latitude
until the arrow points to the current latitude on the
Latitude Scale (2
nd
photo in Step 2).Tighten the
LatitudeLockingT‐boltswhendone.
6. Install Counterweight (CW) Shaft:(1) Remove CW
ShaftLockingScrew.(2)InsertCWShaftintotheCW
Mounting Nose.(3)Thread in the CW Shaft Locking
Screwfromtheotherside
.(4)TightentheFrontCW
PositionScrew.
CW Shaft Locking Screw
CW Mounting Nose
(1)
(2)
(3)
Front CW Position Screw
Rear CW Position Screw
[TIP:At very low latitudes (<10°), to avoid CW
bumping into tripod leg, turn the Rear CW Position
Screw (a hex head set screw) further into CW
Mounting Nose before tightening the Front CW
PositioningScrew.]
7. Install Counterweight: With CW shaft points to
ground,r
emoveCWSafetyCapattheend.Withthe
CW wider opening towards the shaft end, guide CW
throughtheshaft.UsetheCWLockingScrewtohold
the CW in place.Place Safety Cap back onto the
shaft.
CW should be always at the lowest position if no
telescopeis
mounted.
[TIP:ZEQ25comeswitha10.4lbs(4.7kg)CW,which
should be sufficient for an 8” scope with total
payloads up to about 13 lbs (6kg).Use extraCW or
CWExtensionBartobalancehigherpayloads.]
8. Balance Payload:After attaching scope and
accessories, the mount head assembly must be
balanced in both R.A. and DEC axes to ensure
minimumstressesonthemountdrivingmechanism.
CAUTION:The telescope may swing freely when
R.A.orDECGearSwitchisopen.Alwaysholdonto
the telescope assembly before opening
the gear
switches to prevent it from swinging, which can
causepersonalinjury and/orequipmentdamage.
Turn Tension Adjuster counterclockwise all the way
outtorelievethecontactpressure.TurnGearSwitch
Knob by 90° to the OPEN position to disengage the
wormfromthewormwheel.
Tension Adjusters
OPENLOCK
Gear Switch
CAUTION: The balance process MUST be done wit h
Gear Switch at OPEN position!Otherwise it might
damagethewormsystem.
With the corresponding Gear Switch in the OPE N
position,balancetheassemblyinR.A.axisbymovin g
CWalongitsshaft,andbalanceinDECaxisbymoving
CW Shaft inserts into
CW mountin
nose.
 Loading...


