scope can be used at anytime as it is not blocked by DEC axle as is the case in a German Equatorial
Mount. This makes it possible to adjust the polar alignment while the mount is tracking.
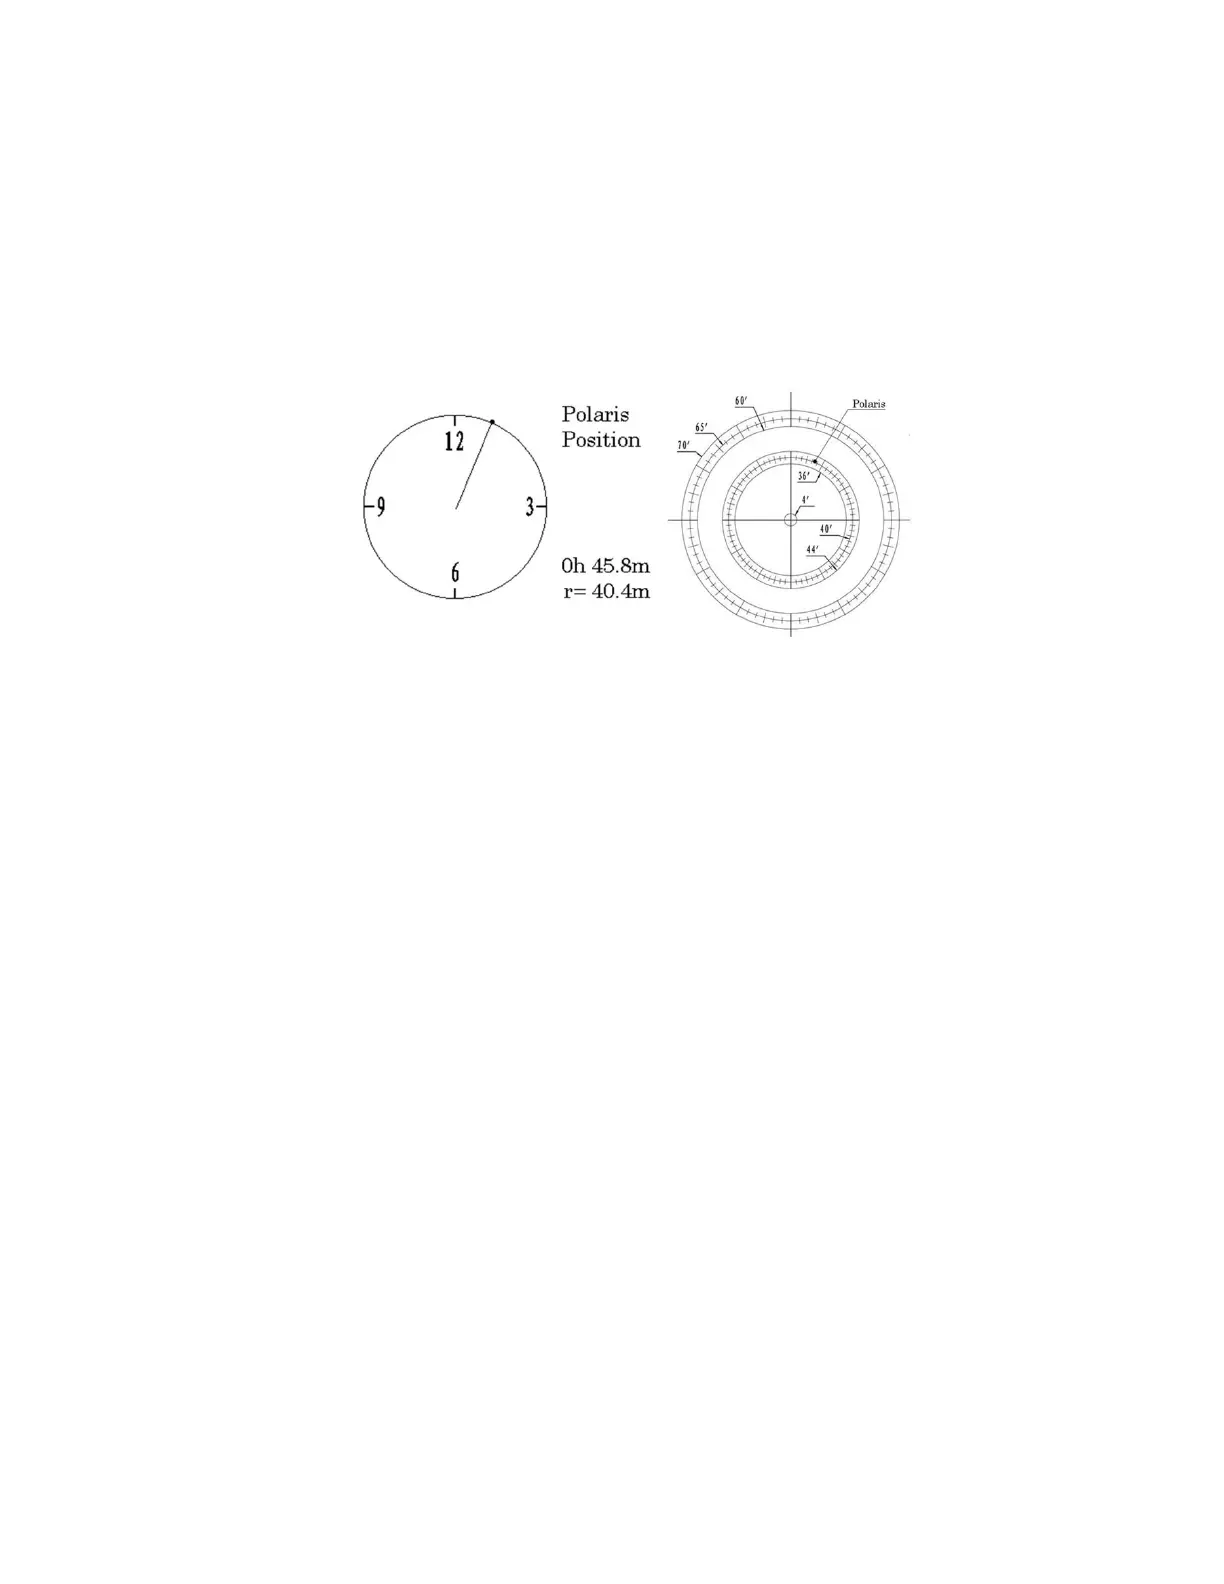
As indicated in Figure 21, the Polar Scope reticle has been divided into 12 hours along the angular
direction with 10-minute tics. There are 6 concentric circles in 2 groups of 3 marked from 36’ to 44’ and 60’
to 70’, respectively. The 36’ to 44’ concentric circles are used for polar alignment in the Northern
Hemisphere using Polaris, while the 60’ to 70’ circles are used for polar alignment in Southern Hemisphere
using Sigma Octantis.
Figure 22. Connect polar scope LED
To perform the polar alignment:
(1) Level the GEM28 mount and set it to the Zero Position. Make sure the telescope optical axis is
parallel to the polar axis (R.A. axis) of the mount. If using a finder scope, adjust it to be parallel to
the telescope optical axis.
(2) Remove both the polar axis cover. Thread the polar scope LED to the Polar Scope. Connect one
end of the polar scope power cable to the illumination LED and the other end to the DC12V output
located on RA Unit (Figure 22).
(3) Turn the mount power on.
(4) Adjust the polar scope dial to rotate one of the major ticks at the top.
(5) Use the Hand Controller (MENU => “Alignment” => “Position of Polaris/SigmaOct”) to display
the current position of Polaris on the LCD screen, as indicated in the left side of the figure below.
For example, June 22, 2014, 20:19:42 in Boston, US (long. W71°08’50” and lat. N42°30’32”, UTC -
300 min,) the Polaris Position is 0h45.8m and 40.4m.
(a) (b)
Figure 23. Polaris position shown on HC (a) and where to put on polar scope reticle (b)