3. GEM28 Mount Assembly
3.1. GEM28 Mount Assembly
NOTE: The GEM28 mount is a precision astronomical instrument. It is highly recommended that you
read the entire manual and become familiar with the nomenclature and function of all components
before starting the assembly.
WARNING: DO NOT rock the counterweight shaft rigorously. This may damage the
worm/drive gear system and such damage will not be covered by warranty.
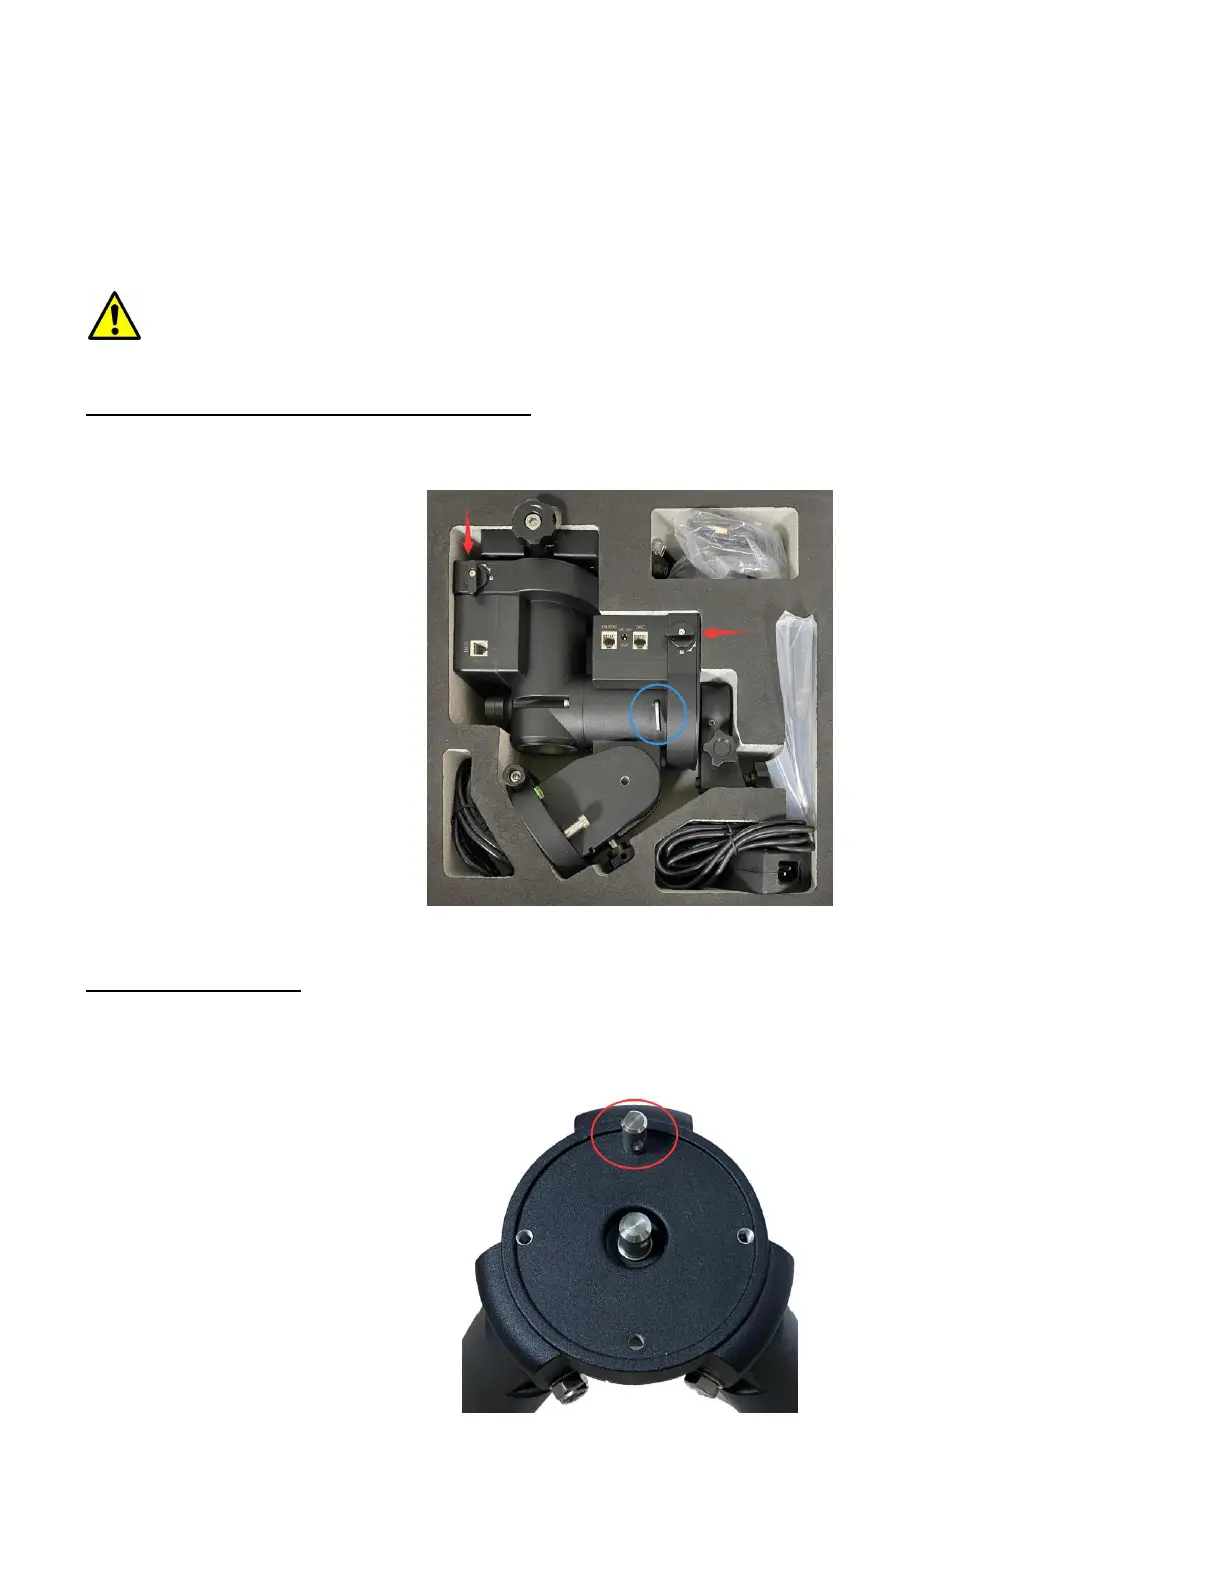
Step 1. Remove mount head from package
The RA axle is locked by an Allen wrench (blue circle). Make sure it is inserted all the way in. Check
the R.A. and DEC Gear Switches and make sure they are at the unlock position before removing it from the
box.
Figure 7. GEM28 mount in a case
Step 2. Set up tripod
The mount has a 102mm base. Thread the Alignment Peg onto the tripod head, on top of a tripod
leg or between two legs depending on the latitude. Insert the Accessory Tray through the center rod and
secure the setup by tightening Locking Knob from underneath.
Figure 8. GEM28 tripod top