2
iOptron Corp. | 6E Gill Street | Woburn, MA01801USA | (781) 569-0200 | support@ioptron.com | www.iOptron.com
HEM is operated under unbalanced condition and could be tipped over if tripod is not secured.
Please use “Search Zero Position” to set the mount before each session to avoid scope hit the tripod.
To avoid cable management system damage, there is a RA mechanical stopper designed to prevent the mount rotating over 360°.
Do not slew 20° past the meridian or the stopper may be deformed due to a large torque of the strain wave gear system.
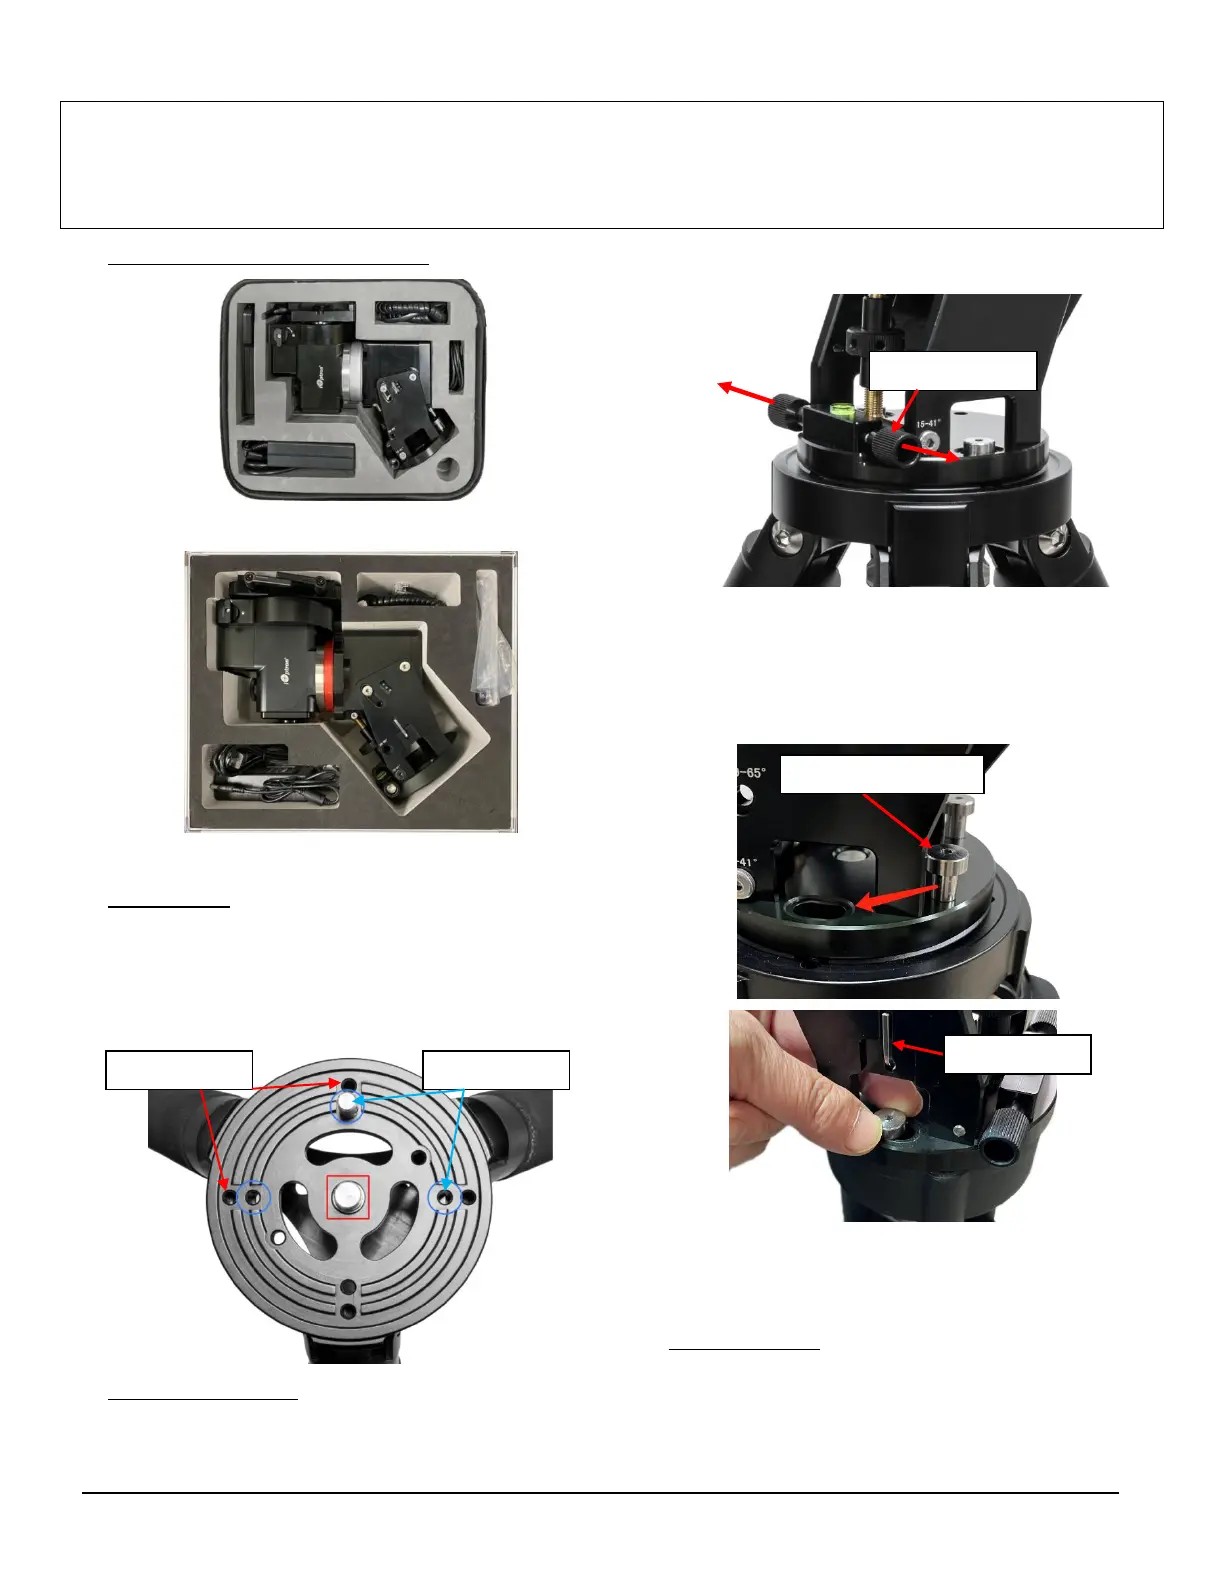
1. Remove mount head from package:
HEM27
HEM44
2. Set up tripod: Setup and level the tripod. Adjust the
tripod height. Tighten tripod locking knob to secure
the tripod. Thread the Alignment Peg onto the tripod
head. It can be installed using a threaded hole on top
of a tripod leg or between two legs (as shown) for low
latitude.
3. Attach mount head: Retract the 2x Azimuth (Azi)
Adjustment Screws from both sides to leave ample
space for the alignment peg to be fitted in between
the 2x Azi Adjustment Screws.
Remove the 2x Azi Locking Screws from the mount base.
Secure the mount head by tightening the Azi Locking
Screws into the M6 holes on the tripod. There is an Allen
wrench stored on the mount base for tightening the
screws or adjusting the latitude.
Level the mount by adjusting the tripod legs. Use the
built-in Bubble Level Indicator or an external leveler
for this purpose.
4. Adjust latitude: Without any payload, slightly loosen
4X Latitude Locking Screws. Use the Latitude
Adjustment Knob to set the correct latitude value, as
displayed in the Latitude Mark Window.
 Loading...


