EasyManuals Logo
Home>iOptron>Camera Accessories>SkyTracker

iOptron SkyTracker User Manual

iOptron SkyTracker
14 pages
To Next Page IconTo Next Page
To Previous Page IconTo Previous Page
Page #7 background imageLoading...
Page #7 background image
7
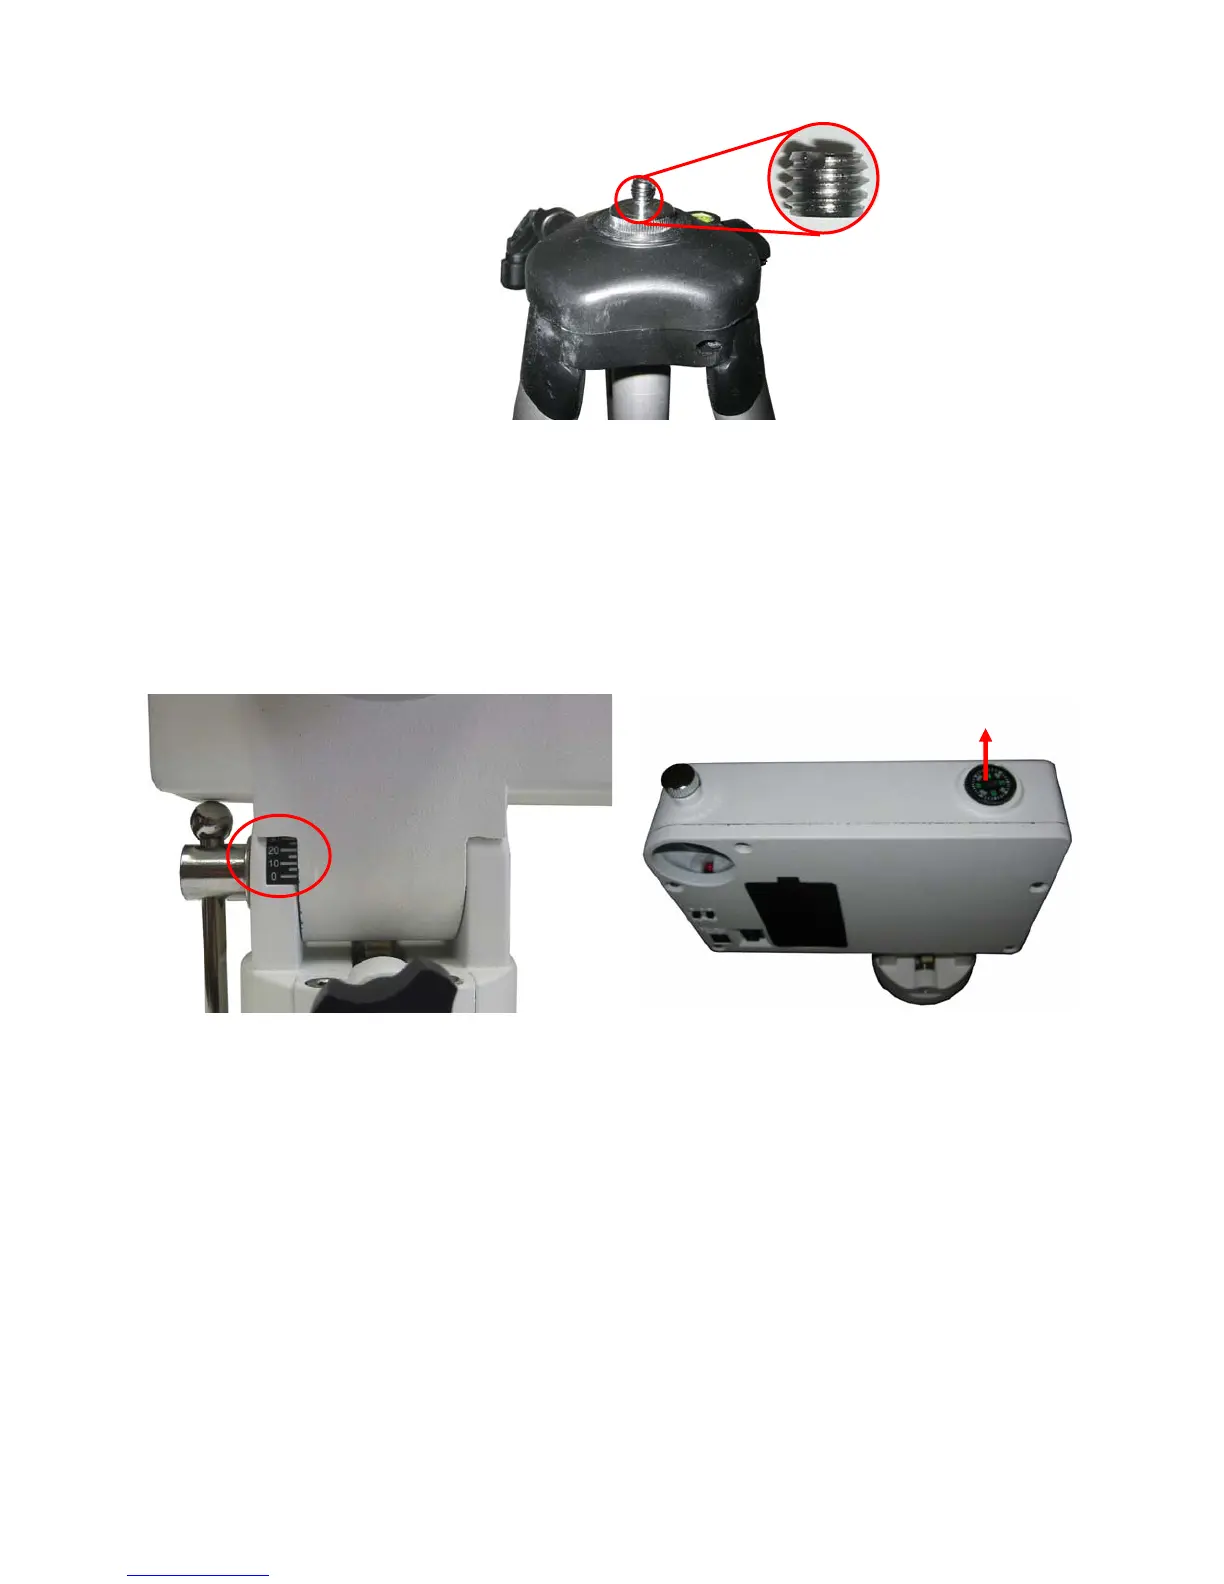
Figure 6. Install SkyTracker onto a tripod
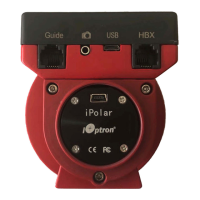
STEP 3. Set the SkyTracker
TM
mount
Release Latitude Lock a half turn. Set the latitude at zero mark (Figure 7) by turning the
Latitude Adjustment Screw and retighten the Latitude Lock. Place the tripod to make the
SkyTracker
TM
mount face north. Level the mount. Release Azimuth Locking Screw and turn the
camera mount to make the compass N-S perpendicular to the mount front edge (Figure 8). You may
need to tap the compass lightly to make the compass move freely.
Figure 7. Set latitude to zero mark
Figure 8. Face the mount north
STEP 4. Set the latitude and find the Polaris
Release Latitude Lock a half turn. Set the latitude at your current latitude by turn the Latitude
adjustment screw and retighten the Latitude lock, as indicated in Figure 9. You may find your current
latitude from your smart phone or internet using your current address. If the north pointing and the
latitude set are correct, you should be able to find the Polaris through the Polar Sight Hole. Center the
Polaris inside the Polar Sight Hole as good as possible for the polar alignment. Retighten all the
screws and locks.
For those located in the southern hemisphere, use Sigma Octantis in Octans as the pole star.
1/4” to 3/8” tripod adapte
r
N

Questions and Answers:

Question and Answer IconNeed help?

Do you have a question about the iOptron SkyTracker and is the answer not in the manual?

iOptron SkyTracker Specifications

General IconGeneral
MountUltra compact EQ
Body materialCast aluminum
Worm wheelΦ80mm, 156 teeth aluminum alloy
Worm gearΦ11mm, brass
Bearing4 pieces
Motor driveDC servo
Payload (MAX)6.6 lbs (3kg)
TrackingR.A. automatic
Tracking speed1X Cel, 1/2 Cel, N/S
Duration of operation24 hours at 20ºC
Latitude adjustment range0º ~ 70º
Operation Temperature-10~40ºC
Polar sight hole~ 8.5º FOV
Polar scope6º FOV with dark field illuminated (optional for #3301)
Built in accessoryCompass
WarrantyOne year limited
Power consumptionDC 4.8 ~ 6V, 0.06A at Max load
Power requirement4 AA batteries, or External DC 9 ~12V, 500mA
Base connect3/8” threaded socket
Weight and Dimensions IconWeight and Dimensions
Mount weight2.4 lbs (1.1kg) w/o battery
Dimensions153 x 104 x 58 mm

Related product manuals