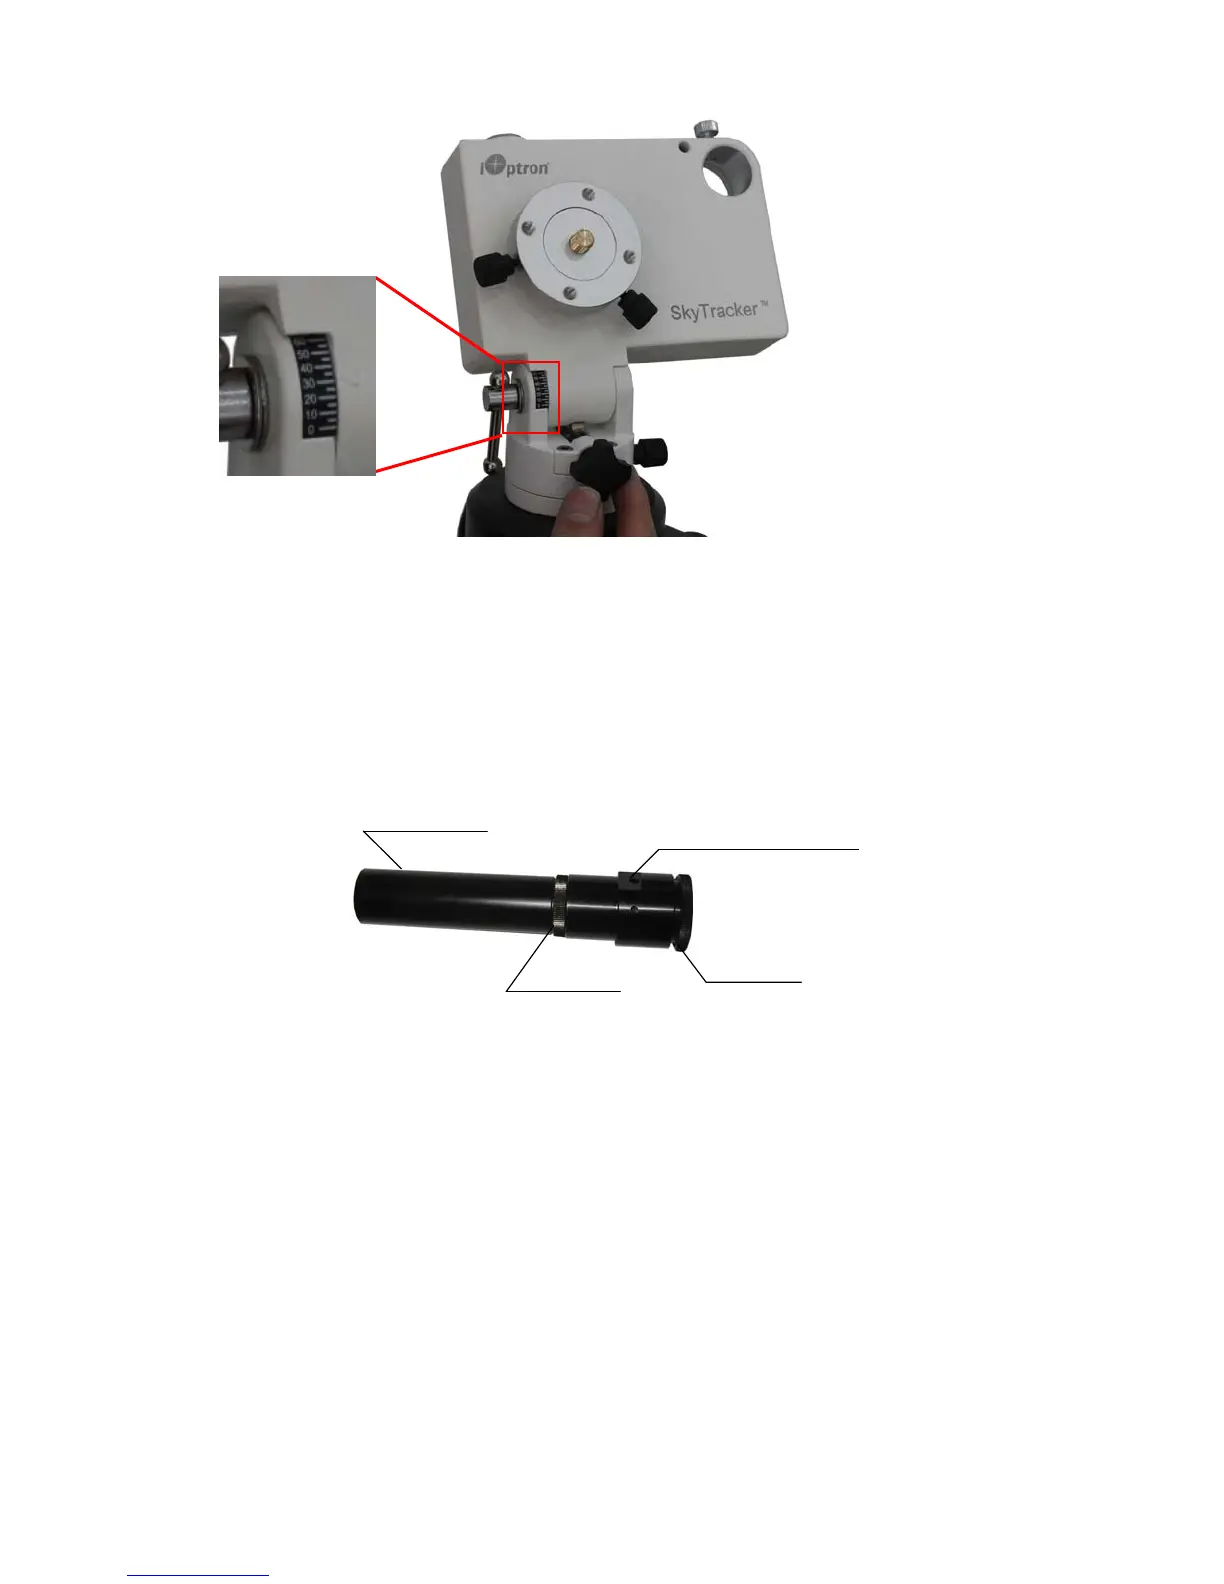
8
Figure 9. Set current latitude
STEP 5. Easy Polar Alignment
This STEP will discuss how to use iOptron’s AccuAlign
TM
dark field illuminated polar scope
(Figure 10) for easy and accurate polar alignment. You may skip this part and directly go to STEP 6,
if your model does not equipped with a polar scope or can’t see pole star. In order for the
SkyTracker
TM
mount tracking properly, it has to be accurately polar aligned. This is achieved by
making the polar axis of the mount parallel to that of the Earth’s axis of rotation.
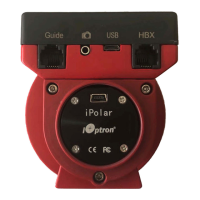
Objective lens
Lock ring
Eyepiece
Reticle illumination inlet
Figure 10. AccuAlign
TM
dark field illuminated polar scope
Before installing the polar scope onto the mount, face the polar scope to a bright source, such
as the sky (but not the SUN) or a lamp from distant. Adjust the eyepiece to focus the reticle pattern.
Then face the polar scope to a distant object and look through the eyepiece. If you can not see the
distant object clearly, the polar scope is not focused for your eyesight. Release a few turns of the Lock
ring. Turn the Objective lens until the image is focused. Retighten the Lock ring.
Turn the Polar Scope Lock Screw until it does not intrude into the Polar Scope Mounting Hole.
The flat surface inside the mounting hole is for polar scope alignment and the LED acts as both the
power indicator and the illuminating light for the polar scope reticle, as shown in Figure 11. Gently
insert the polar scope into the Polar Scope Mounting Hole with the flat platoon on the polar scope face
down. Push the polar scope all the way in so the flat surfaces inside the hole will align to the flat
platoon on the polar scope and the LED will sit right to the little opening on the flat platoon. Finger
tighten (not too tight) the Polar Scope Lock Screw (Figure 12).