9
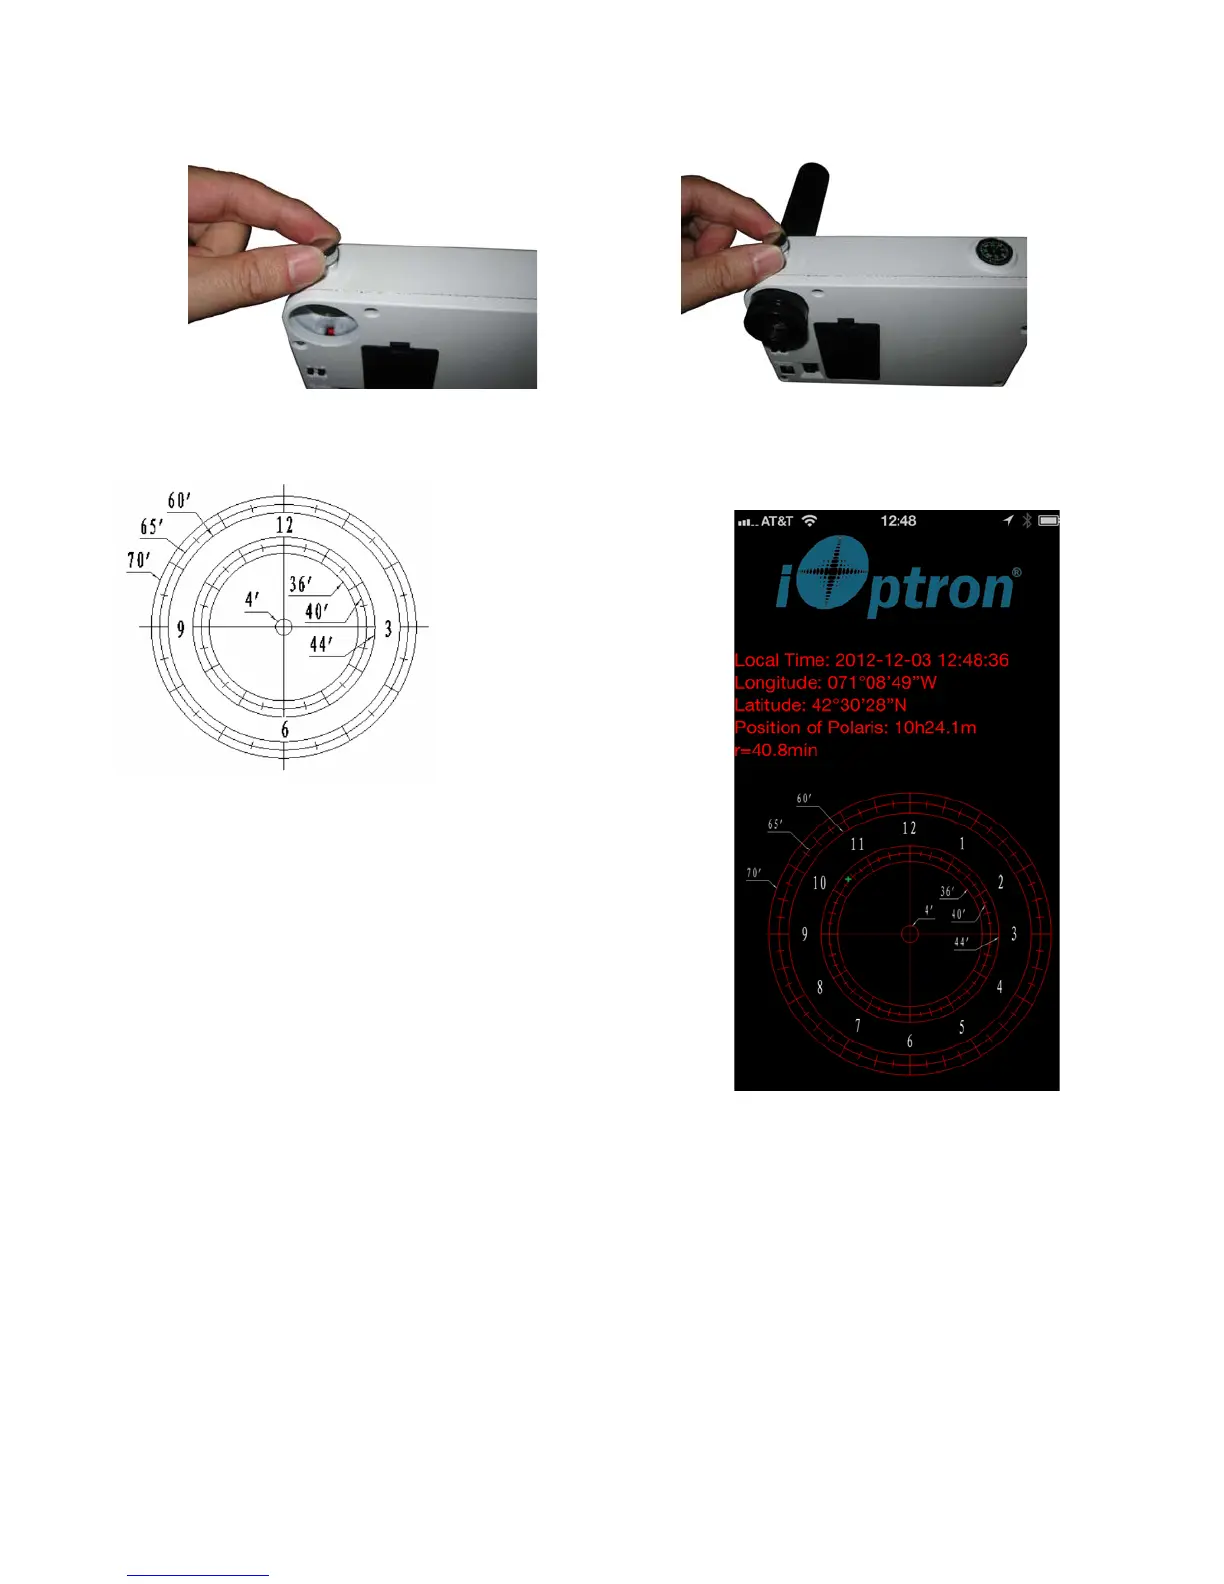
Figure 11. Release polar scope lock screw
Figure 12. Installed polar scope
Press the power switch on the mount to turn the
SkyTracker
TM
mount on. Look through the polar scope eyepiece.
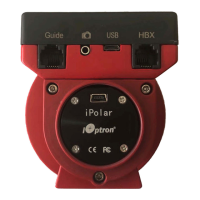
Adjust the eyepiece to
bring the reticle dial in
focus. As indicated in
Figure 13, the Polar
Scope Dial has been
divided into 12 hours
along the angular
direction with half-hour
tics. There are 2 groups,
6 concentric circles
marked from 36’ to 44’
and 60’ to 70’,
respectively. The 36’ to
44’ concentric circles
are used for polar alignment in the northern hemisphere
using Polaris. While the 60’ to 70’ circles are used for polar
alignment in the southern hemisphere using Sigma Octantis.
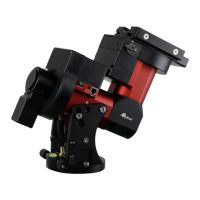
To maximize the benefits of the iOptron polar scope
for polar alignment, you need to know where the Polaris is
in the northern hemisphere. You may find this information
via an iPhone/iPad app (iOptron Polar Scope in Apple iTune
store). Shown in Figure 14 is a screen shot of an iPhone
chart. For example, on December 3, 2012, 12:48:36 in
Boston, USA (Lat N42º30’28” and Long W71º08’49”), the
Polaris Position is 10hr 24.1m and r = 40.8min (the green
dot on the chart).
Adjust the mount in latitude (using Latitude Adjustment Screw) and azimuth (heading, tuning
the mount by releasing Azimuth Locking Screw) direction to place Polaris in the same position on the
Polar Scope Dial as indicated on your iPhone/iPad screen. In this case, the Polaris will be located at a
radius of 40.8’ and an angle of 10 hour 24.1 minute.
If you don’t have an iPhone/iPad, you still can get a better polar alignment using other
program/software to calculate the pole star position.
STEP 6. Install ball head
Take off the Camera Mounting Block from the SkyTracker mount by releasing two thumb
screws that hold the Camera Mounting Block in place, as indicated in Figure 15. Mount the ball head
Figure 13. Polar scope chart
on an iPhone
Figure 14. Polar scope dial