6
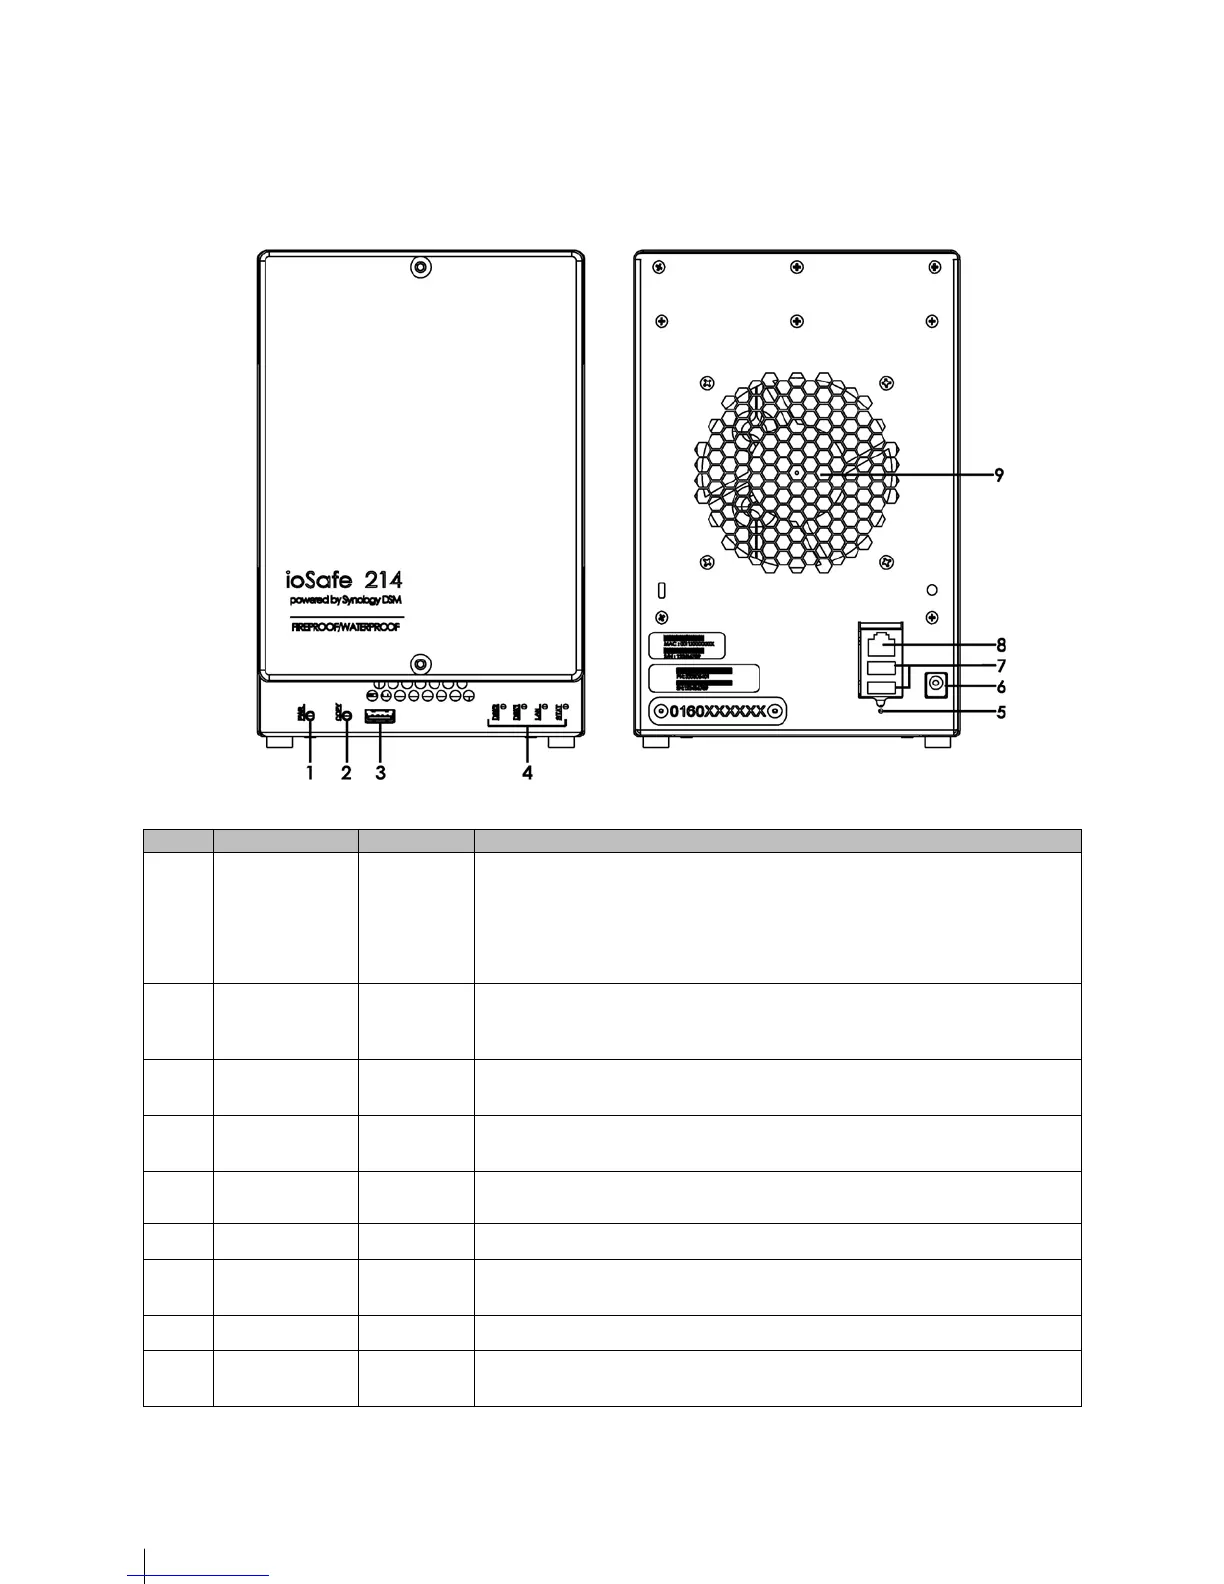
ioSafe 214 at a Glance
1)
Power Button Front Panel
The power button is used to turn the ioSafe 214 on or off.
To turn the 214 on, press and release the power button. The LEDS will start
flashing. The system is ready when you hear a beep.
To turn off the ioSafe 214, press the power button and hold it until you hear a
beep sound and the Power LED starts blinking.
2)
Copy Button Front Panel
The Copy button lights up when you connect a USB Device to the USB port on
the front panel. Pressing the button will copy the data from the connected USB
device to ioSafe 214’s internal HDD.
3)
USB 2.0 Port Front Panel
USB ports for adding additional external hard drives, USB printers, or other USB
devices.
4)
LED Indicators Front Panel
The LED indicators are used to display the status of the internal disk and the
system. For more information, see "LED Indication Table" on Page 30.
5)
RESET Button Back Panel
1. To restore IP, DNS, passwords for the admin account to default value.
2. To reinstall the ioSafe 214.
6)
Power Port Back Panel
Connect the AC adapter to this port.
7)
USB 3.0 Ports Back Panel
USB ports for adding additional external hard drives, USB printers, or other USB
devices.
8)
LAN Port Back Panel
The LAN port for connecting network (RJ-45) cable to the ioSafe 214.
9)
Fan Back Panel
To maximize cooling, please do not block the fan exhaust. If the fan is
malfunctioning, the system will beep.