Do you have a question about the IriSys IRI 1011 and is the answer not in the manual?
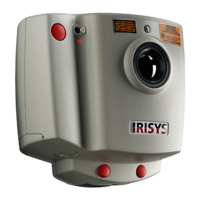
Details the contents of the IRI 1011 toolbox and initial inspection.
Instructions for powering the imager via battery or AC mains.
Step-by-step guide for inserting AA batteries into the imager.
Instructions for connecting and using the AC mains power supply.
Guide on connecting the imager to a 'Pocket PC' or Palm device.
Details the IRI 1011 system's compatibility with various devices.
Explains how to use the laser pointer to identify the scene center.
Describes using the IRI 1011 thermal imager with a 'Pocket PC'.
Steps for installing the IRISYS 1011 Imager software onto a 'Pocket PC'.
Details software button operations for the 'Pocket PC' interface.
Explains software button functions: Grab, Auto, Tools, Browse, Exit.
Describes how to use the Navigation/Action button on the 'Pocket PC'.
Instructions for transferring snapshot images from 'Pocket PC' to a PC.
Lists 'Pocket PC' models tested with the IRI 1011 and required cables.
Describes using the IRI 1011 thermal imager with a Palm device.
Guide for installing IRISYS 1011 Imager software onto a Palm device.
How to install 'AlwaysOn' software to disable automatic Palm shutdown.
Steps to launch the IRISYS 1011 Imager software on a Palm.
Details software button operations for the Palm interface.
Explains software button functions: Grab, Auto, Tools, Browse.
Describes how to use the Navigation/Action button on the Palm.
Lists Palm models tested with the IRI 1011 and recommended sync cables.
Describes using the IRI 1011 thermal imager with a PC.
Instructions for installing the IRISYS 1011 Imager and report writer software on a PC.
How to connect and launch the IRISYS 1011 Imager software on a PC.
Steps to disable ActiveSync to resolve COM port conflicts.
Explains the controls available in the PC software's control panel.
Overview of the File, Edit, View, Tools, Window, and About menus.
How to display and adjust temperature graphs for live imaging.
How to use PC software to examine saved snapshots without the imager.
Notes on obtaining accurate temperature readings, thermal stabilisation, and emissivity.
General information regarding the imager's fixed lens and internal components.
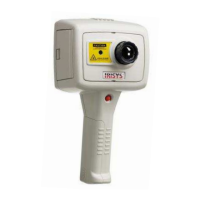
Describes the purpose and features of the optional IRI 1011 handle.
Step-by-step guide for mounting the imager and 'Pocket PC' onto the handle.
Instructions for swapping 'Pocket PC' hooks for Palm hooks on the handle.
Steps to detach the imager from the accessory handle.
Section for users to provide technical issues or feedback about the imager.
| Image Format | JPEG |
|---|---|
| Battery Life | 4 hours |
| Encapsulation | IP54 |
| Focus | Manual |
| Detector Type | Uncooled microbolometer |
| Spectral Range | 8 ~ 14 μm |
| Digital Zoom | 2x |
| Display | 3.5 inch LCD |
| Temperature Range | -20 °C ~ +350 °C |
| Accuracy | ±2°C or ±2% of reading |
| Battery Type | Rechargeable Li-ion |
| Operating Temperature | -15°C to +50°C |
| Output Interface | USB |
| Power Supply | AC adapter |