IPU 40060 Issue 9
Page 2 of 27
Contents:
1 GETTING STARTED..................................................................................... 3
1.1 UNPACKING .............................................................................................. 3
1.2 POWERING THE IRI 1011 ............................................................................. 3
1.2.1 Using Battery Power .......................................................................... 3
1.2.2 Using AC Mains Power ........................................................................ 4
1.3 CONNECTING THE IRI 1011 TO A ‘POCKET PC’ OR PALM ......................................... 4
2 OPERATING THE IRI 1011 THERMAL IMAGER ............................................ 5
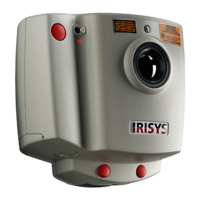
2.1 HARDWARE ............................................................................................... 5
2.2 USING THE LASER POINTER ............................................................................ 6
2.3 USING THE IRI 1011 THERMAL IMAGER WITH A ‘POCKET PC’.................................... 6
2.3.1 Setting up the ‘Pocket PC’ with the IRI 1011 Thermal Imager.................. 6
2.3.1.1 Installing the IRISYS 1011 Imager software onto a ‘Pocket PC’ .........................6
2.3.1.2 Starting the IRISYS 1011 Imager software.....................................................7
2.3.1.3 Reinstalling the IRISYS 1011 Imager software onto a ‘Pocket PC’ from Flash
Memory. 7
2.3.2 Operating the ‘Pocket PC’ with the IRI 1011 Thermal Imager .................. 7
2.3.2.1 Software Button Operations .........................................................................8
2.3.2.2 Navigation/Action Button Operations ...........................................................10
2.3.2.3 Snapshot Transfer from a ‘Pocket PC’ to a PC ............................................... 10
2.3.3 Recommended ‘Pocket PCs’ for use with the IRI 1011 ..............................11
2.4 USING THE IRI 1011 THERMAL IMAGER WITH A PALM ...........................................12
2.4.1 Setting up the Palm with the IRI 1011 Thermal Imager .........................12
2.4.1.1 Installing the IRISYS 1011 Imager software onto a Palm ............................... 12
2.4.1.2 Switching off the Palm’s automatic shutdown ...............................................13
2.4.1.3 Starting the IRISYS 1011 Imager software...................................................13
2.4.2 Operating the Palm with the IRI 1011 Thermal Imager..........................14
2.4.2.1 Software Button Operations ....................................................................... 14
2.4.2.2 Navigation/Action Button Operations ...........................................................15
2.4.3 Recommended Palms for use with the IRI 1011....................................16
2.5 USING THE IRI 1011 THERMAL IMAGER WITH A PC ..............................................17
2.5.1 Installation of software on PC.1000 Report Writer note..........................17
2.5.2 Operating IRISYS 1011 Imager software .............................................17
2.5.2.1 Turning off Microsoft ActiveSync:................................................................ 17
2.5.2.2 Control Panel............................................................................................18
2.5.2.3 Menus ..................................................................................................... 19
2.5.2.4 Producing a Temperature Graph (live imaging):............................................ 20
2.5.2.5 Use of PC software with no Thermal Imager connected ..................................20
3 OPERATING NOTES AND PRECAUTIONS................................................... 21
3.1 TEMPERATURE MEASUREMENT.........................................................................21
3.2 GENERAL.................................................................................................21
4 OPTIONAL ACCESSORIES......................................................................... 21
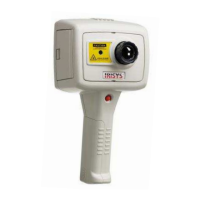
4.1 IRI 1011 HANDLE .....................................................................................21
4.1.1 Mounting the imager and Pocket PC onto the Handle.............................21
4.1.2 Preparing the Handle for use with a Palm PC. .......................................25
4.1.3 Removing the Imager from the Handle................................................26
5 CUSTOMER FEEDBACK ................................................................................ 27