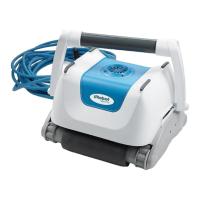
The iRobot Verro Model 600 is an automatic pool cleaning robot designed to efficiently clean the bottom and walls of swimming pools. It operates by pumping 80 gallons of water per minute through its system, generating suction at two vacuum intakes located underneath the robot. This powerful water flow, combined with brushes at the front and back, helps to loosen and vacuum up dirt, debris, and even small particles down to two microns in size. The robot's coverage algorithm allows it to brush and clean the entire pool, from the bottom to the waterline, in approximately 60 to 90 minutes.
Important Safety Notes:
- The iRobot Verro should never be used while people are swimming in the pool.
- A Ground Fault Current Interrupter (GFCI) outlet is mandatory for protection against electric shock. The unit must be supplied through a GFCI outlet.
- All electrical connections must comply with local and national wiring rules.
- If the supply cord is damaged, it must be replaced by the manufacturer's service agent or a qualified professional to avoid hazards.
- Always turn the Power Supply OFF and unplug it from the power outlet before removing the cleaner from the pool.
- The cleaner should not be left in the pool at all times.
- Mishandling can lead to lubricant leakage.
- Keep the power plug away from water.
Cautions for Use:
- Never switch the pool cleaner ON unless it is fully immersed in water. Operating it dry will cause immediate and severe damage, voiding the warranty.
- After a cleaning cycle, allow the cleaner to remain in the pool for 15 to 20 minutes for the motors to cool down adequately.
- Do not use the Verro in pools with water temperatures exceeding 100 degrees Fahrenheit.
- Always use the handle to lift the Verro from the pool; do not use the floating power cord.
- The floating power cord plug is designed to fit into the socket only one way; do not force it.
- Ensure the floating power cord is securely locked into the socket on the Power Supply.
- Do not leave the cleaner or its Power Supply in direct sunlight when not in use.
- Protect the Power Supply from rain, as it is water-resistant but not waterproof. Improper storage will void the warranty.
Usage Features:
- Handle Positioning: To prevent the floating power cord from twisting and to ensure comprehensive pool coverage, the handle should be positioned diagonally across the Verro. The direction of the handle should be reversed before each cleaning run.
- Deployment: Uncoil the floating power cord and spread it over the water's surface. Place the Verro in the water and rock it side-to-side to release trapped air, allowing it to settle correctly at the bottom of the pool, right side up and level.
- Power Supply Placement: The Power Supply (transformer) must be placed at least 3.5 meters (12 feet) away from the pool.
- Connecting Power: Plug the floating power cord into the Power Supply, ensuring it is fully seated and then turning the locking collar clockwise to secure it. The Power Supply must be plugged into a properly grounded GFCI outlet at least 12 feet from the pool.
- Operation: Press the green ON button on the Power Supply to start the Verro. A light on the Power Supply will illuminate, indicating operation. To stop the Verro before the cycle ends, press the red OFF button.
- Retrieval: After the cleaning cycle, the Verro will stop automatically, and the Power Supply light will turn off. Wait 20 minutes for the motors to cool. Always turn off and unplug the Power Supply from the GFCI outlet before unplugging the floating power cord (by turning the locking collar counter-clockwise) and removing the cleaner from the water. Use the handle to lift the Verro, allowing water to drain.
Maintenance Features:
- Filter Bag Cleaning: Regular cleaning of the filter bag is crucial for optimal performance. A clogged filter bag reduces traction, affecting the Verro's ability to clean effectively and climb walls.
- Unplug the Power Supply and the floating power cord.
- Place the Verro upside down on a towel.
- Unlock and remove the bottom panel by pushing the two locking tabs.
- Remove the filter bag assembly and then the filter bag from its support bars.
- Turn the filter bag inside out and rinse it thoroughly with a hose until the water runs clear. Gently agitate and squeeze the bag. If necessary, machine wash the bag in cold water on a gentle cycle without detergents, fabric softeners, bleach, or other additives. Do not machine dry.
- Turn the filter bag so the felt surface is inside and the smooth, shiny surface is outside, then place it back on the support bars.
- Replace the filter bag assembly in the robot.
- Replace the bottom cover, ensuring the tabs click into place.
- Tip: For pools with significant large debris (e.g., leaves), iRobot recommends using a mesh filter bag (available separately). The fine filter bag is ideal for small debris (e.g., algae, sand) and regular maintenance.
- Rinsing Verro: iRobot recommends rinsing the Verro with a garden hose after each use to extend the life of its plastic components and maintain its appearance.
- Storage: Store the Verro in a dry place, out of direct sunlight, at temperatures between 50 and 104 degrees Fahrenheit. The Power Supply is water-resistant but not waterproof; protect it from rain.
- Changing Brushes: Brushes need replacement when the Verro starts riding on its side tracks instead of its brushes.
- Unplug the Power Supply and the floating power cord.
- Place the Verro upside down on a towel and remove the filter bag assembly.
- Locate the side with the drive belts and remove the four screws holding the side plate.
- Note the arrangement of drive belts and tracks, then remove the front and rear brush rollers.
- Remove the end hubs from the rollers.
- Pull the brushes off the wheel tubes. If difficult, soak them in water for 20 minutes.
- Push the new brushes onto the wheel tubes.
- Place the brushes back in the robot, reinstalling the drive belts and tracks over the end hubs.
- Replace the side plate and reattach the four screws.
- Changing Drive Belts or Tracks: Over time, drive belts can stretch, causing the Verro to move slowly, struggle with wall climbing, or produce a clicking sound.
- Place the Verro upside down on a towel and remove the filter bag assembly.
- On each side, remove the four screws holding the side plate.
- Remove the side plates.
- Remove the drive tracks.
- Carefully note their installation, then remove the drive belts.
- Install the new drive belts and drive tracks.
- Replace the side plates.
- Reattach the four screws on each side.
- Untwisting the Floating Power Cord: Periodically check the cord for damage. While the Verro is designed to minimize twisting, manual untwisting may be necessary if the cord tangles or kinks. Changing the handle direction before each run helps.
- Unplug the floating power cord from the Power Supply.
- Position the Verro so you can walk 50 feet away from it.
- Hold the Detangler (integrated into the handgrip) and walk away from the Verro. The Detangler allows the cord to rotate and untwist.
- If the cord isn't fully untwisted, manually give it a few more turns.
- Cleaning the Impeller:
- Unplug the floating power cord from the Power Supply.
- Remove the screws attaching the outlet top to the robot.
- Lift off the outlet top.
- Clean any debris from the propeller and shaft.
- Replace the outlet top and reinstall the screws.
Troubleshooting:
Many issues stem from a dirty or clogged filter bag. If rinsing by hand doesn't work, machine wash the bag in cold water (no detergents, softeners, bleach, or machine drying). Consider using a mesh bag for large debris. Always turn off and unplug the Power Supply before troubleshooting.
- Verro will not start:
- Power Supply not plugged in: Plug into GFCI outlet, 12 feet from pool.
- Floating power cord not plugged in: Plug into Power Supply, turn locking collar clockwise.
- Verro is not cleaning properly:
- Filter bag needs cleaning: Clean the filter bag (p. 12).
- Pump impeller fouled: Clean the impeller (p. 18).
- Verro does not climb walls:
- Filter bag needs cleaning: Clean the filter bag (p. 12).
- Brushes, drive belts, or tracks need replacing: Replace them (p. 16).
- Pump impeller fouled: Clean the impeller (p. 18).
- Verro does not cover the entire pool:
- Filter bag needs cleaning: Clean the filter bag (p. 12).
- Brushes, drive belts, or tracks need replacing: Replace them (p. 16).
- Floating power cord preventing reach: Use Detangler (p. 17). Position Power Supply 12 feet from the center of a long side of the pool. Ensure cord isn't caught. Reposition Power Supply if needed.
- Pump impeller fouled: Clean the impeller (p. 18).
- Verro gets stuck on its floating power cord:
- Floating power cord is twisted: Use Detangler (p. 17). Remember to reverse handle direction before each cycle.
Customer Care:
For support tips, FAQs, accessories, and other iRobot products, visit www.irobot.com. For assistance, call 877.855.8593. Customer Care hours are Monday-Friday 9 AM – 7 PM Eastern Time, and Saturday 9 AM – 6 PM Eastern Time.