Signal interruptions
Each sensor is read by the device once a minute. If more than 8 readings are read one after the other without data, lines
appear in the display for this channel and the HTG79 then stops any other reception attempts after this for 8 hours.
The display device starts a reception again by itself after approx. 8 hours. If the original sender is not found again, the
device starts with a new search for a new sensor on this channel.
When the signal is interrupted, you can start a new signal search at any time manually. Please, however, check the
following points beforehand:
1. whether the sensor is still in place
2. the batteries of the sensor and the display device. Please also replace them when a battery tester rates them as still being
sufficient! Further info on this can be found in the FAQ on www.irox.com.
Note: If the outdoor temperature drops sharply, the output of batteries that have been started is also strongly reduced. It is
therefore recommended that new batteries are always inserted in the sensor at the beginning of the winter (alkaline type or
better).
3. whether disturbances or shields are to be found in the area of the sender/receiver or the distance between the two devices
is too great.
The search processes described above for a ‘lost’ sensor do not have any influence on any other existing sensors that function
without problems.
Signal ‘collisions’
Radio signals of other devices in their environment can cause disruptions or temporary interruptions in reception. This is
not bad but could be annoying under certain circumstances. Such typical 'disruptive systems’ are radio door bells, wireless
security systems, tube screens (PC/TV), control systems, etc.
In such cases, it can also be helpful to use another channel.
5. OPERATION
5.1 TIME
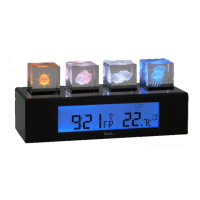
The time (hh:mm) and the date are depicted in the upper information window.
-Time setting ●-----SET----●
By pressing the CHANNEL/+ and MEMORY/- keys at the same time and holding them for approx. 3 seconds, it is possible to
change to the time setting mode.
The element to be set starts flashing in the display: With the + and - keys, you can now make a setting for as long as the
element is flashing.
You can now move from setting to setting with a single brief pressing of the SET key.
The procedure of the settings is as follows:
- Date setting (year ---> month ---> day)
- Time format: 24 hours or 12 hours (AM/PM) display
- Time setting (Hour ---> Minute)
You cannot directly interrupt the setting process. You then therefore go through the entire selection of settings with the SET key
until the time of day reappears again after the minutes setting with the flashing ‘:’ In the time.
If you do not press a key in setting mode for more than 2 minutes, the settings made will be adopted and the time of day
displayed.
 Loading...