5
5
6
25
25
25
25
26
26
26
26
26
26
26
33
33
33
33
33
33
33
33
33
33
33
33
33
33
33
33
33
33
33
33
33
33
33
33
33
33
33
18
18
18
18
35
35
35
35
35
35 35
35
35
35
35
35
35
35
1
1
2
3
3
-2-
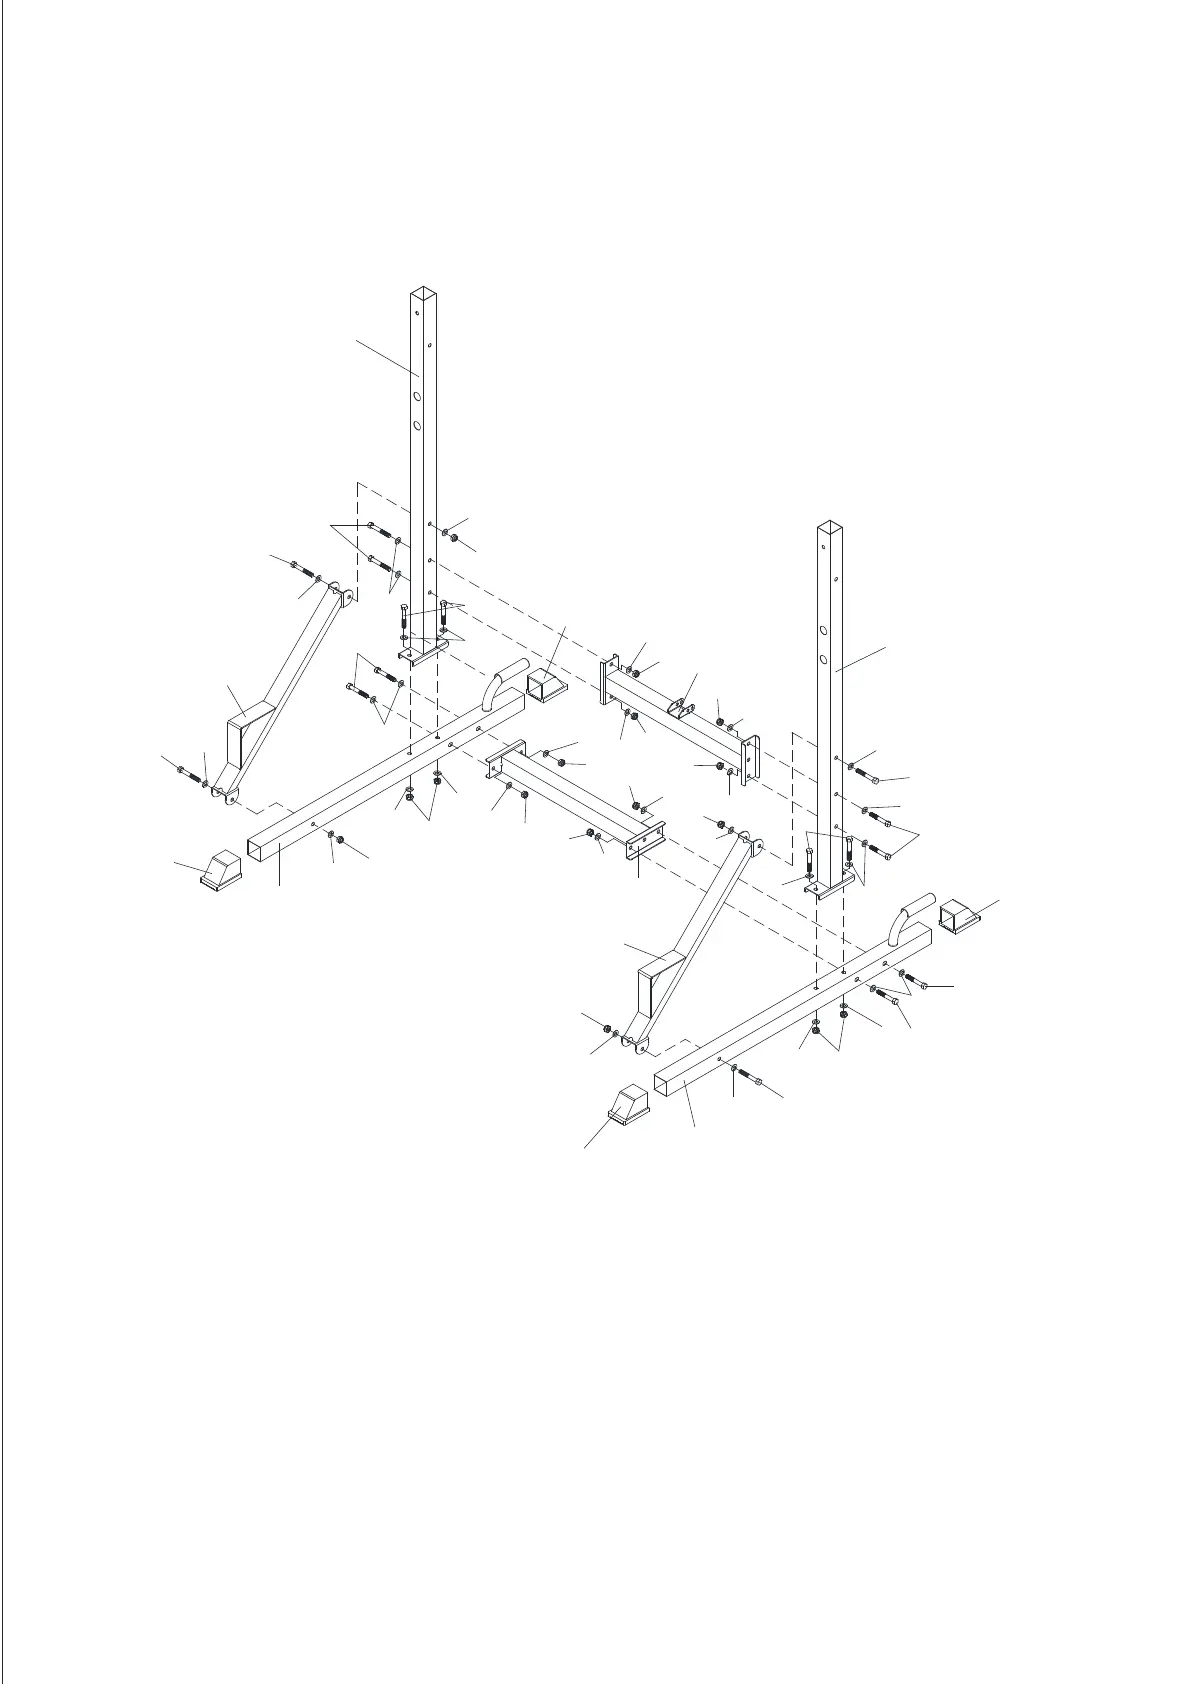
ASSEMBLY INSTRUCTION
STEP 1
1. Attach the four 50mm Square End Caps (18) to the Bottom Tube (1).
2. Attach the Under Connect Tube (2) to the Bottom Tube (1), using four M10X65mm
Hex Bolts (26), eight M10 Washers (33) and four M10 Nylon Nuts (35).
3. Attach the Down Upright Frame (3) to the Bottom Tube (1), using four M10X65mm
Hex Bolts (26), eight M10 Washers (33) and four M10 Nylon Nuts (35)
.
4. Attach the Upper Connect Tube (6) to the Down Upright Frame (3), using four
M10X65mm Hex Bolts (26), eight M10 Washers (33) and four M10 Nylon Nuts (35).
5. Attach the Push-up Bar (5) to the Bottom Tube (1) and Down Upright Frame (3),
using four M10X70mm Hex Bolts (25), eight M10 Washers (33) and four M10 Nylon
Nuts (35).
 Loading...