Do you have a question about the IsEasy LT4-41 and is the answer not in the manual?
Specifies model LT4-41 and dimensions: product 770x520mm, built-in 740x490mm.
Details voltage (220-240V) and total power (7200W).
Must be installed and grounded by a qualified technician to a grounded outlet.
Do not repair yourself. Refer service only to authorized centers.
Children must be closely supervised when using the appliance.
Avoid storing flammables nearby. Do not use for warming rooms.
Wear appropriate clothing. Use flat-bottomed pans covering the heating element.
Use specific glass, ceramic, earthenware, or glazed pots/pans.
Do not soak removable elements or immerse them in water.
Do not use a broken cooktop. Clean with caution to avoid steam burns.
Cut a hole with 50mm space. Worktop must be 30mm thick and heat-resistant.
Ensure the cooktop is well ventilated; air intake and exit must not be blocked.
Maintain at least 760mm gap between the hob and any cupboard above it.
Installation must be done by a qualified person. Never attempt self-installation.
Do not install above refrigerators, freezers, dishwashers, or tumble dryers.
The wall and area above the cooktop must withstand heat.
Damaged cables must be replaced by after-sales technicians. Check regularly.
Installer must ensure correct, safety-compliant electrical connection.
Details 240V 60Hz wiring (L1, L2, Ground) and double pole breaker.
If wires are not connected, the machine won't power. Check for damage if not working.
E4 fault displayed if no heating for 2 minutes after selecting gear.
Contact support via email with videos, pictures, and order number for solutions.
Provides a visual representation of the cooktop's control panel layout.
Place suitable cookware on the plate. Avoid placing hot pots on keypad.
Press On/Off button. Unit returns to standby if no program selected within 2 mins.
Use slider to adjust power. Three circles on left, two on right. Use inner/outer circles.
Details power outputs for different zones: 2400W (triple), 2000W (dual), 1200W, 1600W.
Indicates residual heat for each zone with an 'H' symbol. Activated when unit returns to normal.
Touch pause button to stop. Touch again to return to previous status.
Set time using slider (1-min) or key press (10-min, max 99 min).
Set time to '00' or press timer key for 3s to cancel timer for one or two zones.
Hold 'Inter lock' key for 3s to lock (shows 'LO'). Hold again to unlock.
Detects excessive heat, switches off hotplate, displays 'H'. Activates when normal.
Switches off hotplate if radiant surface is excessively heated.
If cracks appear, disconnect from mains. Do not use until replaced.
Hob switches off automatically if no cooking time set or no operation for 2 hours.
Stainless steel, enamel, iron, ceramic, and copper pans are suitable.
Aluminum pans not recommended unless they have stainless steel encapsulated bottoms.
Never switch on hotplates without a pan. Pan base must be flat and dry.
Ensure pan diameter is at least that of the hotplate.
Avoid dragging pans to prevent scratching. Always lift the pan.
Never use tin foil or plastic containers; they may melt and fuse to the surface.
Clean when cool. Use damp cloth and soapy water. Never use abrasive products.
Use specific products for radiant cooktops. Scrape off stuck dirt with a scraper.
Remove sugar/plastic spills immediately with a scraper while hot to avoid permanent marks.
Do not use cooktop as a work surface. Be careful of dust/dirt that can scratch when pans slide.
Contact support via email: service@iseasy.com for assistance.
Visit the official website for more information and support.
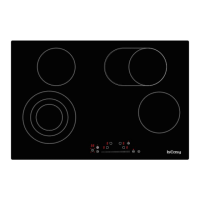
This document describes the IsEasy Ceramic Hob, Model LT4-41, an instruction manual for a ceramic cooktop.
The IsEasy Ceramic Hob is a cooking appliance designed for kitchen use, featuring multiple heating zones for various cooking needs. It operates by generating heat through radiant elements beneath a ceramic glass surface. The hob is controlled via a touch-sensitive control panel, allowing users to select power levels, set timers, and activate safety features such as a child lock. The design emphasizes ease of use and safety, with features like residual heat indicators and automatic shut-off mechanisms.
Operating the Device: To operate, place suitable cookware on the cooker plate. The operation of both zones is similar. Avoid placing hot pots or pans on the keypad.
Stand-By-Modus: Press the On/Off button. A beep will sound, and flashing lines will appear on the display. If no program is selected within approximately 2 minutes, the unit will return to standby.
Power Selection: Press the power button for the desired cooking zone. Power levels can be adjusted by sliding the slider. The left-down heating zone has three heating circles, and the right-up heating zone has two circle zones, allowing users to select inner heating circles for smaller pots or lower power, or the whole bigger heating circle by pressing the heating zone selection button.
Timer Function: After selecting the power, press the timer key. Repeatedly pressing the timer key allows selection of the desired zone for timer setting. The display will show "00". Use the slider to set the time in 1-minute steps, then press the timer key again to set in 10-minute steps (maximum 99 minutes). If no number level key is pressed for 5 seconds, the timer will start counting down. If different times are set for two zones, the display will show the three setting times sequentially. To cancel the timer, select the zone and slide the setting time to "00", or press the timer key for three seconds to cancel both zones simultaneously.
Key Lock (Childlock): To ensure child safety, the ceramic hob is equipped with an interlock device. To lock, hold down the "Inter lock" key for 3 seconds. The hob will enter "Interlock" mode, display "LO", and disable all other keys. To unlock, hold down the lock key for 3 seconds, and the hob will return to normal operation.
Residual Heat Indicator: After the hob has been operating, residual heat will be present. A "H" symbol will appear on the display for each cooking zone to warn of residual heat.
Pause Function: Touching the pause button will stop the cooker's operation. Touching it again will resume the cooker to its previous status.
Safety Systems:
Use of Containers:
Cleaning:
Troubleshooting (Electric Ceramic Stove Failure):
Repair: Any faults in the cooktop must be repaired only by an Authorized Repair Service technician to maintain warranty validity. Electrical connection must be carried out by a certified specialist. Damaged cables should only be replaced by an after-sales technician using proper tools.