eJoni
Step 5 of 13
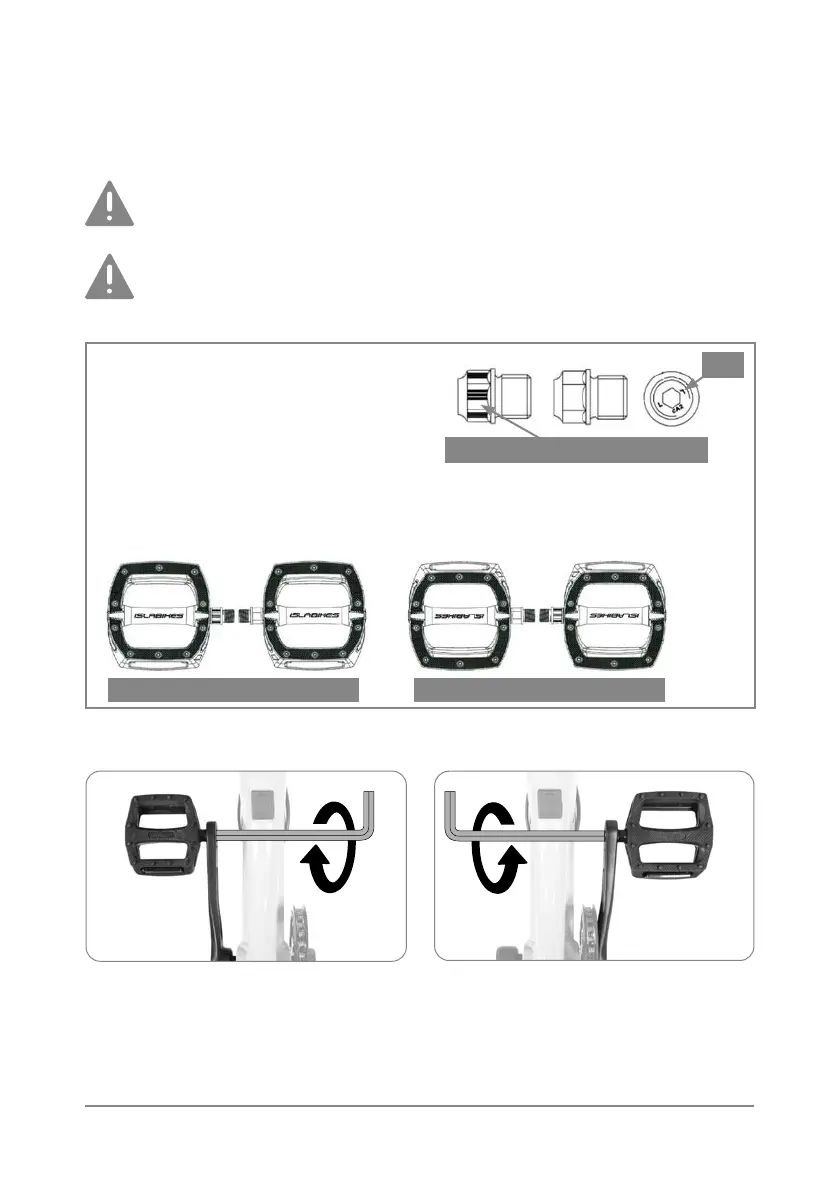
Pedal installation
All pedals are supplied in pairs with a specic left and right pedal. This is
to prevent the pedals from undoing as you turn the cranks with your feet.
Please ensure that you have identied the left and right pedal before
installation to avoid damaging the crank arm.
1. Left pedal
2. Right pedal
If these features are missing, another tip is to check the Islabikes logo.
When standing at the back of the bike looking towards the front, the
Islabikes text on the pedal should be in the correct orientation to read:
Many of our pedals have the following
features on the pedal axle to help you
identify the left and right pedals:
LH pedal has line marking on axle.
Incorrect
Correct
L/R
1. Left pedal – rotate pedal axle clockwise towards front of bike
2. Right pedal – rotate axle anti-clockwise towards front of bike
Tighten max. 30Nm