4
4
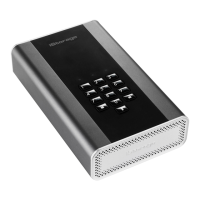
Instructions - first time use LED LED State
1. Connect the diskAshur DT
2
to a USB port -
Standby State
RED LED will be solid awaiting PIN entry
2. In Standby State (solid RED LED), press and
hold down ‘UNLOCK + 1’ buttons
Solid RED LED will change to blinking
GREEN and BLUE LEDs
3. Enter the Admin PIN (default - 11223344)
and press ‘UNLOCK’ button
GREEN and BLUE LEDs blink rapidly
together for a few seconds then to a
solid GREEN and finally a solid BLUE LED
indicating the diskAshur DT
2
is in “Admin
Mode”
4. Press the ‘UNLOCK’ button once again to
unlock diskAshur DT
2
and access drive contents
Solid BLUE LED will change to a blinking
GREEN, and finally a solid GREEN LED
indicating the diskAshur DT2 is unlocked
With your diskAshur DT
2
powered on and connected, follow the instructions in the table below to unlock with the
default Admin PIN for the first time.
To setup the diskAshur DT
2
, insert the supplied USB cable to the back of the drive and connect to your computer.
Next, connect the supplied AC adapter to the back of the drive and a mains power outlet. Once connected press the
power switch on the back of the drive to the ON position, your diskAshur DT
2
undergoes a rapid self-test to verify
all security components are working properly each time the diskAshur DT
2
is powered on. The LEDs will go
through 3 test stages, blinking in sequence RED, GREEN and BLUE, followed by two GREEN blinks and then to
RED (Standby State) on a successful test. Any test failure will force the diskAshur DT
2
to securely reset itself and
automatically resume the self-test without affecting the security characteristics or any data stored on the drive.
First Time Use
Note: Once the diskAshur
DT
2
has been successfully unlocked, the GREEN LED will remain on
and in a solid state and will only blink when data is being transferred. It can be locked down
immediately by pressing the ‘LOCK’ button once or by (strongly recommended) clicking
the ‘Safely Remove Hardware/Eject’ icon within your operating system.
 Loading...