Do you have a question about the Isuzu 4JG1-PK and is the answer not in the manual?
Covers hazards from drives, exhaust, fuel, oil, and thermal risks.
Step-by-step guide for starting and stopping the engine.
Details on how to stop the engine and emergency stopping methods.
Specifies required diesel fuel quality and engine oil grades.
Steps for changing the engine oil and oil filter.
Guide on installing anti-vibration mounts for engine alignment.
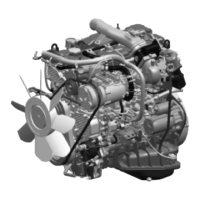
This document serves as a comprehensive manual for Isuzu marine diesel engines, specifically those distributed and manufactured in the UK by HMI. It is designed to guide users through the installation, operation, and maintenance of these engines, ensuring their longevity and optimal performance.
The Isuzu marine diesel engines are designed to provide motive power for propelling vessels. They are built with a focus on durability and operating economy, leveraging Isuzu's extensive experience and advanced technology in diesel engine manufacturing. The engines are supplied as a complete propulsion package, including the engine itself and a gearbox, ready for integration into a marine vessel. The manual emphasizes that the machinery is not intended for service until properly incorporated into a vessel, with the purchaser/installer/owner responsible for ensuring all health and safety requirements are met, particularly concerning guarding and compliance with the Recreational Craft Directive 94/25/EC where applicable.
The manual provides detailed instructions for starting and stopping the engine, distinguishing between a cold start and starting an engine already at running temperature. For a cold start, the process involves turning the key to the "1" position for approximately 60 seconds to allow fuel to be pumped, then to the "Pre-Heat" position for 10-15 seconds, and finally to "Start/Crank" until the engine fires. For an engine already at running temperature, a shorter pre-heat of 1-2 seconds is sufficient. The manual highlights the use of "Quick Heat" Glow Plugs in Isuzu Marine engines, which shorten pre-heat times but caution against prolonged pre-heat cycles to prevent premature plug failure. It also advises against continuous engagement of the starter for more than 20 seconds, with a 20-second break between attempts, to prevent damage to the starter pinion and flywheel ring gear.
For stopping the engine, models Isuzu 35/42/55/70 are equipped with a stop solenoid energized to stop the engine; users simply press and hold the stop push button until the engine stops, then turn the key to "O". The Isuzu 25 model has a stop solenoid energized to run, so stopping involves turning the key from "1" to "O". An emergency stop lever is also provided for manual intervention if the stop solenoid fails, by pushing it towards the back of the engine until it stops. The manual explicitly warns against turning the key to the off position while the engine is running, as this prevents the alternator from charging and can cause damage.
The engine control panels vary, with deluxe panels featuring an oil pressure gauge that reads high on startup and decreases as the engine warms, which is normal. Basic and intermediate panels do not illuminate the temperature light during startup.
The manual outlines a comprehensive maintenance schedule to ensure the engine's reliability and longevity. Daily or every 8 hours of running, users should check engine oil level, gearbox oil level, coolant level, drive belt tension, raw water inlet strainer (for heat exchanger cooled engines), and stern gland lubrication.
After the first 50 hours, a more extensive service is required, including changing gearbox lubricant, engine lubricating oil, oil filter, and fuel filter. Additionally, checks for fuel contamination, water trap/agglomerator drainage, chafing and leaks in all water and fuel pipes, exhaust system leaks, wiring loom and cable chafing, coupling alignment, and the tightness of all bolts on anti-vibration mounts are necessary.
Every 250 hours or annually, the 50-hour checks are repeated, along with checking the air cleaner element and changing the oil filter. Every 500 hours, or every two years, the air cleaner element and fuel filter should be changed, anti-freeze replaced, and electrical equipment, hoses, and belts inspected and replaced as necessary.
Detailed instructions are provided for checking engine oil level, emphasizing that this should be done before starting or more than five minutes after stopping. The dipstick should be wiped clean, re-inserted, and checked for oil level between the two marks. New oil should be added via the filler port if the level is too low, but overfilling should be avoided. Changing engine oil involves warming the engine for 10 minutes, draining the oil using the sump drain pump, and replacing the oil filter. The manual advises wrapping a plastic bag around the filter during removal to catch oil and keeping bilges clean.
Fuel system maintenance includes instructions for air bleeding, which is crucial after servicing the fuel tank, draining the water sedimentor, or changing the fuel filter element. The "automatic air-bleeding system" is activated by turning the starter switch to "1" (ON), which powers an electromagnetic pump to send fuel and bleed air to the fuel tank. The manual also addresses the use of biocides to prevent fungus and bacteria growth in diesel fuel, especially in warm or humid weather, and warns against using smoke suppressant additives due to potential engine damage.
The freshwater system requires specific filling instructions for new engines, including mixing the correct strength of anti-freeze solution, checking drain taps, filling the header tank, running the engine for 5 minutes (no load) to check coolant level, and topping up as needed. For keel-cooled engines, a larger quantity of solution is required, and thorough air bleeding is critical before running on load. The manual also provides a stern warning about removing the pressure cap from the header tank when the engine is hot, as this can cause severe scalding.
The manual also covers the installation of anti-vibration mounts, which are supplied to ensure accurate alignment between the gearbox output shaft and propeller shaft, and to minimize vibration transmission to the hull. It details the assembly and adjustment process, including setting the gap between the Nyloc Nut 'A' and Locknut 'B', securing mounts to engine bearers, and checking coupling alignment using a dial indicator and feeler gauges. A critical note states that the Locknut 'B' should never be loosened or adjusted.
Finally, calorifier connection points are illustrated, suitable for 15mm (5/8") bore flexible hose, secured with hose clips. The manual specifies that if no calorifier is fitted, the connections must be blanked off and not connected directly. It also provides guidance on calorifier position, recommending piping within 3 meters of the engine and connections no more than 300-450mm above the top of the engine or below the bottom of the engine sump for optimal performance.
| Engine Model | 4JG1-PK |
|---|---|
| Manufacturer | Isuzu |
| Engine Type | Diesel |
| Aspiration | Turbocharged |
| Fuel System | Direct Injection |
| Configuration | Inline 4 |
| Cooling System | Water-cooled |