IA-200 Rev.0
20.10.2012
-16-
IA-200 Rev.0
20.10.2012
ES – GB
ES
Radiador mural a gas
Echo XC, XN y EN
Instrucciones de Instalación y Mantenimiento
Etapas de instalación
Las etapas de instalación del convector son:
- Elección de la ubicación del aparato
- Cortar el tubo
- Instalación del tubo
- Kit de tubo concéntrico L = 500mm
- Kit de tubo concéntrico L = 900mm
- Kit de tubo concentric especial L = 900mm
- Terminal simple de kit ventosa
- Junta de sellado
- Instalación Convector
- Conexionado eléctrico
- Conexión del gas
Tipo de instalación segun UNI CIG 7129
A continuación, vamos a mostrar los tipos de
instalación según la norma UNI CIG 7129.
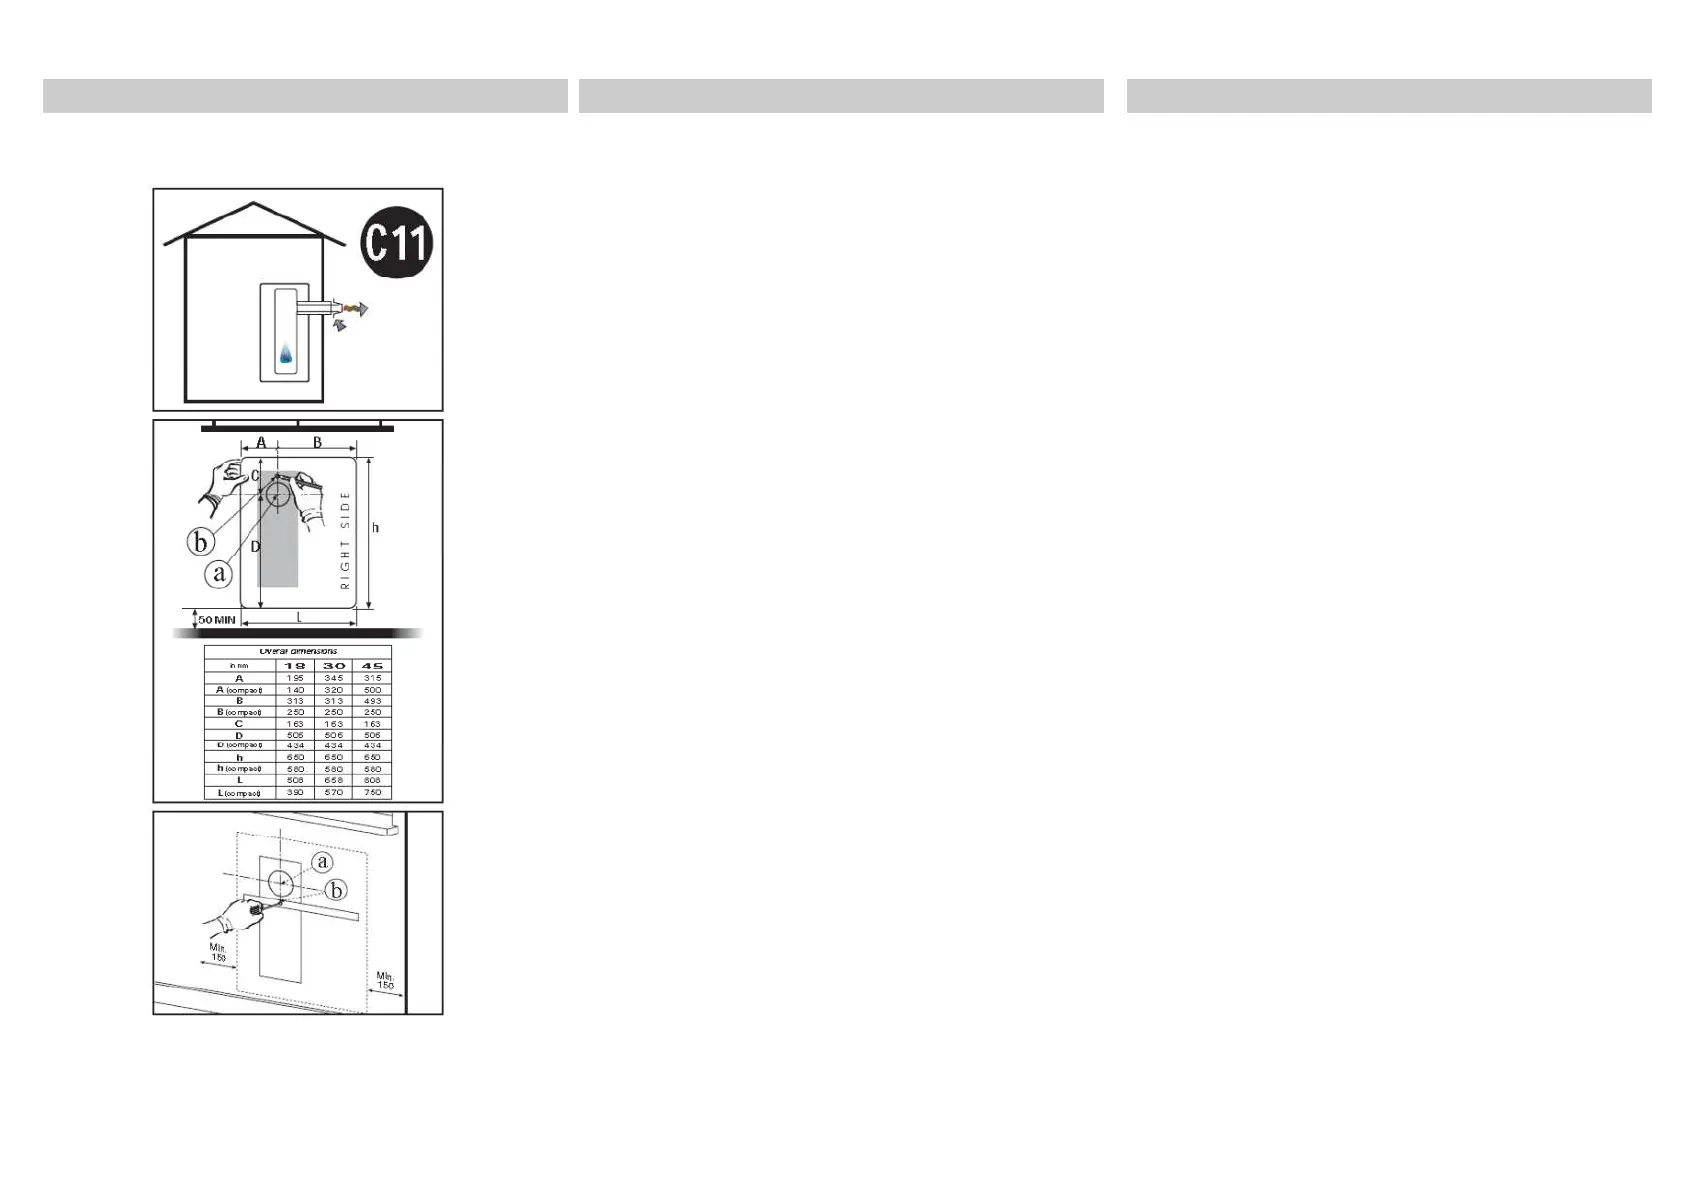
Plantilla y montaje de soporte
Para colocar la plantilla y estribo utilizar el papel transparente,
marcando y ejecutando los agujeros B (ø 8 mm).
- Fijar el estribo de uno de los 4 tacos ø 8 mm suministrados.
- Marcar y ejecutar los otros 3 agujeros (ø 8mm) en los orificios
correspondientes presentes en el estribo y en la plantilla,
fijándolos con los tres tacos.
- Marcar en la pared el centro del agujero A para el kit ventosa.
Puede recibir soporte técnico en la sucursal/representación que a Ud. le corresponda.
L
a dirección la puede obtener en Internet o a través de la empresa Kromschroeder, S.A.
L’Hospitalet Barcelona.
GB
Wall gas Stove
Echo XC, XN y EN
Instructions of Installation and maintenance
Installation stage
The convector installations stages are:
- Apparatus choice location
- Cut tube
- Tube installation
-- Concentric tube kit L = 500mm
-- Concentric tube kit L = 900mm
-- Concentric tube SPECIAL kit L = 900mm
- Intake/exhaust tube unique terminal
- Seal gasket
- Convector installation
- Electrical collegaments
- Gas connection
Type of installation second UNI CIG 7129
As
we go on, we are going to show you the types of
installation second by the Uni Cig 7129 rule.
Template and stirrup assemblage
To position the template & stirrup use the paper mask then
marked, and execute hole B (8mm).
-
Fasten the stirrup with one of the 4 inserts 0 8mm furnished
- Mark, and execute the other 3 holes (Ø 8mm) in the
corresponding buttonholes present on the stirrup and on the
template, fasten with the 3 inserts.
- Mark on the wall the centre for A hole for the intake tube.
If you have any technical questions please contact your local Branch office / agent.
The addresses are available on the internet or from Kromschroeder, S.A.
L’Hospitalet Barcelona