Installation information DVB 200-300 FR/FC
Filling the water heater
To prevent damaging the water heater, it is important that
the water heater is fi lled with water before the outer shell
is pressurised.
PLEASE NOTE: Do not forget to vent after fi lling the outer
shell and commissioning the system.
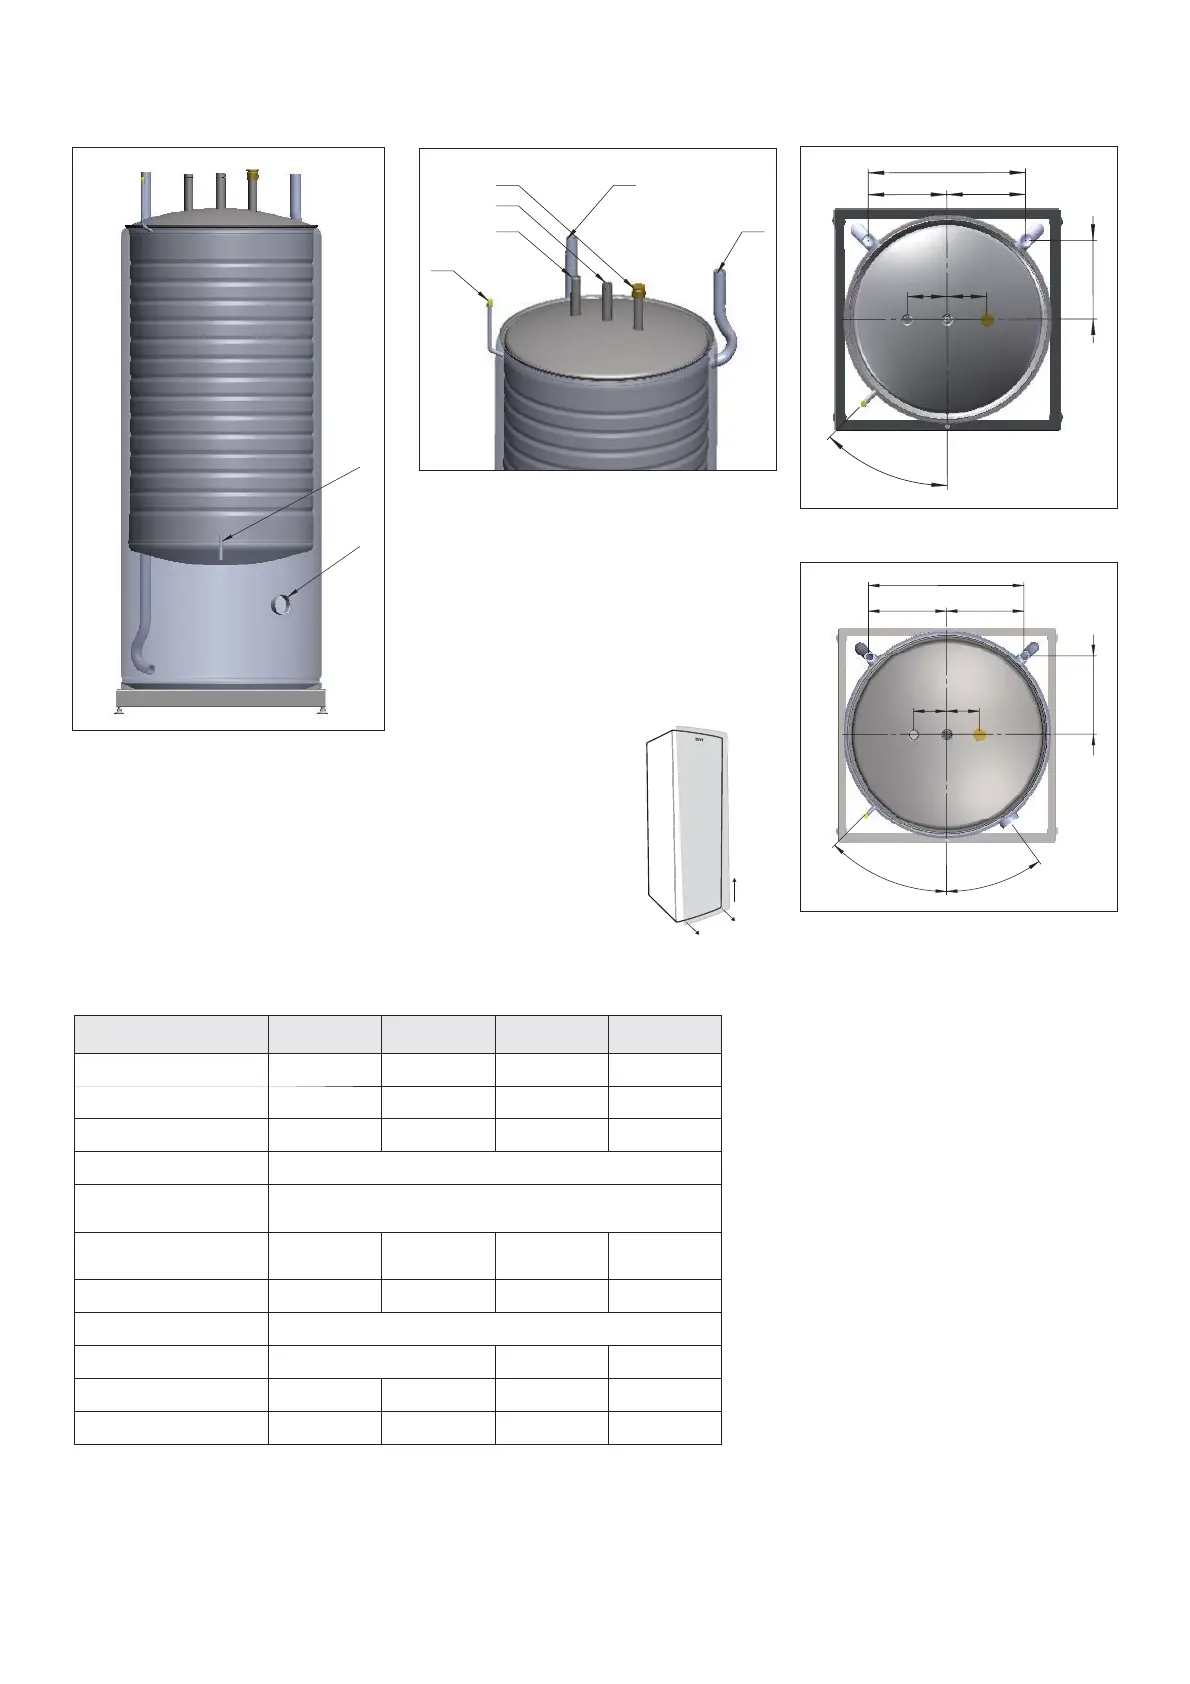
Anode
For extra safety there is an electronic sacrifi cial anode
installed in the water heater (model FR). The task of the
anode is to protect against corrosion to give the water
heater a longer service-life. In cases where there are
thought to be high amounts of chlorides in the water (> 10
mg/litre), inspect the anode every 1-2 years. The anode
(aluminium) which is on the top of the water heater has an
original diameter of 20 mm. If it has been affected, e.g. its
diameter has been reduced to 5-8 mm or is 10 cm long, it
should be replaced and re-inspected after 2-3 years.
• Pressurise the water heater (outer-shell first).
• Shut off the main cold water supply.
• Open the venting cock.
• Unscrew the anode at the top of the water heater,
check and replace if necessary.
In confi ned spaces (low ceiling heights) a chain anode is
available as an alternative. Order anodes from your local
installer specifying the tank model.
Technical information
Model DVB 200 FR DVB 300 FR DVB 200 FC DVB 300 FC
Volume of hot water 185 286 185 286
Outer shell volume 105 176 105 176
Hot/cold connection (mm) 22 28 22 28
Outer shell connection G25”
Submerged tube sensor
(mm)
9,5
Immersion heater
connection
-2”-2”
Working pressure radiator 3 2,5 3 2,5
Working pressure hot water 10
Aluminium anode Yes - -
Dimensions (mm) (WxDxH) 600x600x1520 695x695x1700 600x600x1520 695x695x1700
Weight 97 136 108 151
Ceiling connection dimensions DVB 200 FR/FC
Ceiling connection dimensions DVB 300 FR/FC
1
2
3
4
6
5
1 Venting
2 Hot water
3 Cold water
4 Anode pipe
5 Charge pipe return
6 Charge pipe supply
1 GT 3
2 Electric element outlet (DVB 300)
==
198
396
iV
100100
4
5
°
3
6
°
==
100 100
471
238,5
4
5
°
1
2
Removing the front
1. Pull out the lower section of
the front
2. Then lift the front straight
up
 Loading...