9/51
1. Hold the lance at the normal working height and spray into the bottle
while walking the distance required to spray an area corresponding to
25 m².
2. Place the bottle on a level surface and observe the liquid level visible
through the side of the bottle. Match the liquid level to the corresponding
scale on the calibrator bottle.
3. Empty the bottle and repeat this operation to determine the average of
two or more readings.
NOTE: For the volume in liters per bushel (L / alk), simply multiply the value ob-
tained in liters per hectare (L / ha) by 2.42.
9.4. Solution preparation and tank filling
1. To dilute and premix the product, place 5 liters of water in a separate
container;
2. Mix to a homogeneous solution and pour into the sprayer tank during
lling.
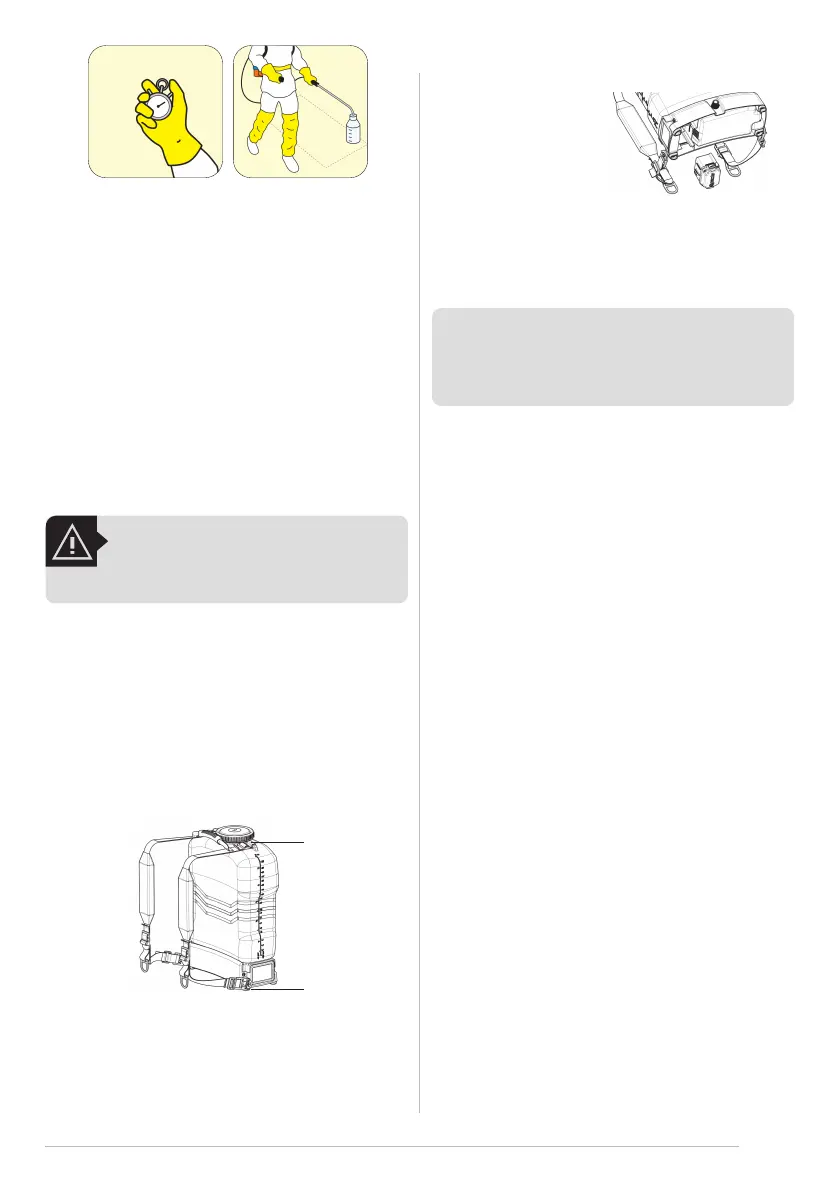
9.5. Shoulder strap adjust
The tank is contoured for the operator comfort. The shoulder straps can be quickly
adjusted to properly position the sprayer on the operator’s back.
1. Mount the strap belt onto the tank as shown in position A.
2. Hook the buckle of the strap to the plastic couplers located at the side of
the sprayer’s base, as shown in position B.
3. To tighten the strap belt, hold the strap buckle rmly with one hand and
pull the handle downward with the other hand. To loosen the strap belt,
hold the buckle rmly with one hand and pull the strap upward with the
other hand.
Record the time it takes to
walk 25 m²
Simulate the spraying
of 25 m²
WARNING!
Use the correct dose and volume of chemical according
to the product label.
To remove the battery:
1. Press both locking buttons;
2. Pull the battery out of the
battery housing.
9.6. Installing and removing the battery
To install the battery:
1. Locate the battery housing, on the bottom of the sprayer’s base, as shown
in the gure.
2. Identify the correct battery position according to the position guides. Do
A
B
not force to install the battery in the wrong position.
3. Press the battery until a “click” is heard.
9.7. Turning the sprayer on and off
To turn on the sprayer, turn the potentiometer clockwise and after hearing/feel-
ing a “click”, the LED will light up on the panel indicating that the sprayer is on. To
turn o the sprayer, turn the potentiometer counterclockwise until you hear/feel a
“click”. The LED will go out, indicating that the sprayer is o.
WARNING!
• Do not force the potentiometer to rotate beyond its limits,
either by hand or with any tool. This will damage the component.
• Do not press or pull the potentiometer. This may damage the
component.
NOTE: If the potentiometer knob comes o the shaft: Turn the potentiometer fully
counterclockwise and replace the cap to align the strip on the cap with the symbol
on the bottom of the panel.
9.8. Battery level indication
When turning on the sprayer, the LED status will indicate the approximate battery
charge level:
• LED ashes 3 times: battery charge above 80%;
• LED ashes twice: battery charge between 50% and 80%;
• LED ashes once: battery charge between 15% and 50%;
• LED illuminates directly without ashing: battery almost discharged. Recharge
as soon as possible.
• LED ashing continuously: battery completely discharged; or overvoltage de-
tected (user attempts to connect a dierent battery from the original). The LED
will remain ashing until the user turns o the sprayer.
When the battery is completely discharged during spraying, the pump automati-
cally shuts o and the LED will remain ashing. Turn the sprayer o and recharge
battery.
9.9. Pressure levels
To adjust the pressure level:
• Place the spraying lance in a safe direction and press the trigger to start spray-
ing;
• Turn the potentiometer clockwise to increase the pressure, and counterclock-
wise to decrease it. Choose the level as desired.
• Pressure will remain constant throughout application.
Note: The pressure level may vary from approximately 15 to 60 psi depending on
the nozzle used. See item “9.2. Pressure, ow rate and autonomy of each nozzle
type”.
 Loading...