72
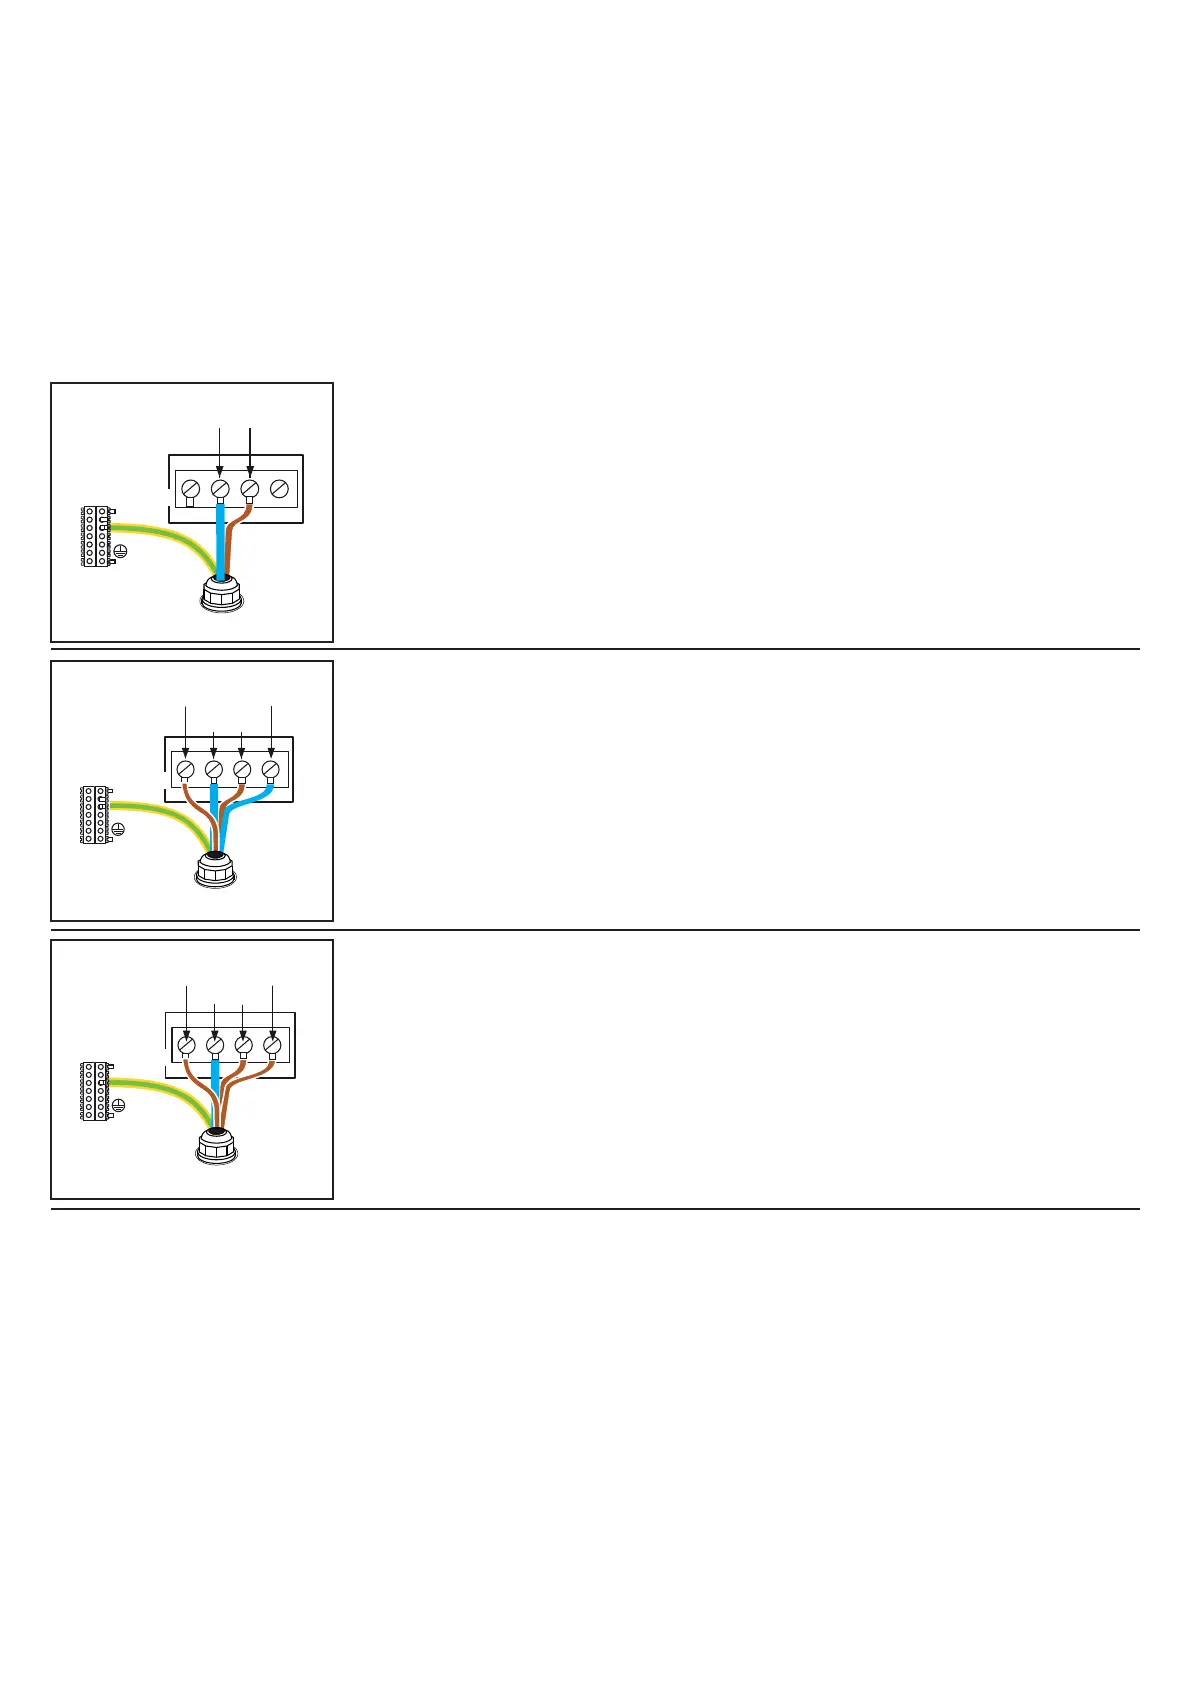
1L
- (L1+N1): linea unica/single line/ligne unique
2L
- (L1+N1): linea per il riscaldatore/ line for heater/ ligne pour le réchaueur
- (L2+N2): linea per gli altri componenti/line for other components/ligne pour les autres
composants
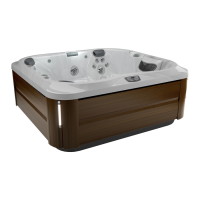
3L
- (L1+N1): linea per il riscaldatore/ line for heater/ ligne pour le réchaueur
- (L2+N1): linea per la pompa 1e gli altri componenti/line for pump 1 and the other components/
ligne pour la pompe 1 et les autres composants
- (L3+N1): linea per la pompa 2/ line for pump 2/ ligne pour la pompe 2
ATTENZIONE: a seconda del numero di linee di alimentazione predisposte è necessario eettuare alcuni collegamenti sulla sche-
da elettronica presente all’interno della cassetta e congurare il banco-interruttori “dip-switch” (vedi “Collegamenti sulla scheda
elettronica/impostazione dei dip switch”)
ATTENTION: According to the number of power lines, some connections need to be made to the electronic board inside the con-
trol box, and the dip switches need to be congured (see “Electronic board connections/Setting the dip switches”)
ATTENTION : selon le nombre de lignes d'alimentation prévues, il est nécessaire d'eectuer certains raccordements sur la carte
électronique présente à l'intérieur du boîtier et de congurer le bandeau des interrupteurs « dip-switch » (voir « Raccordements
sur la carte électronique/conguration des dip switch »)
Collegamento dell’alimentazione elettrica
A seconda del numero di linee di alimentazione predisposte (vedere anche scheda preinstallazione) eettuare il collegamento alla
morsettiera come indicato:
Connecting the electrical power supply
According to the number of power lines (see the pre-installation data sheet), connect them up to the terminal board as indicated:
Branchement de l'alimentation électrique
Selon le nombre de lignes d'alimentation prévues (voir aussi la che de pré-installation), eectuer le branchement sur le bornier
comme indiqué :
(N1)
(L1)
TB1
TB3
Green
Green
(L1)
(L2)
(N1)
(N2)
TB1
TB3
Green
(L1)
(L2)
(N1)
(L3)
TB1
TB3