RAC Plus User’s Manual
1-4
Quick Start Guide
The RAC Plus I and II DMIs will allow you to accurately measure distance
quickly and easily. However, before you can do this a few basic steps must
be taken to ensure that you get the optimum performance from your in-
strument.
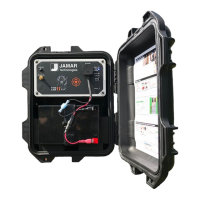
Step 1
Install your RAC and its modular sensor. Refer to Chapter 2 for detailed
instructions on this. If you would like to have the equipment professionally
installed, contact a garage or speedometer shop in your area.
Step 2
Calibrate your instrument. Refer to Chapter 3 for detailed instructions on
how this is done. Your RAC will not accurately measure distance unless
it is properly calibrated.
Step 3
Perform a test measurement with your vehicle. Once your RAC has been
calibrated, you should perform a test measurement over a known distance.
This will ensure that the instrument has been calibrated correctly.
To do a test measurement, drive to your starting point and stop. Turn on the
RAC and wait until zero is shown on the larger, upper display and CH is
shown on the smaller, lower display. Next, press the CH (count hold) button
to release the instrument from count hold and then drive the distance to be
measured. Stop and/or press the CH button once you reach the end of the
distance to be measured.
Step 4
Familiarize yourself with the features and options of the instrument that
you will be using. Refer to Chapter 4 for more detailed instructions on the
functions and procedures of the RAC Plus I or II.
Step 5
Practice. Before attempting to use the instrument on a job, be sure you are
comfortable with how to operate it.