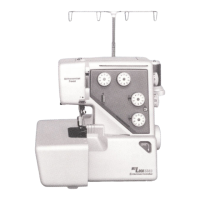
Do you have a question about the Janome myLock 534D and is the answer not in the manual?
Safety instructions related to electric shock hazards.
Safety instructions to prevent burns, fire, electric shock, or injury.
Detailed steps for threading the lower looper of the sewing machine.
Detailed steps for threading the upper looper of the sewing machine.
Instructions for threading the right needle of the sewing machine.
Instructions for threading the left needle of the sewing machine.
Steps for initiating the sewing process with the machine.
How to properly complete a sewing operation and prepare for the next.
Technique for maintaining continuous sewing flow between fabrics.
Using printed guide lines on the machine for accurate seam placement.
Visual and descriptive guide to achieving correct thread tension.
Steps and guidelines for adjusting thread tension dials.
Examples and explanations of incorrect thread tension settings.
Procedure for using only the right needle for three-thread serging.
Procedure for using only the left needle for wide three-thread serging.
Visual and descriptive guide to achieving correct thread tension for three threads.
Steps and guidelines for adjusting three thread tension dials.
Examples and explanations of incorrect thread tension settings for three threads.
Steps for performing pin tucking sewing operations.
Step-by-step instructions for replacing the upper knife of the machine.
How to clean the area around the upper knife.
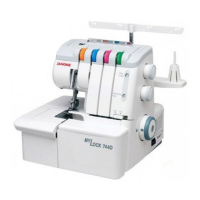
| Type | Overlocker |
|---|---|
| Number of Threads | 3 or 4 |
| Stitch Length | 4 mm |
| Differential Feed | Yes |
| Speed | 1300 stitches per minute |
| Needles | 2 |
| Presser Foot | Snap-on |
| Built-in Stitch Finger | Yes |
| Free Arm | Yes |
| Stitch Options | 3-thread overlock, 4-thread overlock, rolled hem |
| Differential Feed Ratio | 0.7 - 2.0 |
| Cutting Width | 5 mm |
| Threading | Color-coded threading |