Do you have a question about the Janome MyLock 744D and is the answer not in the manual?
Technical notes regarding polarized plugs and foot controllers for the sewing machine.
Critical safety warnings related to electrical hazards during operation and maintenance.
General safety guidelines to prevent burns, fire, electric shock, or personal injury.
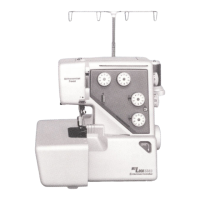
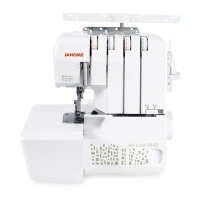
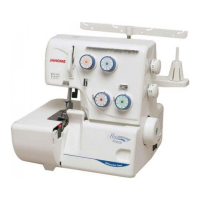
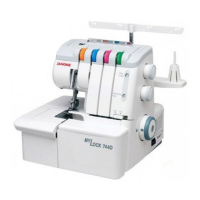
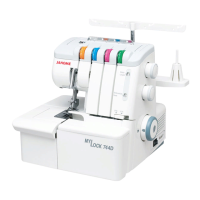
Identification and labeling of the various components of the sewing machine.
Step-by-step instructions for safely connecting the sewing machine to electrical power.
Guidance on how to adjust and control the sewing speed using the foot controller.
Instructions for accessing the looper mechanism by opening and closing its cover.
Instructions for using the needle holder tool for easier needle insertion.
Procedure for adjusting the presser foot height for different sewing operations.
Guidance on adjusting the pressure exerted by the presser foot on the fabric.
How to select and adjust the stitch length for various sewing needs.
Instructions for adjusting the differential feed ratio to manage fabric stretching or gathering.
Procedure for disabling the upper knife for specific sewing techniques.
Procedure for enabling the upper knife for cutting fabric during sewing.
Adjusting the needle plate knob for standard serging or rolled hemming.
Instructions for attaching the spreader component for two-thread serging.
Instructions for safely removing the spreader component from the machine.
Procedure for re-threading the machine when a thread breaks during operation.
Final steps for threading the lower looper, ensuring correct positioning.
Specific guide for threading only the upper looper mechanism.
Initial steps for starting a sewing test, including fabric placement.
Instructions for properly completing a sewing test and creating a thread chain.
Guidance on continuing sewing with new fabric after completing a test.
Explanation of how to use guide lines on the looper cover for sewing accuracy.
Methods to secure the beginning of a seam to prevent unravelling.
Shows correct stitch results with balanced thread tension settings.
Step-by-step guide for adjusting thread tension dials for optimal results.
Identifies and provides remedy for loose left needle thread tension.
Identifies and remedies unbalanced looper thread tension (tight upper, loose lower).
Identifies and remedies unbalanced looper thread tension (tight lower, loose upper).
Instructions for threading the machine with only the right needle for regular 3-thread serging.
Instructions for threading the machine with only the left needle for wide 3-thread serging.
Shows correct stitch results with balanced thread tension settings.
Guide for adjusting thread tension dials for proper 3-thread stitching.
Identifies and remedies loose needle thread tension for 3-thread sewing.
Addresses unbalanced looper tension issues in 3-thread sewing.
Addresses unbalanced looper tension issues in 3-thread sewing.
Instructions for threading with the right needle for regular 2-thread serging.
Instructions for threading with the left needle for wide 2-thread serging.
Shows correct stitch results with balanced thread tension for 2-thread sewing.
Guide for adjusting thread tension dials for proper 2-thread stitching.
Addresses unbalanced needle/looper tension in 2-thread sewing.
Provides steps to correct unbalanced needle/looper thread tension.
Key machine settings, thread, fabric, and tension dial ranges for decorative techniques.
Specific tension guidance for rolled hemming and picot edging techniques.
Illustrates correct stitch results with proper thread tension settings.
Steps for adjusting thread tension dials to achieve optimal sewing results.
Identifies and provides remedy for loose needle thread tension.
Identifies and provides remedy for loose upper looper thread tension.
Addresses issues of unbalanced looper thread tension.
Points to relevant sections for adjusting thread tension balance.
Points to relevant sections for adjusting thread tension balance.
Directs users to page 77 for narrow hemming tension adjustment guidance.
Instructions on how to perform pin tucking, including machine settings and fabric handling.
Detailed steps for removing and installing the upper knife on the sewing machine.
Instructions for cleaning the area around the upper knife, including debris removal.
Instructions for installing the attachment mounting plate for optional accessories.
Instructions for removing the attachment mounting plate.
Addresses problems with fabric not feeding smoothly.
Lists causes and solutions for broken needles.
Covers reasons and fixes for threads breaking.
Troubleshooting for stitches being skipped.
Addresses seams not sewn neatly or puckering.
Covers machine not operating or cutting issues.
Foot for blind stitching cuffs or skirts.
Foot for sewing tape for support or decoration.
Foot used for sewing decorative cording.
Attachment for decorating fabric with beads and cords.
Attachment for sewing sleeves, cuffs, and collars.
Attachment for elastic taping and decorative taping.
Helps create constant-width seams and for flatlock sewing.
Foot for piping edges for decoration or reinforcement.
Foot for sewing sleeves, yokes, and frills.
| Type | Overlock |
|---|---|
| Number of Threads | 4 |
| Differential Feed | Yes |
| Adjustable Cutting Width | Yes |
| Adjustable Stitch Length | Yes |
| Speed | 1300 stitches per minute |
| Needles | 2 |
| Stitch Options | Rolled hem |
| Stitch Types | Overlock, Rolled Hem, Flatlock |
| Stitch Length | 1.0 to 4.0 mm |
| Threading | Color-coded threading path |
| Presser Foot | Standard |