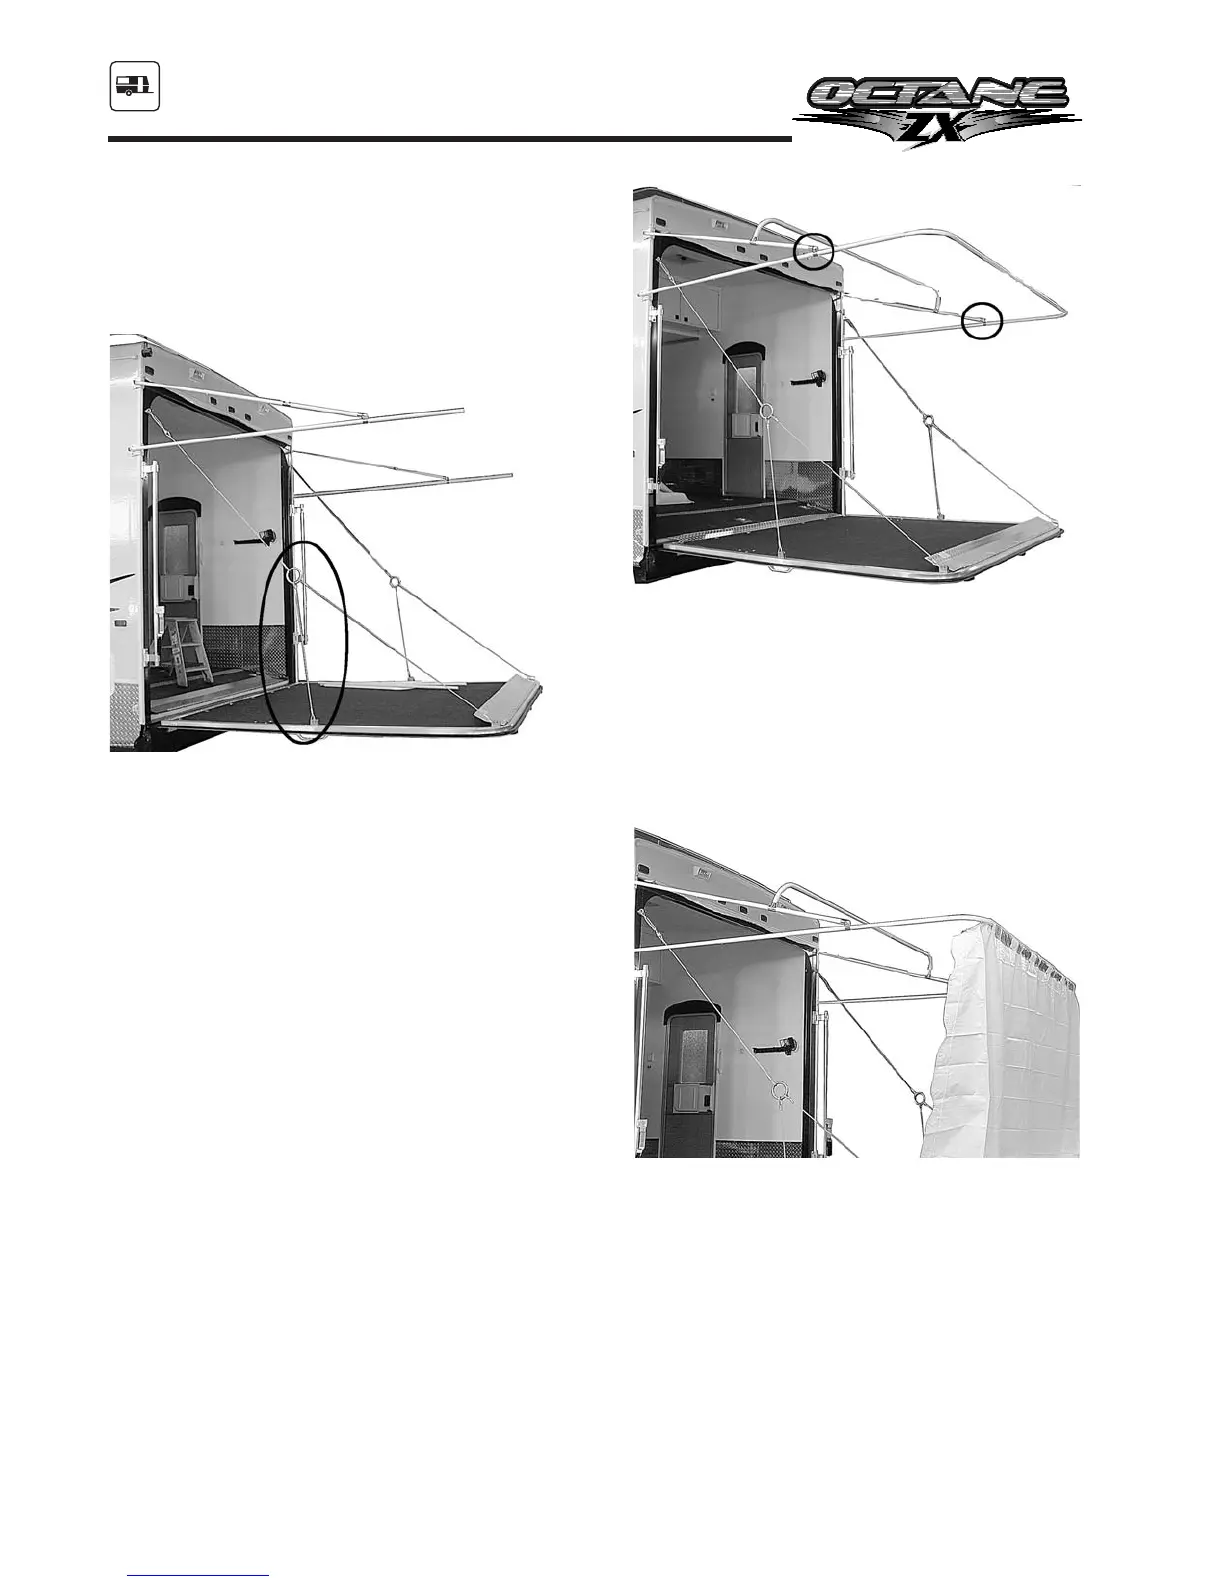
door from flexing and being put under
stress.
There are two holes on the cable fastener
located on the ramp door. This allows you
to make minor height adjustments.
The ramp door flexes noticeably and has
additional stress when the OEM support
cables are used. Damage caused by using the
OEM support cables is not covered under the
terms of the Towable Limited Warranty.
3. Unfasten and raise the awning side arms
parallel to the ramp door. The awning side
arms must be high enough to allow the
valco buttons to snap into place.
Add the awning
There are 4 curved tubes and 2 straight tubes
that complete the support arms for the awning.
4. Install the 2 small curved tubes into the
straight bar; insert this crowning bar into
the top “T” connectors which are
designated by the circles in the image, on
the awning side arms.
5. Insert a straight tube through the sleeve on
the front edge of the awning. Then connect
the 2 curved tubes to each end of the
straight tube. Then connect all 3 pieces
(referred to as the 3 piece crowning bar)
plus awning fabric to the side arms.
6. Unzip the zipper insert from the awning
and slide it through the awning rail located
above the ramp door, the zipper teeth
should be facing downwards. Then pull the
awning up over the awning poles and zip
the awning to the zipper insert.
You may need to center and adjust the awning
once it is attached to the insert.
78
SECTION 10
CAMPING & OPERATING
Fig. 10.16
Fig. 10.17
Fig. 10.18
 Loading...