103
1. Turn o the water heater gas valve typically
located outside the RV. Water heater power
should be OFF (turn o both ELECTRIC and
GAS switches).
2. Level the RV and drain the fresh water
plumbing system. (See Draining the Fresh
Water System).
3. Water heater bypass should be set to
. This allows air to ow through the
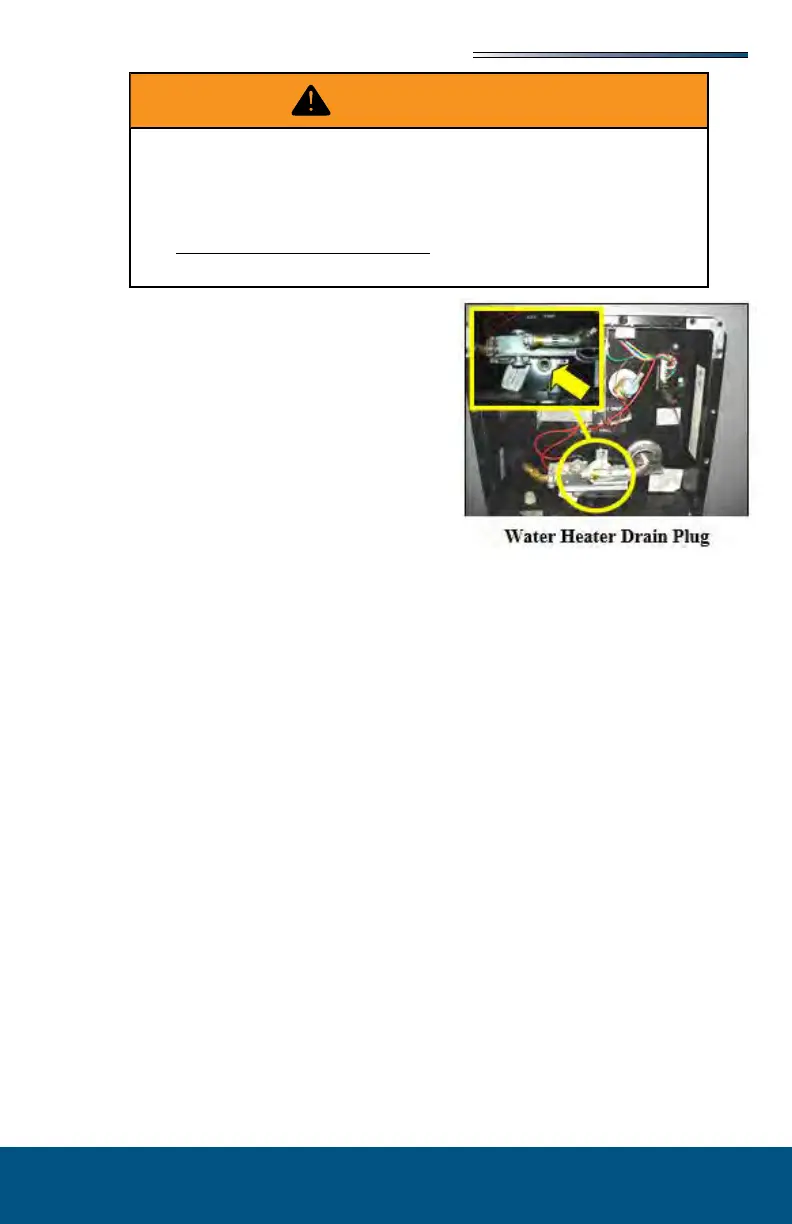
water heater. Remove the water heater drain
plug. D
4. RV water lter should be removed for winterizing (Refer to Water Purication System
section). Your RV may have a cartridge type water lter. Remove the cartridge lter
(if so equipped), and replace it with a bypass hose supplied with your RV. Antifreeze
should be kept out of the water lter.
5. Run the pump until it is dry (approximately 15 to 20 seconds). Operating the pump
longer than that with no water can damage the pump.
6. Open all faucets in the RV. If there is an outside shower, attach the shower hose to the
shower, and open the shower faucets.
7. Attach a blowout plug to the city water inlet on the outside of the RV.
8. Attach the air hose to the blowout plug. Set compressor to 30 PSI.
9. Fresh water tank drain should be open.
10. Blow air into the water lines through the blowout plug and the City Water Inlet to
evacuate all water from the lines.
11. Air should only be blown into the water tank for 30 to 60 seconds to avoid pressurizing
the tank, and then turn the water tank shuto valve OFF. Continue blowing out the
water lines, which can take 5 to 10 minutes.
12. Pour one cup of RV antifreeze in all the drain P-traps (sinks and bathtub).
13. After RV water lines have been blown out, remove the air hose and the blowout plug
from the City Water Inlet.
Never apply air pressure to the water system with any of the valves in
the closed position. Air pressure applied to a closed valve, faucet or low
point drain could potentially damage the seals and cause water leaks. If
you have questions, consult with your RV dealer. Using RV antifreeze is
the preferred method of winterization.
.