90
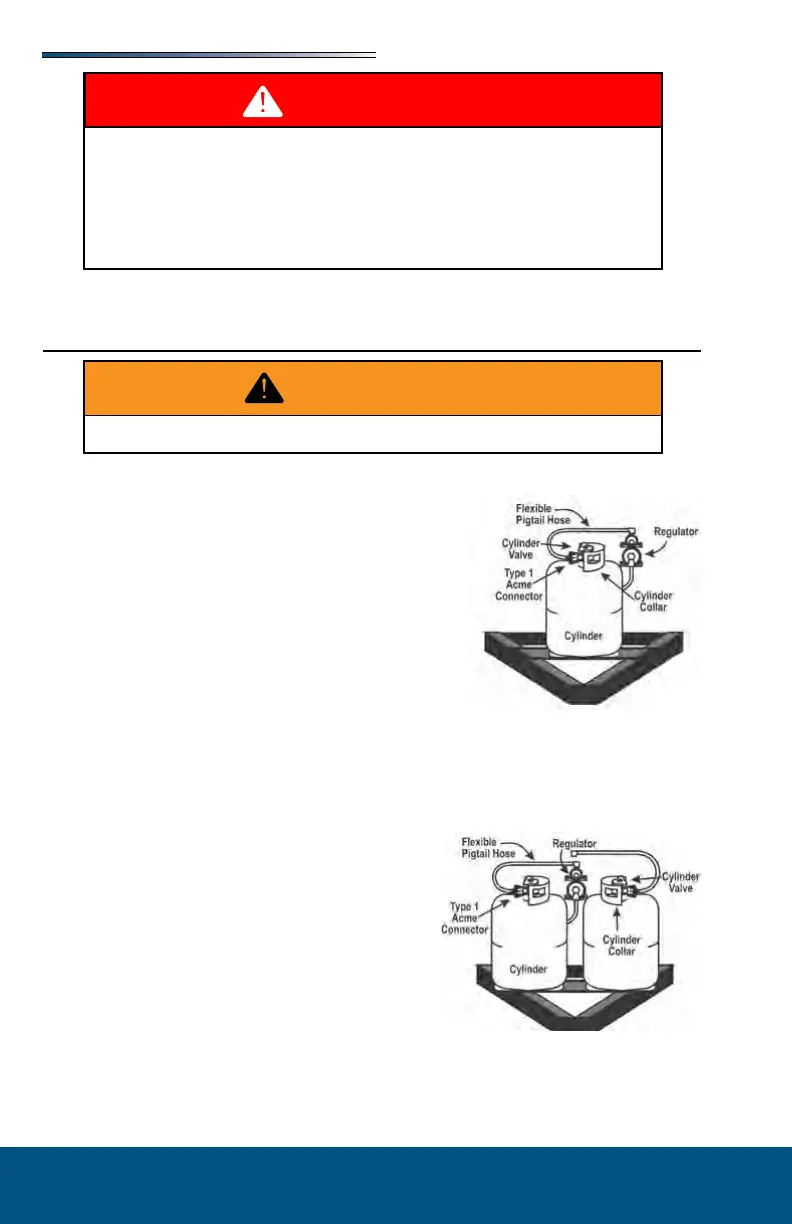
Installing Propane Cylinder(s)
1. Connect the 3/8” low pressure hose to the outlet of
the two stage regulator.
2. Attach the regulator with the “Z” bracket on the cen-
ter of the front wall with the vent pointing down.
3. Attach the protective plastic cover to the regulator.
4. The regulator has a 90° elbow that directs the inlet
toward the trailer curbside.
5. Place the cylinder on the bracket provided on the
A-frame and position it so the outlet of the cylinder
valve is pointed directly outward to the curbside wall.
6. Attach the 1/4” inverted are x 24” Type 1 pigtail
hose to the regulator inlet and the right hand swivel
nut to the cylinder valve.
7. Secure the cylinder to the A-frame bracket using the bolts, nuts and washers provided.
When a second cylinder is installed, a tee check valve
is used to replace the 90° elbow at the top of the regu-
lator and another 1/4” inverted are x 24” Type 1 pig-
tail is added. The regulator stays in the original posi-
tion.Place the second cylinder on the A-frame bracket
so the cylinder valve is pointed to the roadside of the
recreation vehicle.
1. Secure the second cylinder to the A-frame using
the bolts, nuts and washers provided.
2. Attach the second 24” hose to the tee check valve
on the regulator and the right handed swivel nut
to the cylinder valve.
1. Connect the 3/8” low-pressure hose to the outlet of the two-stage regulator.
Use care when fueling your motor fuel tanks and/or propane containers. Make certain your
propane tank is properly fastened in place.
All pilot lights, appliances and their igniters (see operating instructions) should
be turned o before refueling of motor fuel tanks and/or propane containers.
Make sure all fasteners are secured before traveling.