removable parts) when hitching the trailer. If
the RV becomes detached from the tow
vehicle, the pull pin will be pulled from the
switch. This automatically causes the switch to
“close” and activates the RV brakes.
An auxiliary battery (customer supplied)
must be installed to activate the breakaway
switch.
For more information
Refer to the OEM operator’s manual in the
Goodie Bag. Consult with your RV dealer if you
have further questions.
SAFETY CHAINS (TRAVEL TRAILER)
Safety chain requirements vary from state to
state. Your RV is equipped with chains to meet
SAE standard requirements for maximum
gross trailer weight. Always have the safety
chains attached when towing. Install them as
shown below so they do not restrict sharp
turns, but tight enough so they do not drag on
the ground.
Crisscross the left safety chain under the
coupler and attach to the right mounting slot in
the trailer hitch; repeat with the right safety
chain. Slack for each length should be the
same but not more than necessary to permit
the vehicle to turn at its minimum radius.
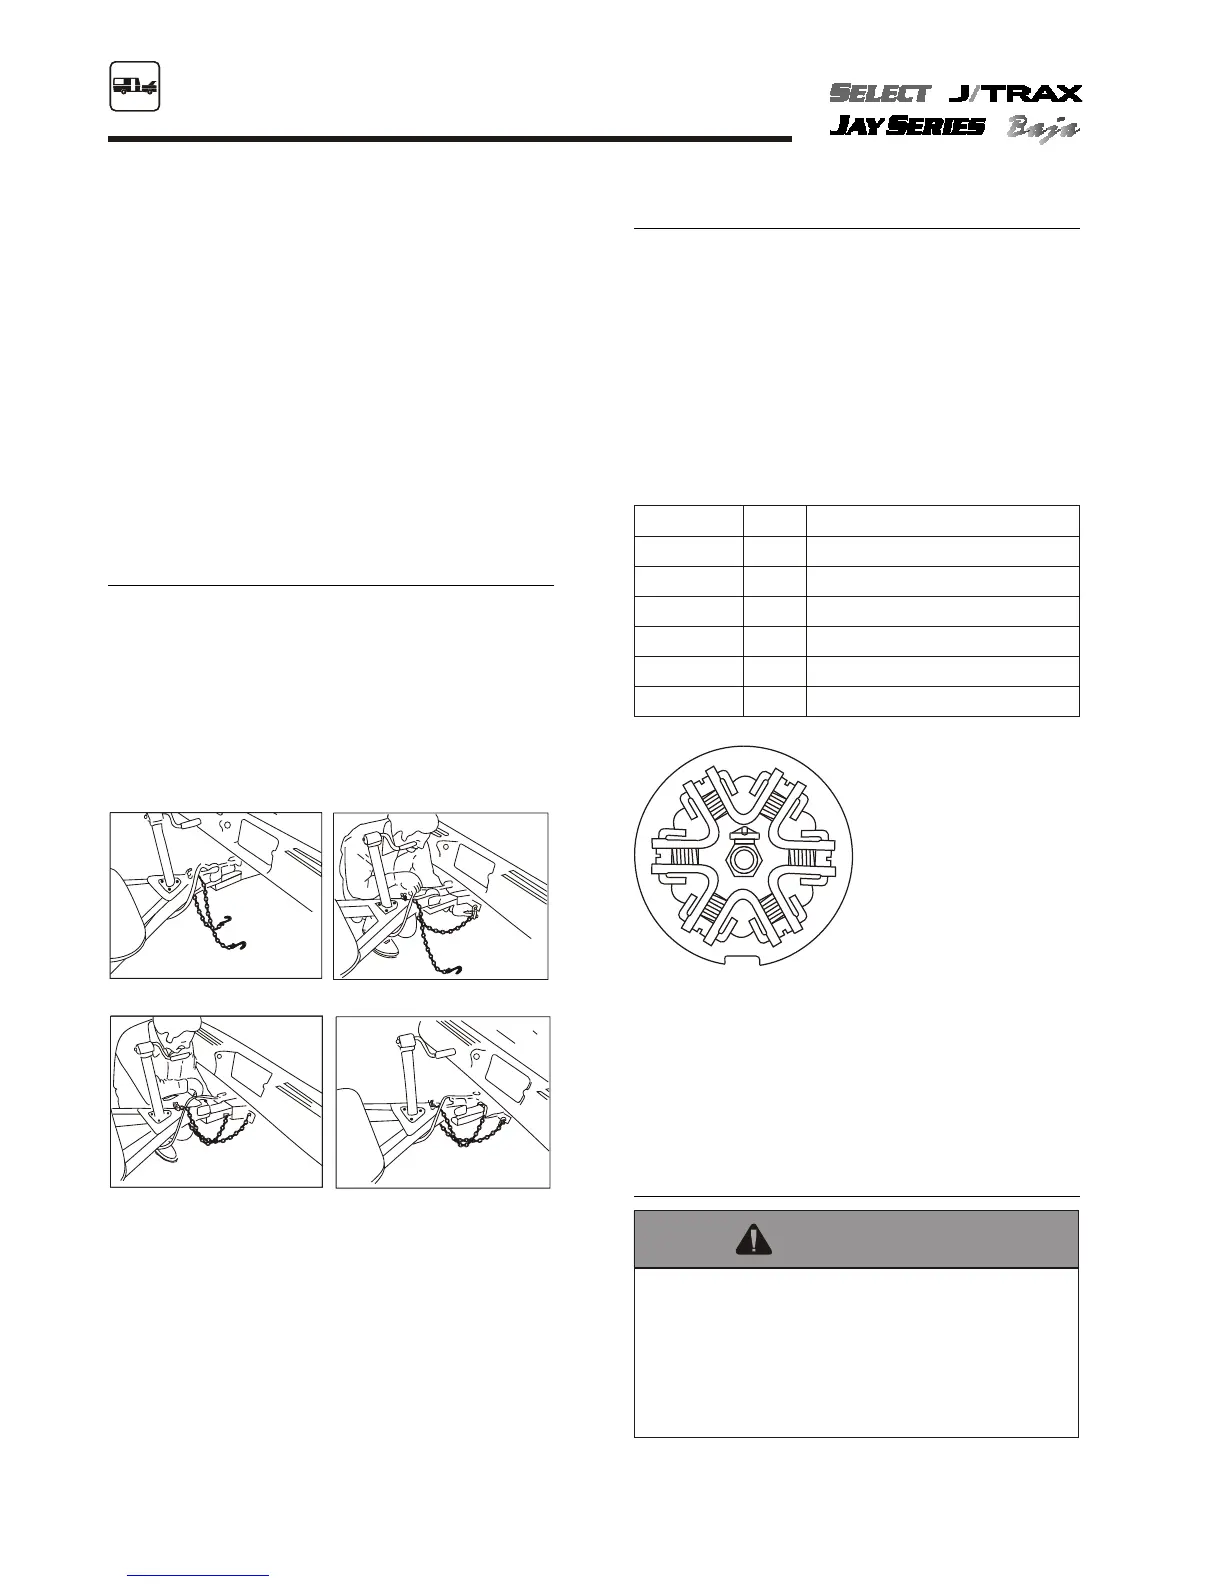
WIRE HARNESS/CONNECTOR PLUG
A 7-way wire harness/connector plug is wired
into your trailer to connect electrical power
from the tow vehicle for travel. This supplies
power to the RV brakes, tail lights, clearance
lights, turn signals, brake lights, etc. Wiring to
operate your brakes must be the same size in
both the tow vehicle and RV (the RV brake
wiring is 12-gauge wire). When attaching wires
to your tow vehicle, carefully and tightly tape
all the connections for moisture protection.
White 1 Ground
Blue 2 Brakes
Green 3 Running lights
Black 4 Auxiliary Battery charge line
Red 5 Stop & left turn
Brown 6 Stop & right turn
Yellow 7 Back up
The connector plug may build up corrosion
with extended use and should be cleaned
periodically to insure good electrical contact.
Make sure the connector plug is kept clean
and protected from road elements as you
travel.
STABILIZER JACKS
60
SECTION 7
TOWING & HANDLING
1. Inspect chains to determine if they are
properly attached to trailer frame.
2. Criss-cross left chain and attach to right
mounting slot in tow vehicle hitch.
3. Repeat step 2 with right chain. Slack
for each length should be the same but
not more than necessary to permit the
vehicle to turn at their minimum radius.
4. Properly mounted safety chains.
Note that the jack is fully raised
and dolly wheel removed.
Fig. 7.1 Safety chain installation
4 bl
a
ck
6
br
o
wn
3
g
re
en
5 red
7 yellow
1 whi
t
e
2
bl
u
e
Fig. 7.2
7-way trailer plug
Car end, rear view
DO NOT USE THE STABILIZER JACKS
TO LEVEL THE RV. It is important to
remember that the stabilizer jacks are to be
used only for support while occupying and
moving around the RV. They are not
designed to bear the weight of the RV.