OVERHEAD RIGGING
• Important: The installation must be carried out by qualified service personal only. Improper
installation can result in serious injuries and/or damage to property. Overhead rigging requires
extensive experience! Working load limits should be respected, certified installation materials
should be used, the installed device should be inspected regularly for safety.
• Make sure the area below the installation place is free from unwanted persons during rigging, de-rigging
and servicing.
• Locate the fixture in a well ventilated spot, far away from any
flammable materials and/or liquids. The fixture must be fixed at
least 50cm from surrounding walls.
• The device should be installed out of reach of people and outside
areas where persons may walk by or be seated.
• Before rigging make sure that the installation area can hold a
minimum point load of 10times the device’s weight.
• Always use a certified safety cable that can hold 12 times the
weight of the device when installing the unit. This secondary
safety attachment should be installed in a way that no part of the
installation can drop more than 20cm if the main attachment fails.
• The device should be well fixed; a free-swinging mounting is
dangerous and may not be considered!
• Don’t cover any ventilation openings as this may result in
overheating.
• The operator has to make sure that the safety-relating and
machine-technical installations are approved by an expert before
using them for the first time. The installations should be inspected
every year by a skilled person to be sure that safety is still
optimal.
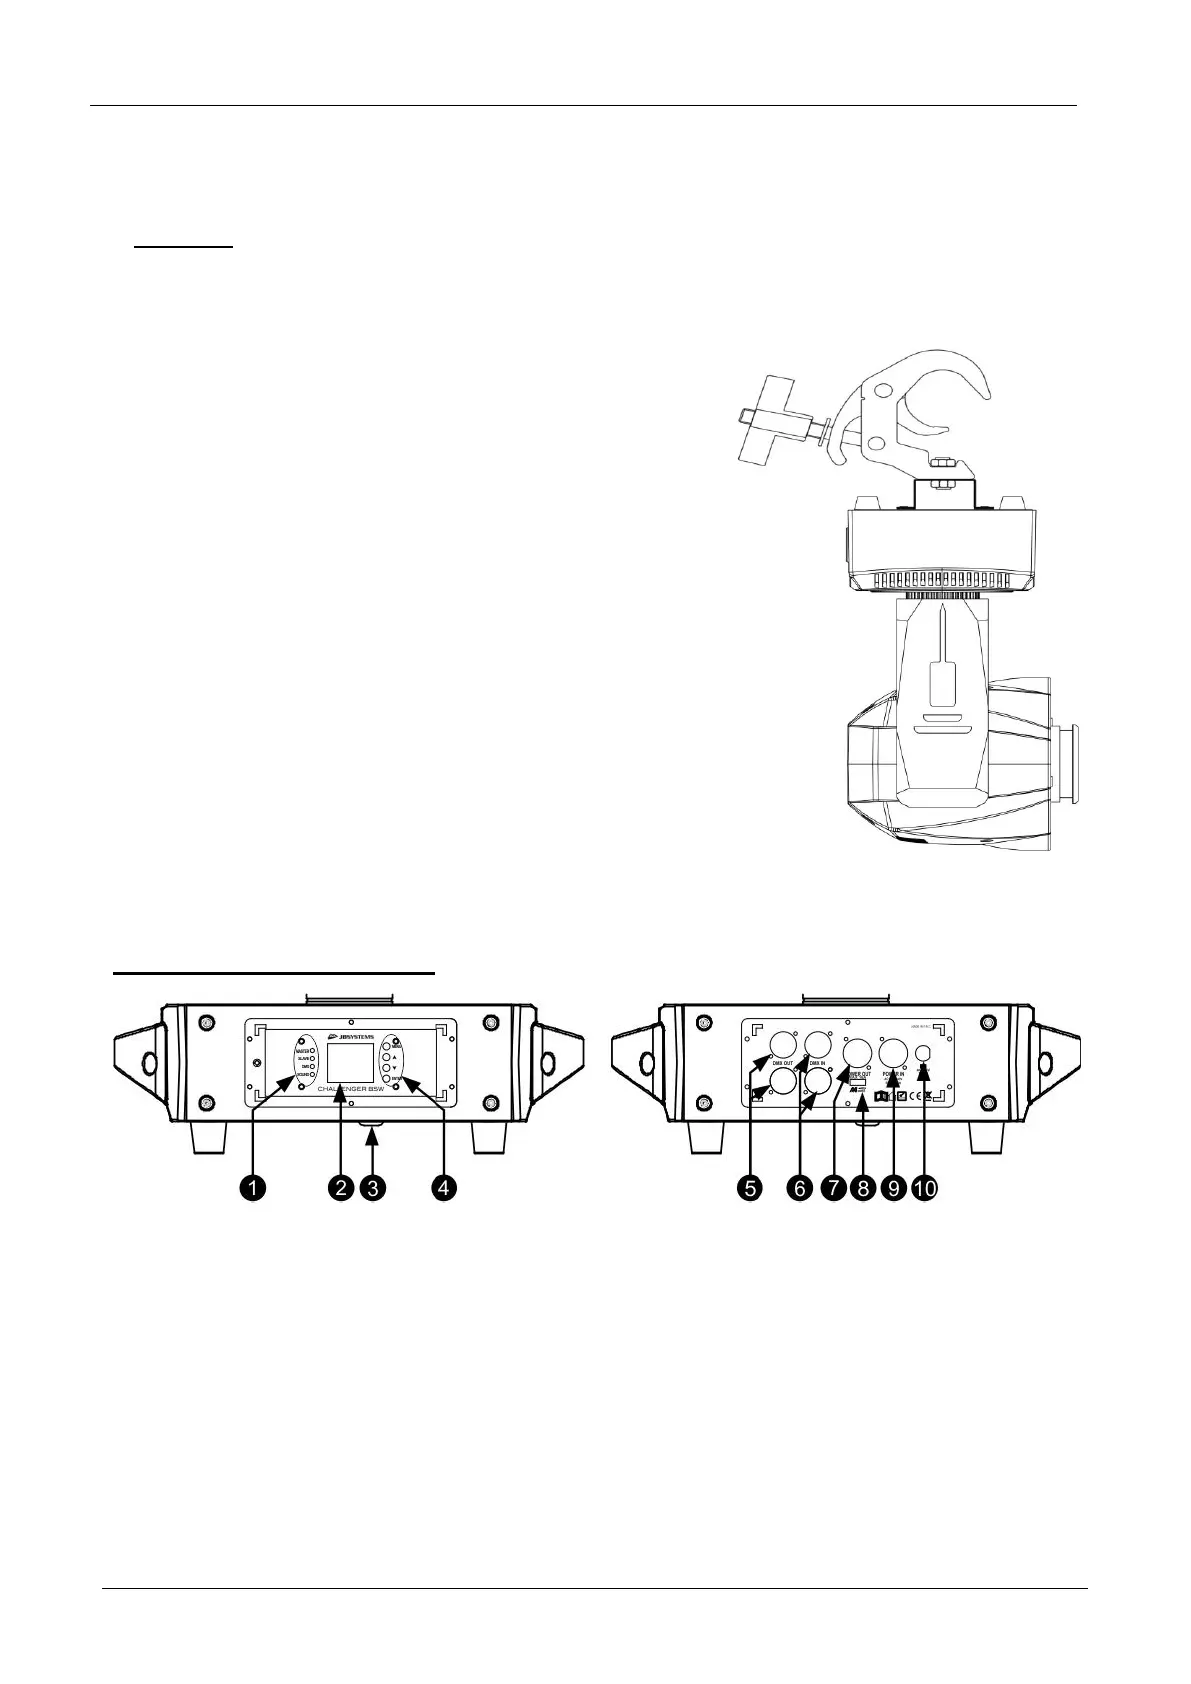
HOW TO SET UP THE UNIT
FRONT + BACK PANEL:
1. Indicator LEDs [MASTER-SLAVE-DMX-SOUND]
2. [DISPLAY]: shows the information on the different modes and functions.
3. Microphone for sound mode.
4. DISPLAY MODE BUTTONS:
• [▼] button : press this button to go down in the menu
• [▲] button : press this button to go up in the menu
• [ENTER]: press this button to confirm the selected function in the menu
• [MENU]: press this button to go back to the main menu or to leave submenus.
5. [DMX OUT]: 3p and 5p XLR Female connector to connect other projectors or use in Master/slave mode.
6. [DMX IN]: 3p and 5p XLR Male connector receive DMX data from a console or use in Master/slave
mode.
7. [POWER OUT]: used to daisy chain the power to several other fixtures. Always pay attention to the
maximum load while adding fixtures! Special combi cables (power + DMX XLR-cables) are available: see
our website!
 Loading...