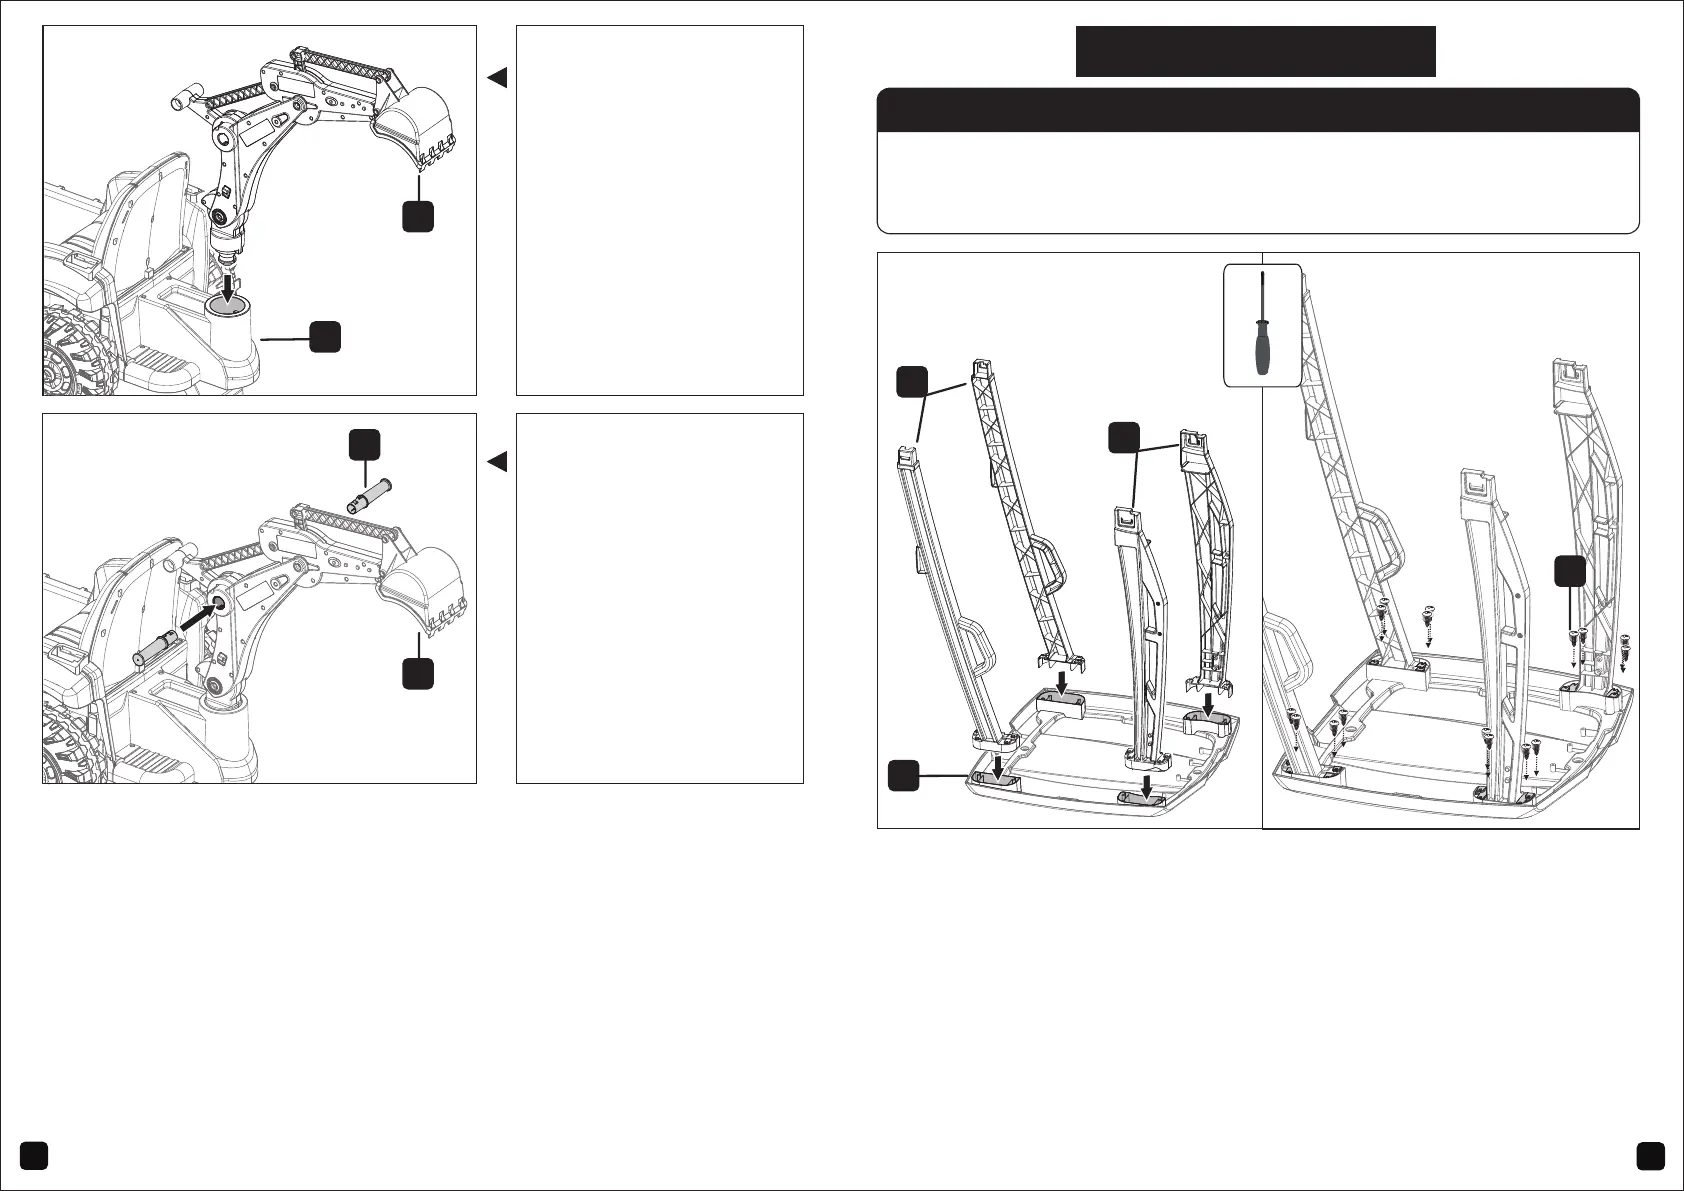
CONFIGURATION A
Put the Ceiling upside down on a soft cloth or smooth plane firstly
(Can't be directly placed on the surface of the cement, etc., which
will scratch the surface of the plastic)
Preparation work:
1. Insert the X(ceiling rear pillar), W(ceiling front pillar) into the Y(Ceiling)
holes on the front of the vehicle.Please pay attention to the installation
direction.
2. Install 16 P (4*12 self-tapping screws) on the ceiling as shown in figure.
Step 11-1: Assemble the Ceiling
Note: The "L1", "L2", "R1", "R2" of the pillars and the ceiling must be
corresponded one by one.
X
W
P
Y
1817
Q
R
Step 11: Assemble the
Digging arm handle bar
Install the R (Digging
a r m h a n d l e b a r ) t o
Q ( d i g g i n g a r m ) , a s
shown in the figure.
Step 10: Assemble the
digging arm
I n s t a l l t h e Q ( d i g g i n g
arm) to O(digging arm
support) , as shown in
the figure.
O
Q