15 - Engine
45 - Oil Sump
00 - General
15 - 176 9823/0000-1 15 - 176
Installation
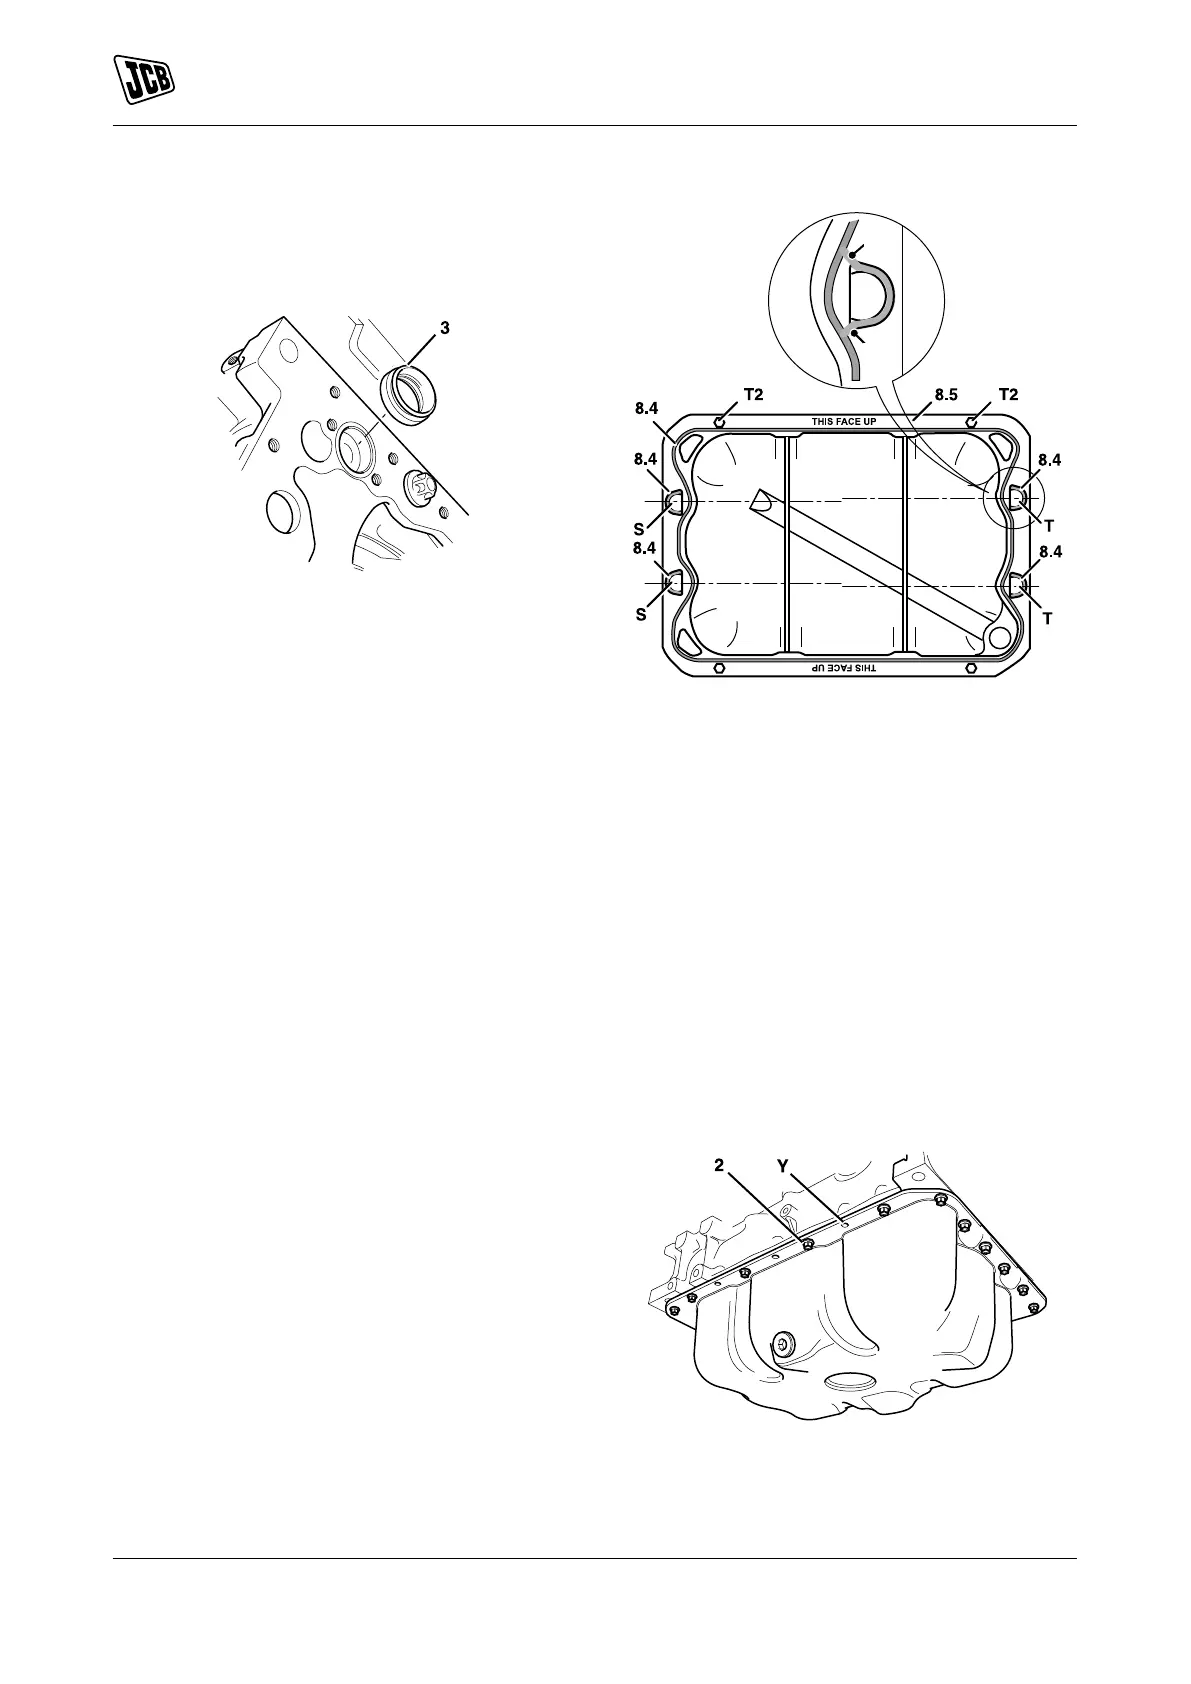
1. Lightly smear the new oil pick up seal with oil and
install into the bedplate as shown.
Figure 212.
3 Oil pick up seal
2. Install the two guide pins at the oil sump screw
holes in the engine.
Special Tool: Oil Sump Location Dowel (Qty.: 2)
3. Use the fixing bolts to locate the template to
the oil sump mating face. Make sure that the
template is the correct way round (note that holes
are on different centres).
Special Tool: Template for Sealant Oil Sump
(Cast) (Qty.: 1)
Special Tool: Template for Sealant Oil Sump -
Pressed (Qty.: 1)
4. Apply a bead of sealing compound around the
oil sump flange using the inside edge of the
template as a guide as shown. Note the beads
around holes.
Length/Dimension/Distance: 4mm
Consumable: Clear Silicone Sealant
5. Carefully remove the template without smudging
the sealant beads.
6. Apply a bead of sealant so as to join the sealant
beads around holes with the bead around the oil
sump flange.
Length/Dimension/Distance: 4mm
7. After applying the sealing compound, the oil
sump must be installed and the bolts torque
tightened within
Duration: 5min
Figure 213.
S Hole
T Hole
T2 Guide pins
X 4mm Bead of sealant
8. Position the oil sump with the suction tube outlet
aligned with the oil pump inlet port on the engine.
Take care not to damage the oil pick up seal when
you install the oil sump. Damage to the seal could
cause a drop in oil pressure and subsequently
damage to the engine.
9. Locate the oil sump on the guide pins on the
engine. Avoid smudging the sealant beads. DO
NOT remove the guide pins until sufficient bolts
have been installed to secure the oil sump.
10. Install the bolts and tighten the bolts to the correct
torque value. Note that the bolts are not installed
at 6 positions.
Figure 214.
2 Bolts
Y No bolts to be installed at this position (x6)