5
Preparation
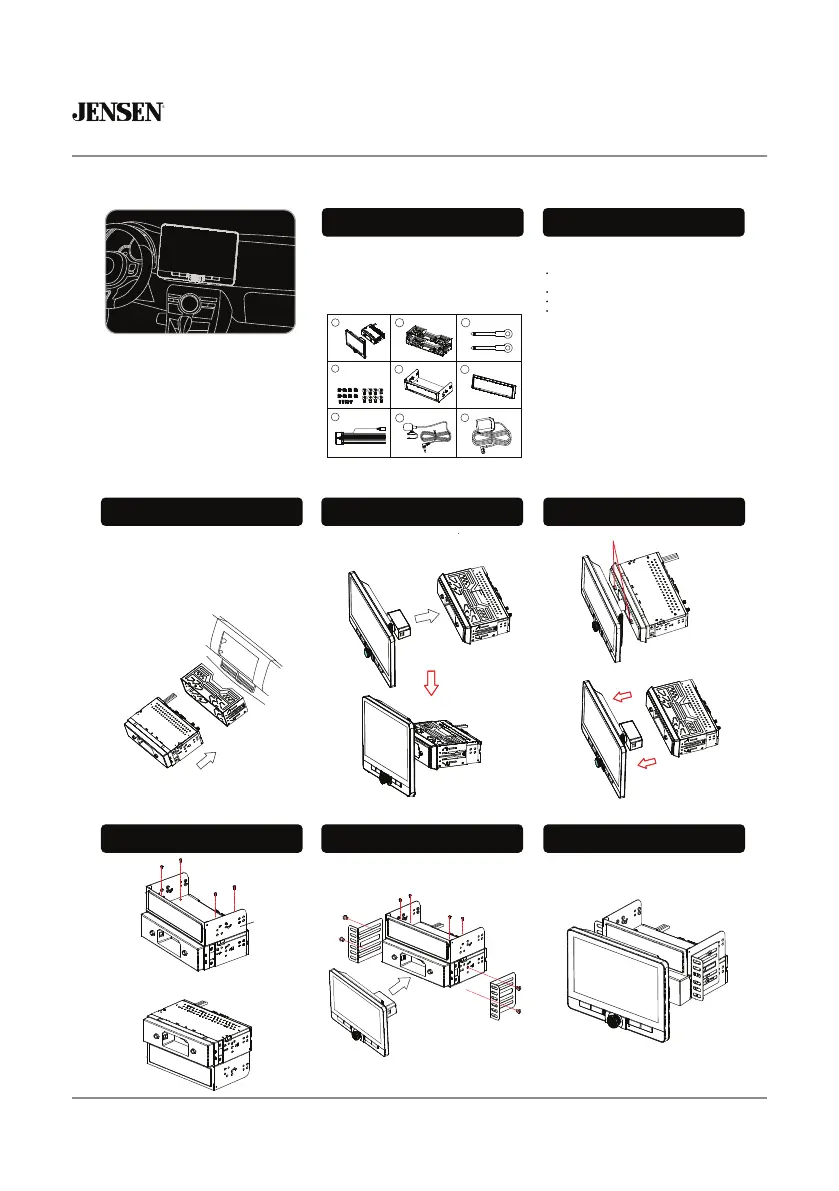
Installation Guide
Preparing for Installation
Installation
Package Contents Before You Begin
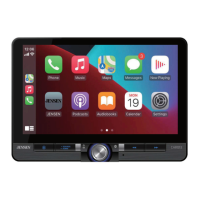
1.Main Unit
2.Mounting Sleeve for 1 DIN
3.Release Keys
4.Screw Kit
5.Chassis sleeve for 2 DIN install
Before You Begin6.Trim Ring
7.Wiring Harness
8.Microphone
1
2
3
Mounting Screw for 2DIN Bracket M2.5*4 5PCS
Flat Head Screw M5*6 8pcs
Round Head Screw M5*6 8pcs
4
5
6
7
9
8
Install Mounting Sleeve and Trim Ring
1) Install the mounting sleeve into a dash kit (sold separately) or dash
opening, bending the tabs to secure the mounting sleeve.
2) Connect the wiring harness, microphone and antenna to the chassis
of the radio.
3) Snap trim ring into place making sure the notched area is on the
bottom.
4) Slide the receiver into the mounting sleeve to secure.
To connect the LCD to the unit, carefully push the LCD
connector into the receiver's chassis until you hear a click
as shown below.
Connecting the LCD to the Chassis
Removing the LCD from the Chassis
Installing the 2-DIN Chassis Sleeve Install Mounting Side Brackets Installation Complete
Attach the 2-DIN chassis sleeve using (4) M2.5*4 screws
Mounting brackets shown below or optional
vehicle mounting kit are not included
2-DIN Chassis Sleeve
Install the 2-DIN mounting chassis sleeve to the top of the
chassis (shown above) or to the bottom of the chassis (shown below).
Step #1
Step #1
Step #2
Step #2
Step #3
Install the mounting brackets to the chassis of the
radio or to the 2-DIN chassis sleeve depending on
choice of mounting option as shown in Step #1 to the left.
9.GPS Antenna (for CarPlay
and Android Auto only)
• Consult a qualified technician for instructions.
We always recommend professional installation.
• Disconnect the negative battery terminal.
• Remove trim ring from unit (if installed).
• Insert the removal keys, and remove the mounting sleeve
from the receiver.
Note: Most vehicles require an installation kit, wiring
harness and/or antenna adapter (all sold separately)
to properly install the head unit in the vehicle.
2. Gently pull the display panel forward
1. Hold down the two release buttons
A
B
OR