13
5- Wait until indicator light “F” is OFF and on
the display appear “end” message (Fig.19).
Open the door and remove clean dishes
basket.
Fig.19
- If during this process door is opened, the
washing cycle is interrupted until door is
closed. To continue and finish washing
cycle you must close the door.
WARNING!
THE APPLIANCE WILL NOT REMOVE
BURNT FOOD DEPOSITS FROM DISHES.
DISHES WITH BURNT-ON FOOD DEPOSITS
SHOULD BE CLEANED
MECHANICALLY/CHEMICALLY (FOR
EXAMPLE, PRE-WASH UNDER RUNNING
WATER) BEFORE PUTTING THEM IN THE
DISHWASHER.
THE USE OF “FOAMING” DETERGENT
AND OR IN ANY DETERGENTS USED IN
DIFFERENT WAYS FROM THAT
PRESCRIBED BY THE MANUFACTURER OR
FAILURE TO REMOVE THE RESIDUE OF
DETERGENT POSSIBLY USED FOR
MANUAL 3B5 - AUTOMATIC WASH
CYCLE (only machines with hood)
3C3– AUTOMATIC CYCLE (only hoodtype
machines)
It is possible to carry out an automatic
washing cycle by simply closing the door of
the machine.
1- Press the "E" key to select the wash
cycle. (Fig. 20)
E
Fig.20
2- Close the door. The washing cycle will
start automatically.
- The first cycle must be started by
pressing the button of the washing
cycle. All other cycles will be automatic.
3D – DAILY CLEANNING / END OF
WORK
Cleaning and user maintenance must not be
performed by children without supervision.
In order to have excellent washing results and
a clean tank, it is recommended to change the
water of the machine at least twice a day and
clean all the filters inside the tank. Filters must
be removed only once all the water is drained
from the machine.
3D1 – WATER DRAIN WITHOUT DRAIN
PUMP INCLUDED
1- Turn OFF the machine by pressing button
“A” On/Off.
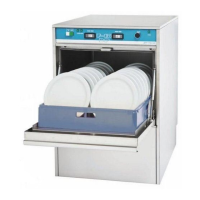
2- Open the door and remove the water flow
device and close the door. (Fig.21)
Fig.21
3D2 – WATER DRAIN WITH DRAIN PUMP
INCLUDED
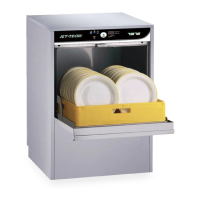
1- Open the door and remove the water flow
device and close the door. (Fig.22)
Fig.22
2- Press button “B” to start drain out the
water and wait until all the water is
completely drained out from the tank.
(Fig.23)
B
Fig.23
3- On the display will appear water drain
message during process. (Fig.24)
Fig.24
4- Turn OFF the machine by pressing button
“A” On/Off.