Installing the Seal
1. Before starting the installation, read the following instructions carefully.
2. Remove the seal from its packaging, inspect for any damage, and wipe
clean.
3. The equipment should be clean and meet the specifications noted in the
“Preparing the Equipment” section. Lubricate sleeve O-ring with lubri-
cant recommended in chart below. Lubricate shaft sparingly. Lubricate
gland plate bolts/nuts as required.
4. Make sure that gland adapter gasket is properly positioned, and
that collar set screws do not extend past sleeve ID. Slide complete
cartridge seal assembly onto shaft. For ANSI pumps position gland
plate so pipe connection #1 is at or near top dead center. For DIN
pumps, position gland plate so slot between pipe connections
#3 and #4 is at or near top dead center. Slide cartridge onto studs
(if applicable) until gasket is flush against the face of seal chamber.
Hand tighten gland plate bolts/nuts.
5. Reassemble pump and make all necessary impeller adjustments.
6. Continue tightening gland plate bolts/nuts in an alternating pattern
until gland plate is secure (1/4 turns, 180˚ apart). Do not over-
stress or distort gland plate.
7. Tighten collar set screws evenly (1/4 turns, 180˚ apart), securing
cartridge seal to shaft.
8. Remove spacers and save.
9. Make appropriate piping connections to seal assembly.
ELASTOMER LUBRICANT
Fluoroelastomer Vegetable Oil, Animal Oil, Mineral-Hydrocarbon Oils,
(i.e. Viton™) Soap Solution, Parker ‘Super-O-Lube’, Silicone Grease
Ethylene Propylene Vegetable Oil, Polywater™, Soap Solution, Glycerine,
Propylene Glycol, Silicone Grease
Perfluoroelastomer Vegetable Oil, Animal Oil, Mineral-Hydrocarbon Oils
(i.e. Kalrez™)
N
OTE: Always use a lubricant that is compatible with your machinery and product.
Use lubricant sparingly, only enough to install seal with ease.
Viton and Kalrez are registered trademarks of DuPont.
P
olywater is a registered trademark of American Polyware Co.
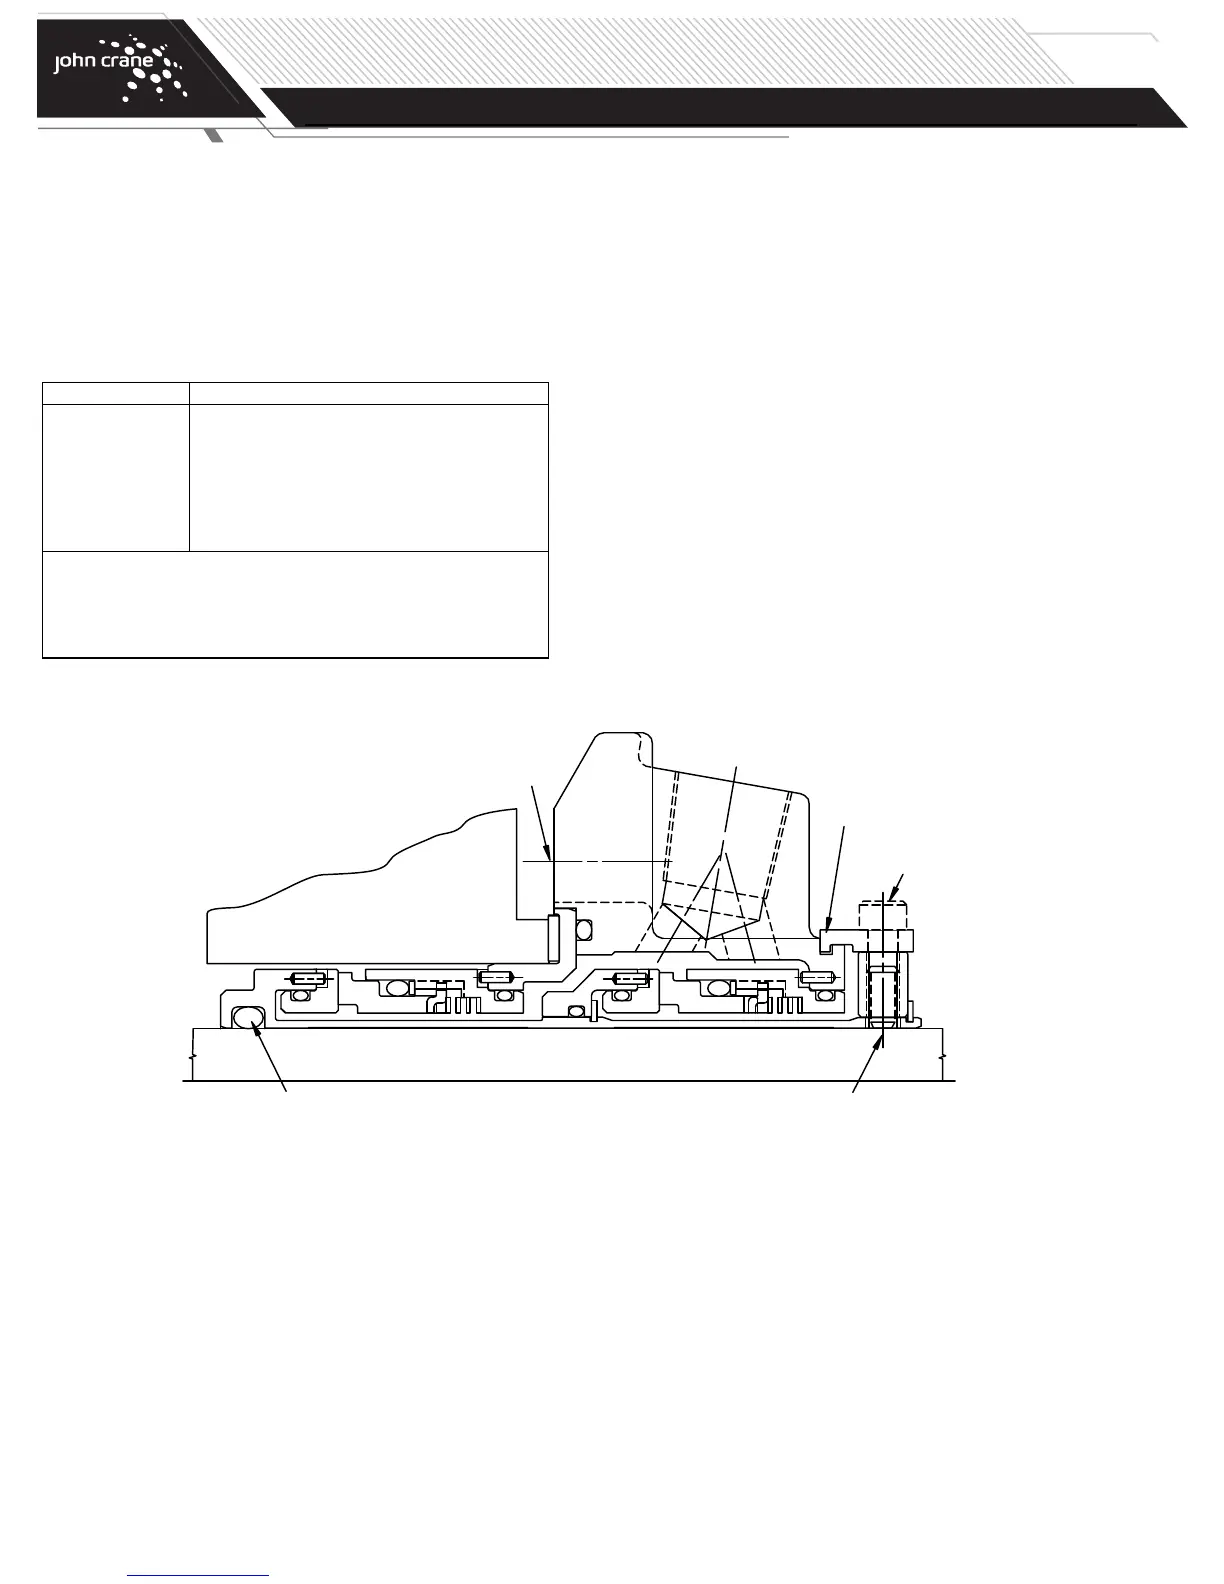
GLAND BOLTS
SPACERS
SET SCREWS
O-RING
CAP SCREWS
TYPE 5620/5620P
DUAL O-RING CARTRIDGE SEAL
Installation, Operation & Maintenance Instructions
PAGE
4