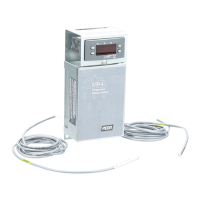
4 MR4PMUHV Electronic Temperature/Defrost Control with Relay Pack Product/Technical Bulletin
Mounting
The MR4PMUHV control is not position sensitive.
Mount the MR4PMUHV control as a single unit, or
separate the control module and relay pack and
mount them individually to allow convenient wiring
and adjustment.
Mounting the MR4PMUHV Control as a
Single Unit
Before mounting the relay pack, ensure that there is
sufficient space. Follow these steps to mount the
relay pack:
1. Hold the MR4PMUHV control against the
surface and use it as a template to trace the
mounting slots.
2. Drill holes for mounting screws in the holes
indicated.
3. Use three screws (No. 8 or No. 10 size) to
mount the MR4PMUHV control.
Mounting the Control Module and Relay
Pack Separately
Mount the relay pack and the control module within
18 in. (46 cm) of each other.
Removing the Control Module from the
Relay Pack
Follow the steps to separate the control module and
the relay pack. See Figures 6-7.
1. Locate the mounting clip that holds the control
module to the mounting bracket on the relay
pack.
2. Squeeze the forward portion of the mounting clip
together and slide the mounting clip back to
remove the mounting clip from the back of the
control module.
3. Pull the control module out of the mounting
bracket on the relay pack.
4. Disconnect the wiring from the control module
and the relay pack terminals V1, V2, O1, and
O2. See Figures 7-9.
Mounting the Relay Pack
Before mounting the relay pack, ensure that there is
sufficient space. Follow these steps to mount the
relay pack.
1. Hold the relay pack with mounting bracket
against the surface and use as a template to
trace the mounting slots.
2. Drill holes for mounting screws in the slots indicated.
3. Use three screws (No. 8 or No. 10 size) to mount the
relay pack.
Mounting the Control Module
Before mounting the control module, ensure that there is
sufficient free space [at least 2-3/4 inches (70 mm)]
behind the mounting surface. Follow these steps to
mount the control module.
1. Cut a hole 1-3/16 x 2-13/16 inches (29 x 71 mm).
2. Remove the retaining clip from the control module.
3. Insert the control module into the hole.
4. Install the retaining clip and slide forward to adjust
for tightness.
5. Reconnect the wires on the terminals in the relay
pack to the corresponding terminals on the control
module. See Figures 7-9.
Mounting
Clip
Control
Module
Mounting
Bracket
Relay
Pack
Figure 6: Removing the Mounting Clip and
Control Module
Figure 7: Relay Pack Terminal Positions on Circuit
Board
 Loading...