OWNER'S MANUAL
M K
M K
4
5
ROWER
ASSEMBLY INSTRUCTION
Step A.
Take the leg and insert into
one of the ends.
Step B.
Gently push the leg through
the opening until the holes
on top match the pre-drilled
holes in the leg insert (a
rubber mallet may be needed).
Step C.
Affix the legs with allen-head
screw.
Step D.
Place rubber end caps on both
ends of leg.
FRONT LEG AS SEMBLY (See Fig.1)
Fig.2
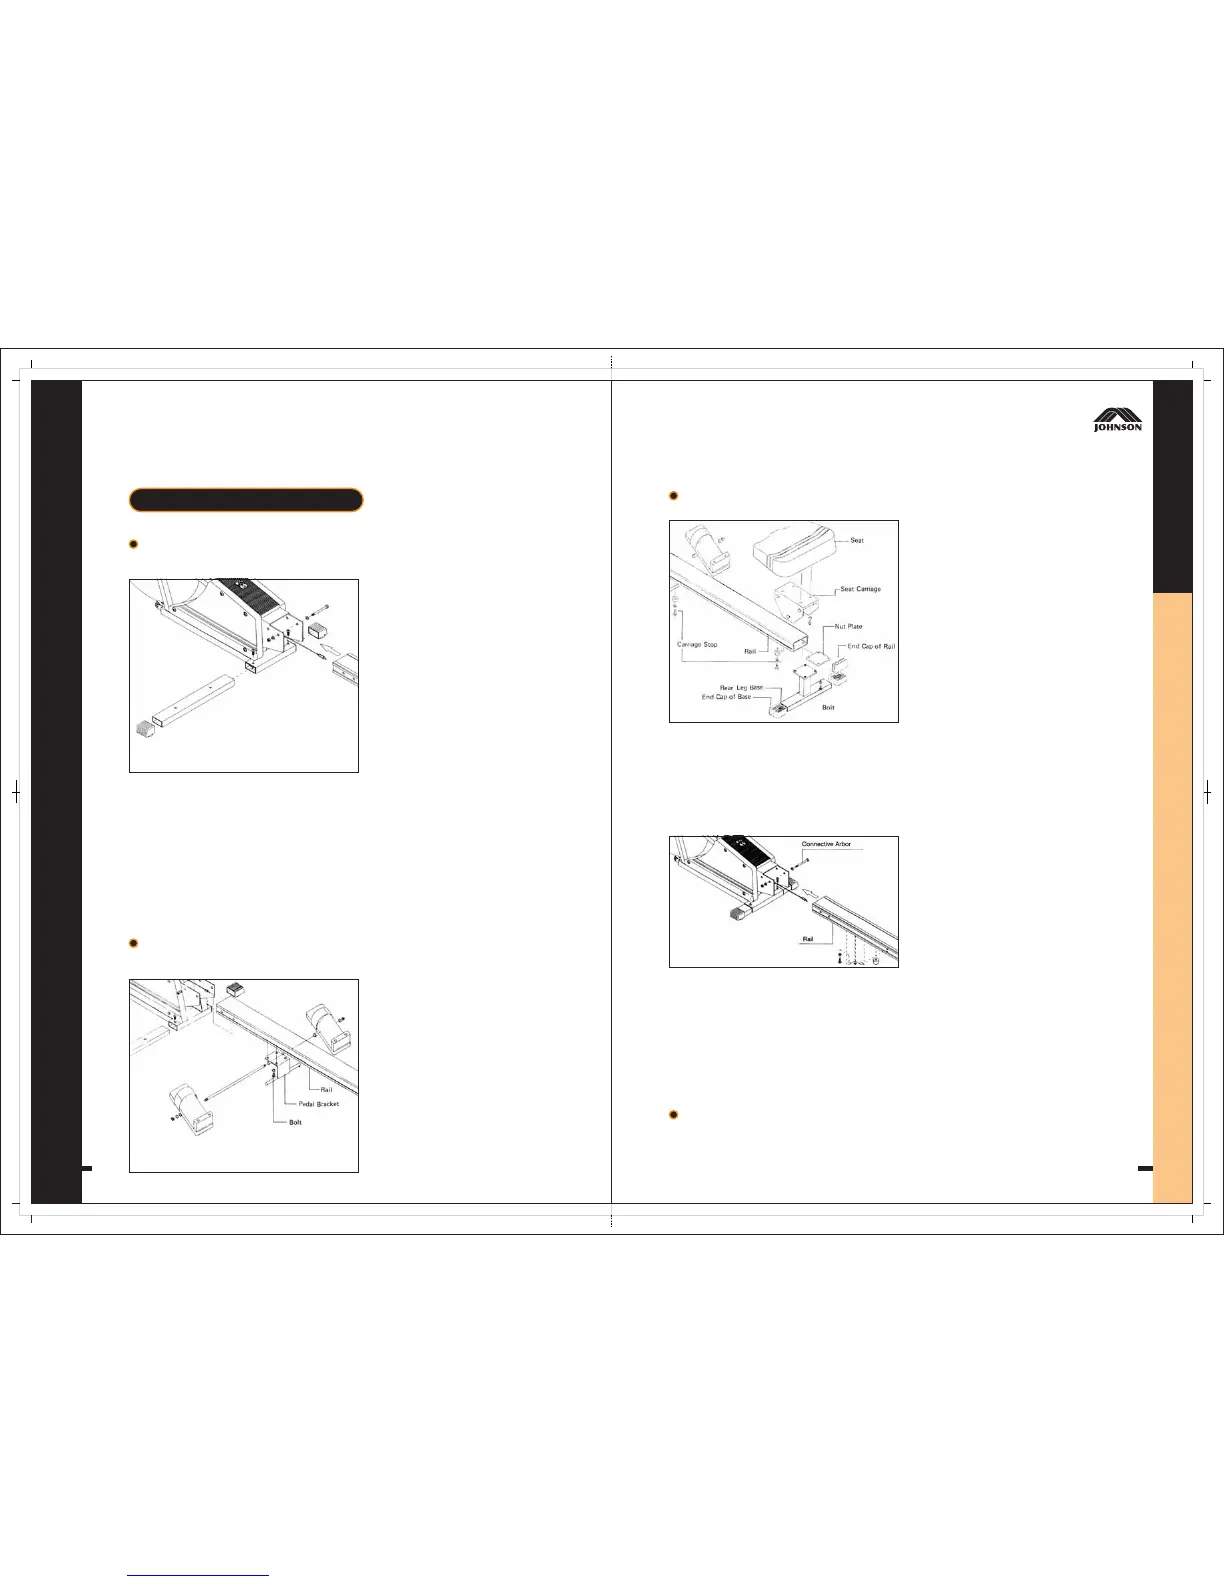
Step A.
Aim the four holes of pedal
bracket to the screw hole of
rail bottom side.
Step B.
Fix pedal bracket by using
washer and nylon nut.
FEDAL FIXED PLATE AS SEMBLY (See Fig.2)
Fig.1
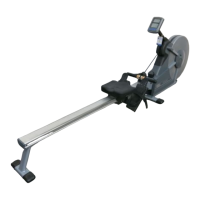
Step A.
Turn over the rail, fixed front
carriage stop using screw &
washers provided.
Step B.
Slide the seat onto the beam
rail, be sure the notch of seat
carriage is Backward.
Step C.
Fixed rear carriage stop.
Step D.
Place rubber caps on both
ends.
Step E.
Insert fix screw through the
hole of rear leg base and rail,
put on nut plate then fasten
fix screw to make rear leg be
steady.
Step F.
Insert the end cap onto Rail
rear part.
Step G.
Put beam front part onto the
main frame U type fixed plate,
aim all holes position and use
connective Arbor and washer
to fix. (See Fig. 4)
FEAR LEG AND RAIL ASSEMBLY (See Fig.3 Fig.4)
Fig.3
Connective Arbor must be fasten as much as you can as it is used for main
frame and beam connection and will support more outside strength.
NOTE
Fig.4