EasyManua.ls Logo

JONATHAN Y JYL8013A - User Manual

Default Icon
2 pages
Print Icon
To Next Page IconTo Next Page
Loading...
PIECE DESCRIPTION PICTURE
QUANTITY
PIECE DESCRIPTION PICTURE QUANTITY
A Lamp base 1X E Shade 3X
B Lamp Body 2X F Ring 3X
C "S" Metal 1X G Bulb 3X
D Socket 3X
Model# JYL8013A
Product Dimensions: 20"L X 11.75"W X70.5"H
* Please make sure that you have all parts indicated before you begin assembly of this item
* This item should be assembled on a soft surface to prevent scratching the finish during assembly
* To reduce the risk of fire, electrical shock or injury to persons or property, please follow the guideline below
for safe use and installation
*The external flexible cable or cord of this luminaire cannot be replaced;
If the cord is damaged, the luminaire shall be destroyed
**This portable lamp has a polarized plug (one blade is wider than the other) as a safety feature to reduce
the risk of electric shock. this plug will fit in a polarized outlet only one way. if the plug does not fit fully in
the outlet, reverse the plug, if it still does not fit, contact a qualified electrician. Never use with an
extension cord unless the plug can be fully inserted. do not attempt to defeat this safety feature.
Part List and Hardware List
WARNING
WE RECOMMEND INSTALLATION OF THIS LIGHTING FIXTURE BE DONE BY A LICENSED ELECTRICIAN.
WARNING *** SWITCH OFF THE MAIN ELECTRICAL SUPPLY FROM THE MAIN FUSE BOX/CIRCUIT
BREAKER BEFORE INSTALLATION.
INSPECT ITEM CAREFULLY BEFORE ATTEMPTING TO INSTALL. IF THERE IS ANY DAMAGE OR
OBVIOUS DEFECT, DO NOT INSTALL. ITEM MAY NOT BE RETURNED ONCE IT HAS BEEN INSTALLED.
CARE AND MAINTENANCE
Unplug lamps before using any cleaning solutions. Dust shades with a feather duster or with an appropriate
vacuum-brush attachment. Wipe with a soft, dry cloth and clean lamp bases with the methods appropriate to
the material. Avoid the use of chemicals and household cleaners as they may damage the finish.
NOTICE& IMPORTANT SAFETY INSTRUCTIONS
Question and Answer IconNeed help?

Do you have a question about the JONATHAN Y JYL8013A and is the answer not in the manual?

Summary

Important Warnings

Electrical Safety and Installation Warning

Switch off power before installation. Inspect for damage. Do not install if defective.

Professional Installation Recommendation

Installation by a licensed electrician is recommended for this lighting fixture.

Care and Maintenance

Cleaning Procedures

Unplug before cleaning. Dust with feather duster or vacuum brush. Wipe with dry cloth.

Material Care and Chemical Avoidance

Clean lamp bases appropriately. Avoid chemicals that may damage the finish.

Safety Instructions

Pre-Assembly and Surface Protection

Ensure all parts are present. Assemble on a soft surface to prevent scratching.

General Safety Guidelines

Follow guidelines to reduce risk of fire, electric shock, or injury.

Cord Replacement and Damage Policy

External flexible cord cannot be replaced; if damaged, the luminaire shall be destroyed.

Polarized Plug Safety Feature

Lamp has a polarized plug to reduce shock risk. Do not defeat this safety feature.

Part List and Hardware

Preparation and Assembly

Pre-Assembly Verification

Verify all parts against package contents and hardware lists before assembly.

Bulb Usage Specifications

Use specific bulb types and wattages (e.g., LED 4-watt) for safe operation.

Step 1: Part Alignment and Assembly

Align parts, screw metal, body, and base together carefully.

Step 2: Shade and Bulb Installation

Attach shade to socket, secure with ring, and insert bulb.

Step 3: Final Stability Check

Place the light on a level surface to ensure stability after assembly.

Overview

This document outlines the assembly, usage, and maintenance of a floor lamp, emphasizing safety and proper handling. It is crucial to ensure all parts are present and undamaged before beginning assembly. If any component is missing or defective, the item should not be installed and cannot be returned once installed. The estimated assembly time for this lamp is approximately 6 minutes, and it is recommended to perform the assembly on a soft surface to prevent scratching the finish.

Function Description

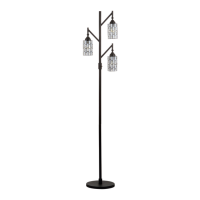
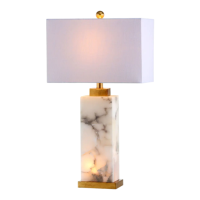
The device is a floor lamp designed to provide illumination in a room. It features multiple light sources, each with its own shade, supported by a central lamp body and a stable base. The lamp is designed for indoor use and operates with specific bulb types to ensure optimal performance and safety. It includes a polarized plug as a safety feature to reduce the risk of electric shock, meaning one blade of the plug is wider than the other and will only fit into a polarized outlet in one specific orientation. This design prevents incorrect electrical connections and enhances user safety.

Usage Features

Before installation, it is imperative to switch off the main electrical supply from the main fuse box or circuit breaker to prevent electrical hazards. The installation of this lighting fixture should ideally be performed by a licensed electrician to ensure compliance with electrical codes and safety standards.

The assembly process involves several steps:

  1. Connecting the Lamp Body Sections: Ensure all parts are aligned correctly before assembly. Begin by screwing the "S" metal component (C) onto the top lamp body section (B2). Then, connect the top lamp body section (B2) to the middle lamp body section (B1), and finally, connect the middle lamp body section (B1) to the lamp base (A). It is important not to rotate the lamp body too forcefully to avoid breaking the base screw. Throughout this process, be careful not to twist the power cord and ensure all connections are tightened securely.
  2. Attaching Shades and Inserting Bulbs: Once the lamp body is assembled, place each shade (E) onto its corresponding socket (D). Secure the shade by tightening the ring (F). After the shades are in place, insert the recommended bulbs (G) into each socket (D).
  3. Final Check: After completing the assembly, place the lamp on a level surface to check for stability. This ensures the lamp stands upright and is not prone to tipping over.

The lamp is designed to use specific bulb types: "G" bulbs with a maximum of 40 watts, CFL bulbs with a maximum of 13 watts, or LED bulbs with a maximum of 9 watts. The product typically includes three 4-watt LED bulbs in the box, providing an immediate lighting solution upon assembly.

Regarding the polarized plug, if it does not fit fully into the outlet, reverse the plug. If it still does not fit, contact a qualified electrician. It is crucial never to use an extension cord unless the plug can be fully inserted into it, and never attempt to defeat this safety feature by altering the plug or outlet. The external flexible cable or cord of this luminaire cannot be replaced. If the cord is damaged, the luminaire must be destroyed to prevent electrical hazards.

Maintenance Features

Proper care and maintenance are essential to prolong the life and maintain the appearance of the lamp. Before cleaning, always unplug the lamp from the electrical outlet to prevent electrical shock.

For cleaning the shades, use a feather duster or a vacuum cleaner with an appropriate brush attachment to remove dust. This method is gentle and effective for most shade materials.

For cleaning the lamp bases, wipe them with a soft, dry cloth. The cleaning method for the bases should be appropriate to the material of the base to avoid damage. It is crucial to avoid the use of harsh chemicals and household cleaners, as these can damage the finish of the lamp base and other components. Regular, gentle cleaning will help maintain the lamp's aesthetic appeal and ensure its longevity.

JONATHAN Y JYL8013A Specifications

General IconGeneral
BrandJONATHAN Y
ModelJYL8013A
CategoryOutdoor Light
ColorBlack
MaterialMetal
Number of Lights1
Specific UsesOutdoor
Shade MaterialGlass
Light DirectionDownlight
Power SourceHardwired
Type of BulbLED
Wattage9 W
Bulb TypeLED
Lumens800
Color Temperature3000K
IP RatingIP65
Voltage120 Volts
Fixture FeaturesDimmable

Related product manuals