(6)
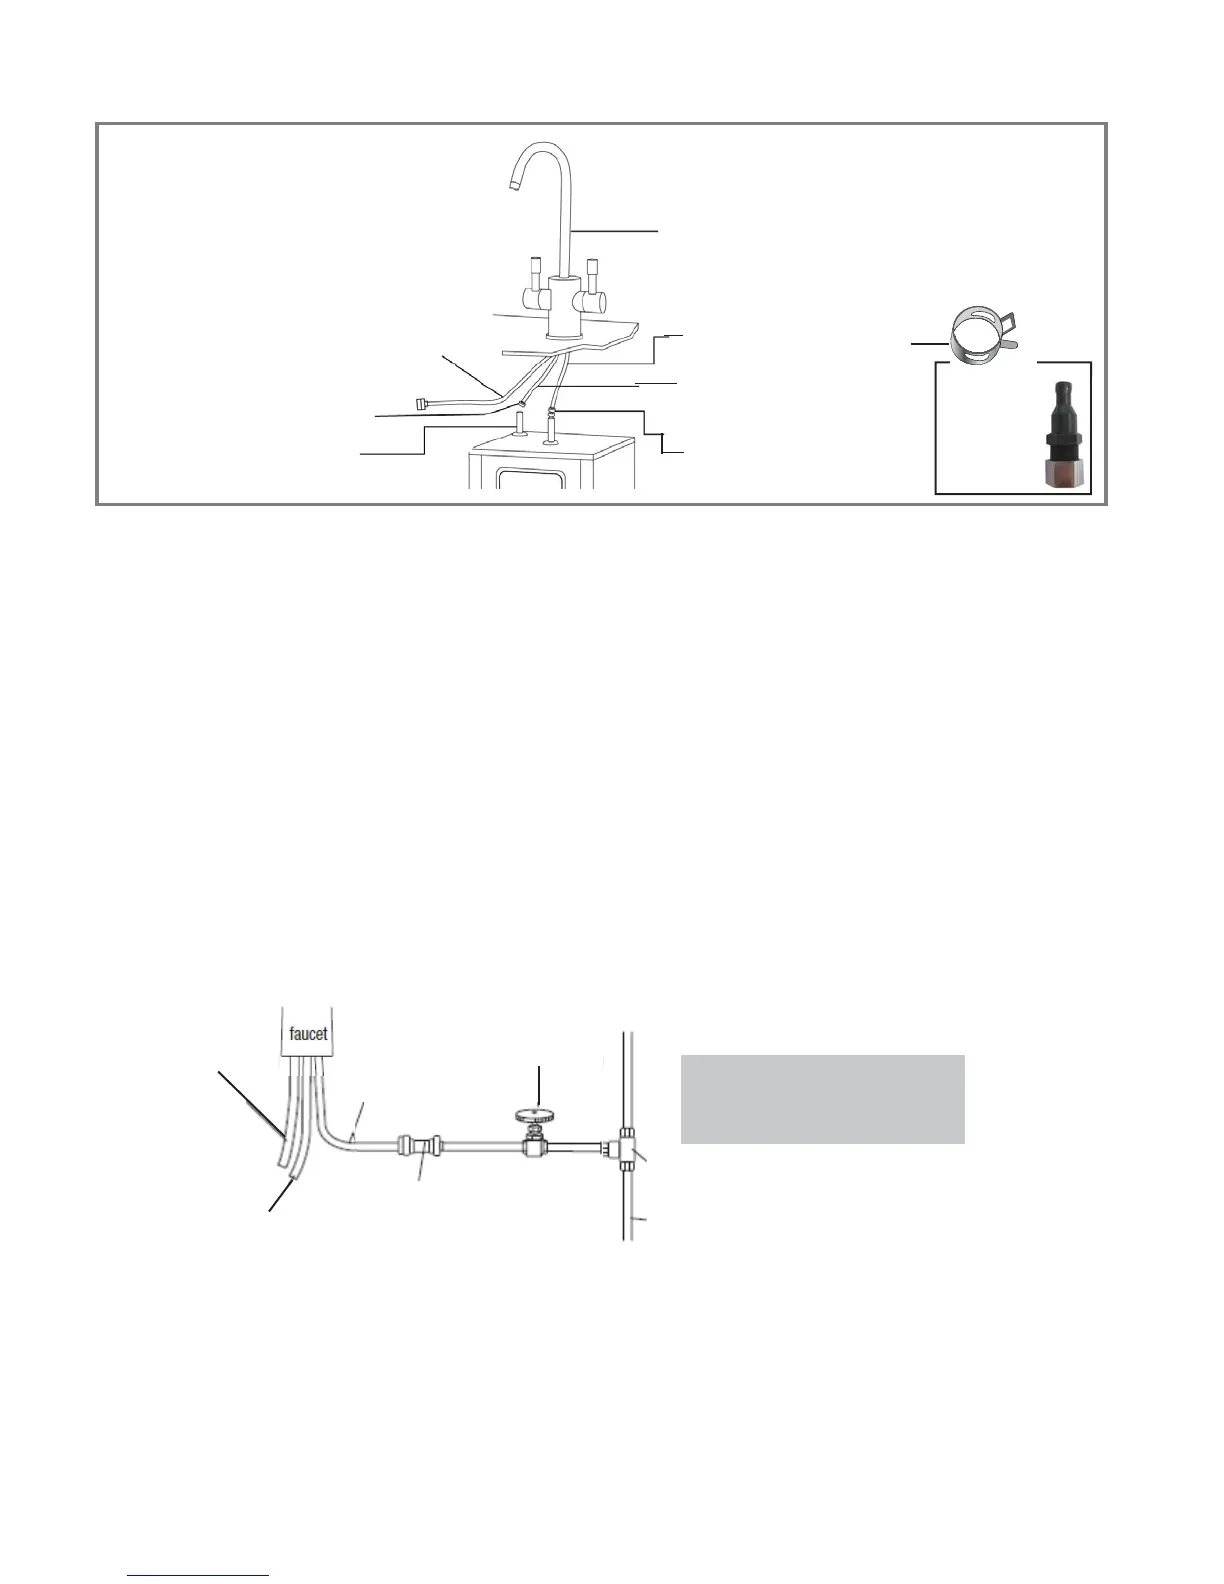
Center outlet
Connect faucet inlet line to the
rear tube at the top corner of the tank
with the quick-connect fitting
Faucet line connects to the cold
water supply with quick-connect
fitting
Connect silicone hose to the center
outlet tube on top of tank. Tighten
the connection with hose clamp
Quick connect fitting
NOTE:
For This Faucet
Do not use the
hose adapter if
one was supplied
with your hot
water tank.
d
Dual Handle Faucet (Single Handle Faucet not shown)
Faucet line connects to filtered cold
water supply for dual handle faucets
¼” (6.4mm) white tubing to supply inlet
Faucet Image Representational
STEP 4 - Connect Cold Water Supply
Refer to installation instructions included with faucet if necessary. Cold water is supplied to the tank through the
faucet. Connect the cold water line to the faucet using the 1.4”/35mm supply line and the quick-connect fi tting.
- Make sure the cold water connecting to the faucet is fi ltered.
- It is suggested that a shut-off valve be installed between this connection and the cold water supply line.
- Another common installation method is with the use of a saddle valve. If a saddle valve is used, follow the
manufacturer’s installation guides.
- Connection to a hot water supply is not recommended. If a water fi lter is used, water pressure to the
tank should not drop below 35psi (2.4 bar).
TYPICAL INSTALLATIONS
"T" connection with
Shut -off valve
T connector
Cold water supply
Quick-connect
fitting
Shut-off valve
Faucet line
to cold
water
supply
to tank
Silicon hose to
tank
Faucet line
STEP 5 - Check for Leaks
Open valve in water line. Turn faucet on to fi ll tank (about 1 minute). When tank is full, water will fl ow from
faucet. Turn faucet off. Check for leaks.
STEP 6 - Prepare for Power
Double check the thermostat control dial is in the OFF position. Thermostat control dial controls the water
temperature, not the water fl ow or delivery.