88
ENGLISH
6.3 Sweeping of fl ue pipes to the
chimney
On certain free-standing fi replaces the top plate can be lifted
off and the pipe swept through the top.
Otherwise, fl ue pipes must be swept through the fl ue pipe
sweeping hatch or through the product’s door opening. Then,
the baffl e must be removed.
6.4 Inspection of the fi replace
Jøtul recommends that you personally inspect your fi replace
carefully after sweeping/cleaning. Check all visible surfaces
for cracks. Also check that all joints are sealed and that the
gaskets are in the correct position. Any gaskets showing signs
of wear or deformation must be replaced.
Thoroughly clean the gasket grooves, apply ceramic glue
(available from your local Jøtul dealer), and press the gasket
well into place. The joint will dry quickly.
6.5 Exterior maintenance
Painted products may change colour after several years
usage. The surface should be cleaned and brushed free of
any loose particles before new paint is applied.
Important! Never place anything on the top plate of the
stove. This could cause permanent damage to the paint
or enamel.
7.0 Service
Any unauthorised modifi cations to the product are prohibited!
Only original spare parts may be used!
Use tools with great care.
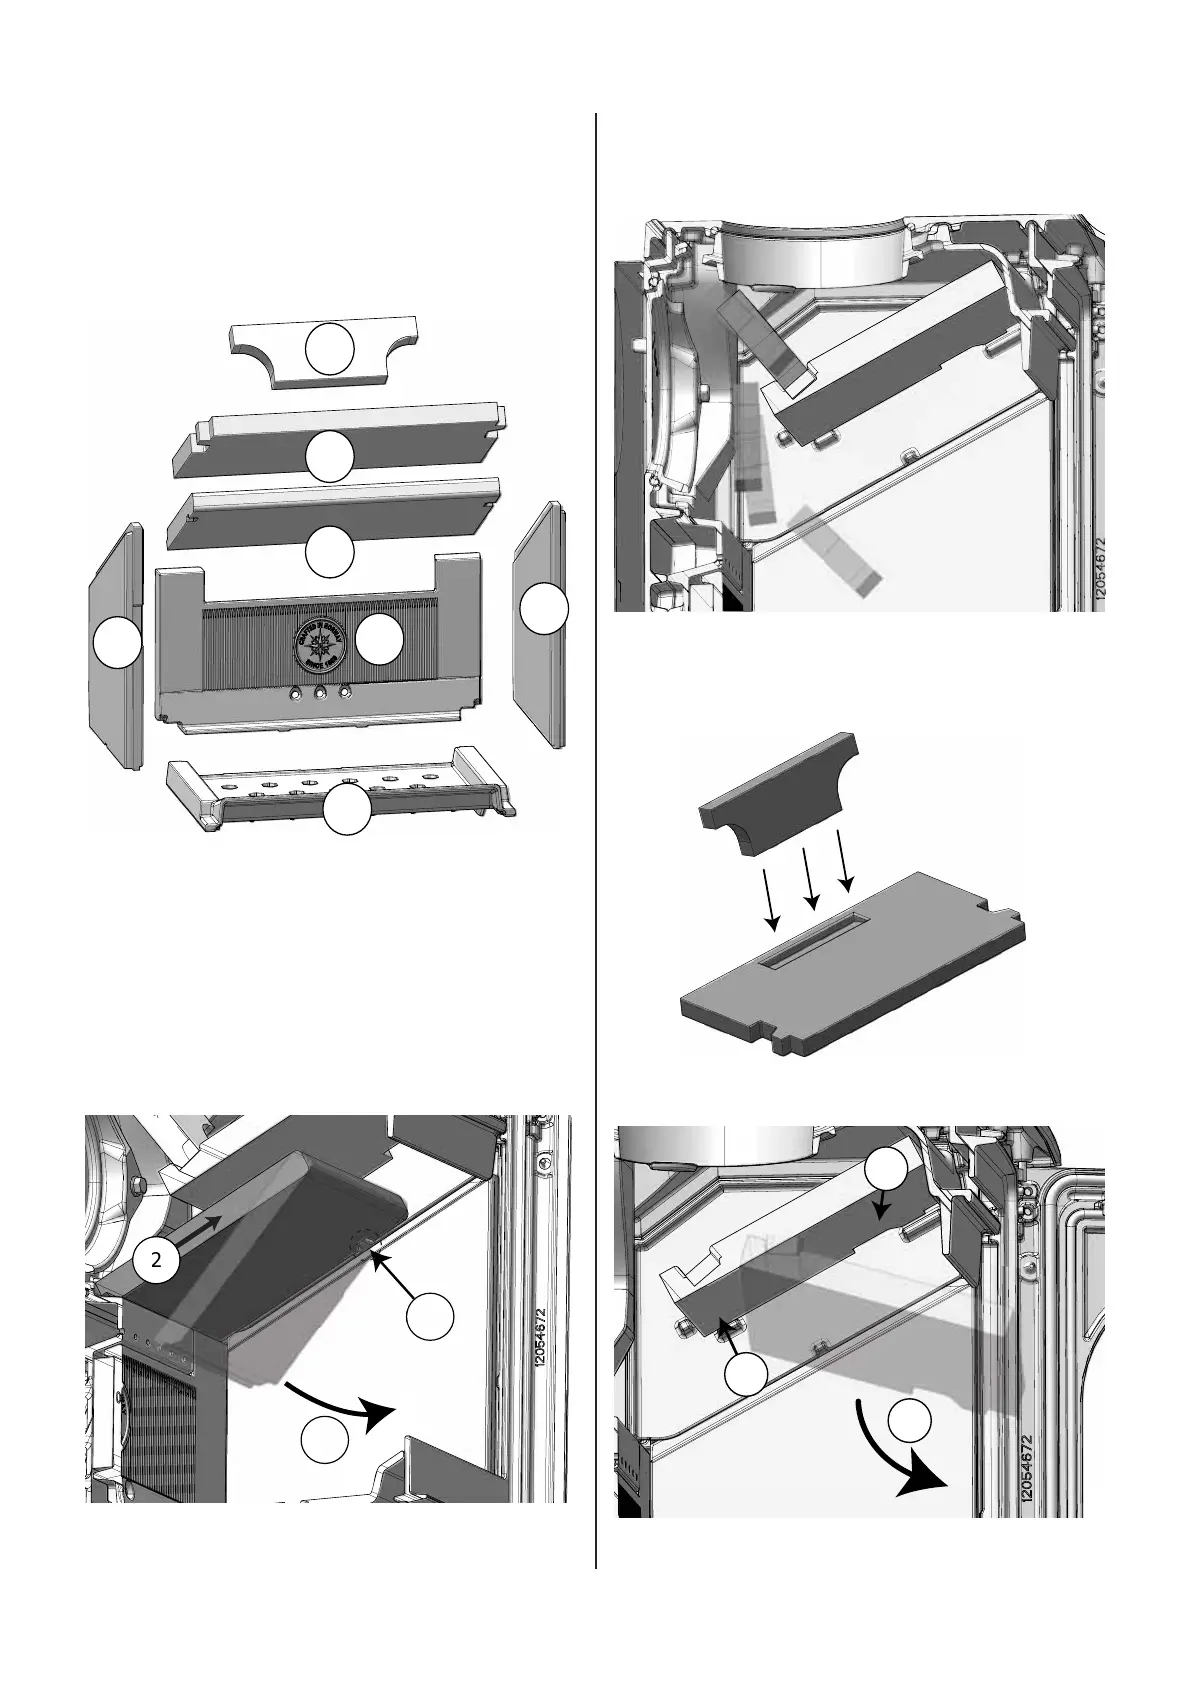
Fig. 15
1
2
3
5
5
4
6
1. Upper exhaust defl ector
2. Lower exhaust defl ector
3. Baffl e plate
4. Rear burn plates
5. Side burn plates (2 pieces)
6. Ash grate
7.1 Replacing the baffl e plate
Fig. 16
1
2
3
1. Lift up the front edge from the cam it rests on.
2. Push the baffl e plate forward so that it is released at the
rear edge.
3. The baffl e plate can now be edged out of the oven.
4. When refi tting, follow the same procedure in reverse order.