4
1.4. Installing the flue
The flue system used when installing the heater MUST comply
with the current installation standard AS/NZS 2918.
Full instructions on the installation of the flue will be supplied
with the flue kit. These MUST be followed closely, including
the minimum exit height from the top of the floor protector
being not less than 4.6m, and the minimum exit height above
the roof line of roof ridge as detailed in the instructions.
If installed adjacent to a combustible surface, a flue shield
must be chosen from these options:
Rear flue shield 900mm long.
8” Solid flue shield with DLR-150 fitted (supplied).
If the draft is insufficient or periodic down drafting occurs and
the heater smokes or only burns slowly, extending the flue or
fitting a specialized cowl will usually resolve the issue.
1.5. Assembly prior to installation
NB: Check that the fireplace is undamaged before installation
begins.
NB: The product is heavy! Ensure you have help when
positioning and installing it. Make sure the product does not
topple over.
NB: Do not place anything on the top plate of the stove as this
could cause permanent damage to the paint.
NB: Read the Installation and Operating instructions carefully
before installing the fireplace!
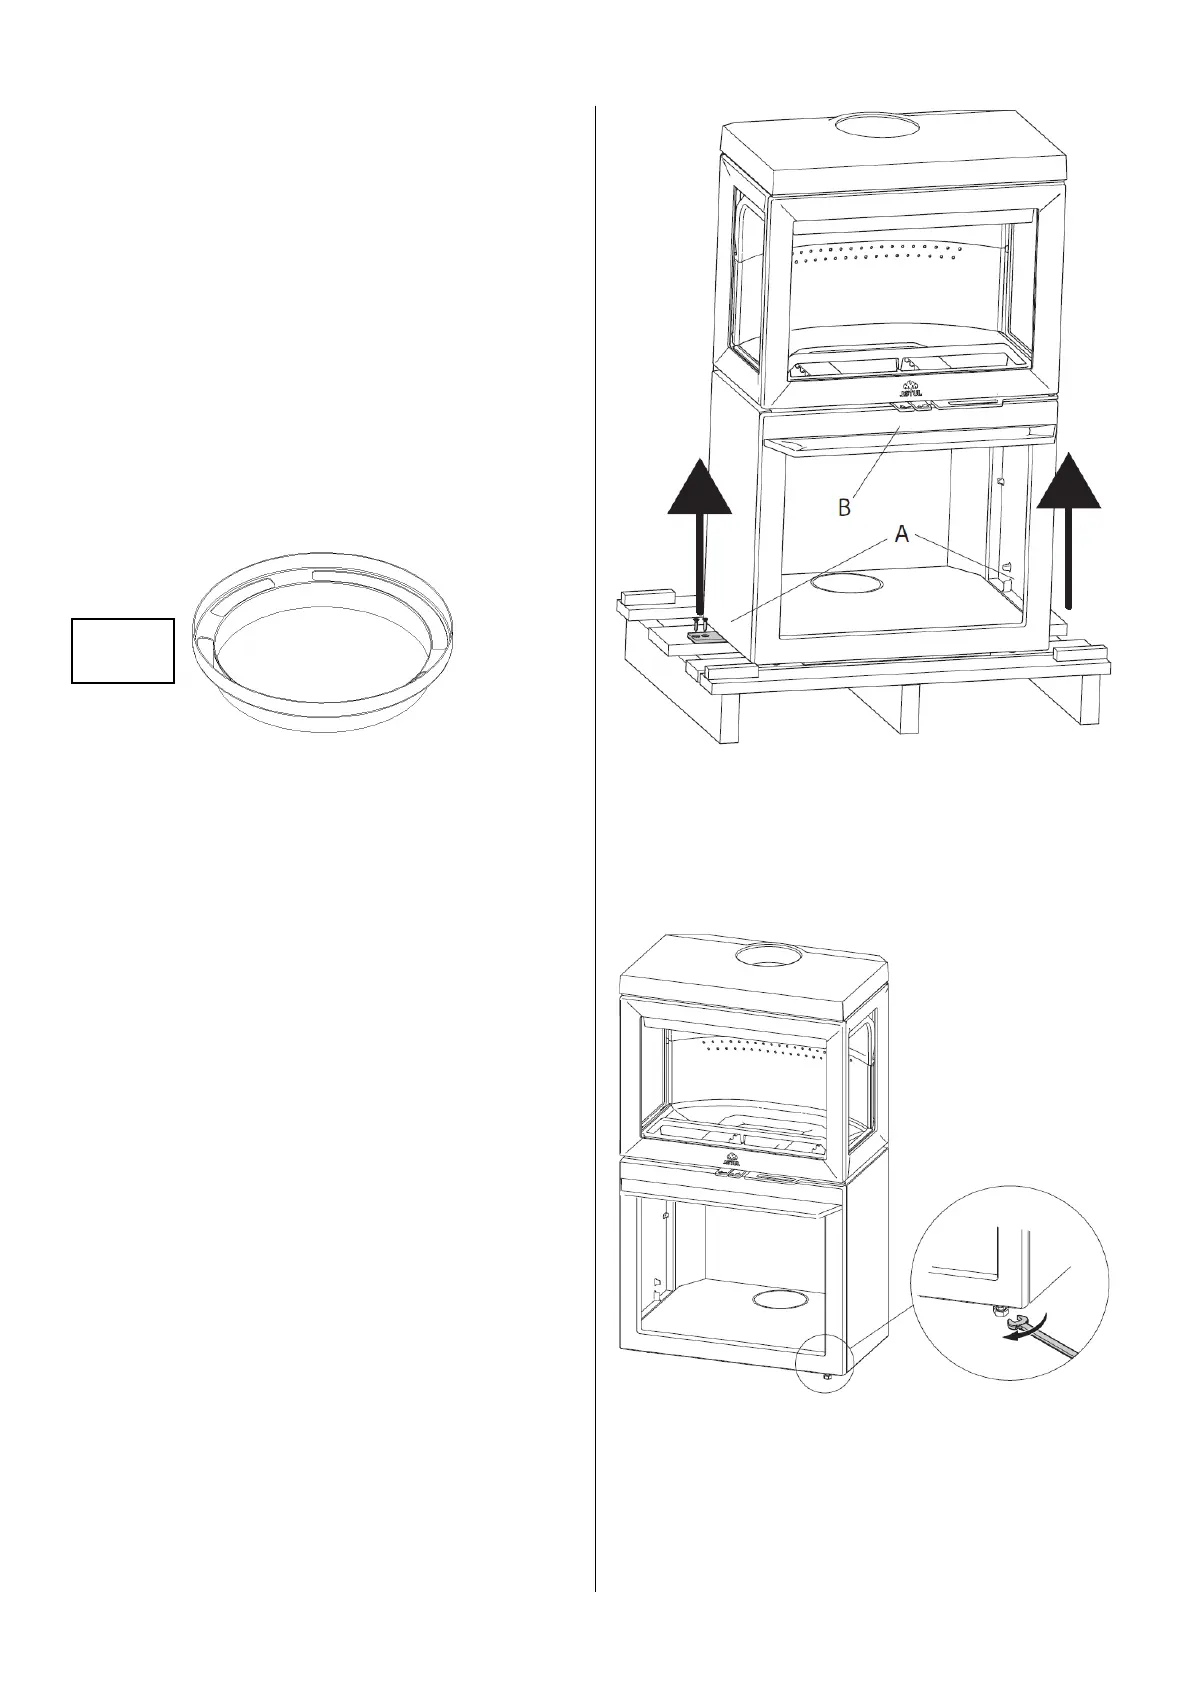
1) Remove the four transport screws (A) that fasten the
stove to the wooden pallet
2) Leave the stove standing on the transport pallet.
3) Check that the control lever (B) moves easily.
4) Lift the stove from the pallet.
5) Set up the stove and adjust using a cap wrench to a
horizontal position with the 4 height adjustment screws