12
SHEETING SETUP
1 For initial sheet setup of both the Jib and Mainsheet, pull the winchline in to its close-hauled (sheeted fully in) position and don’t move it
until both sheets are fully installed.
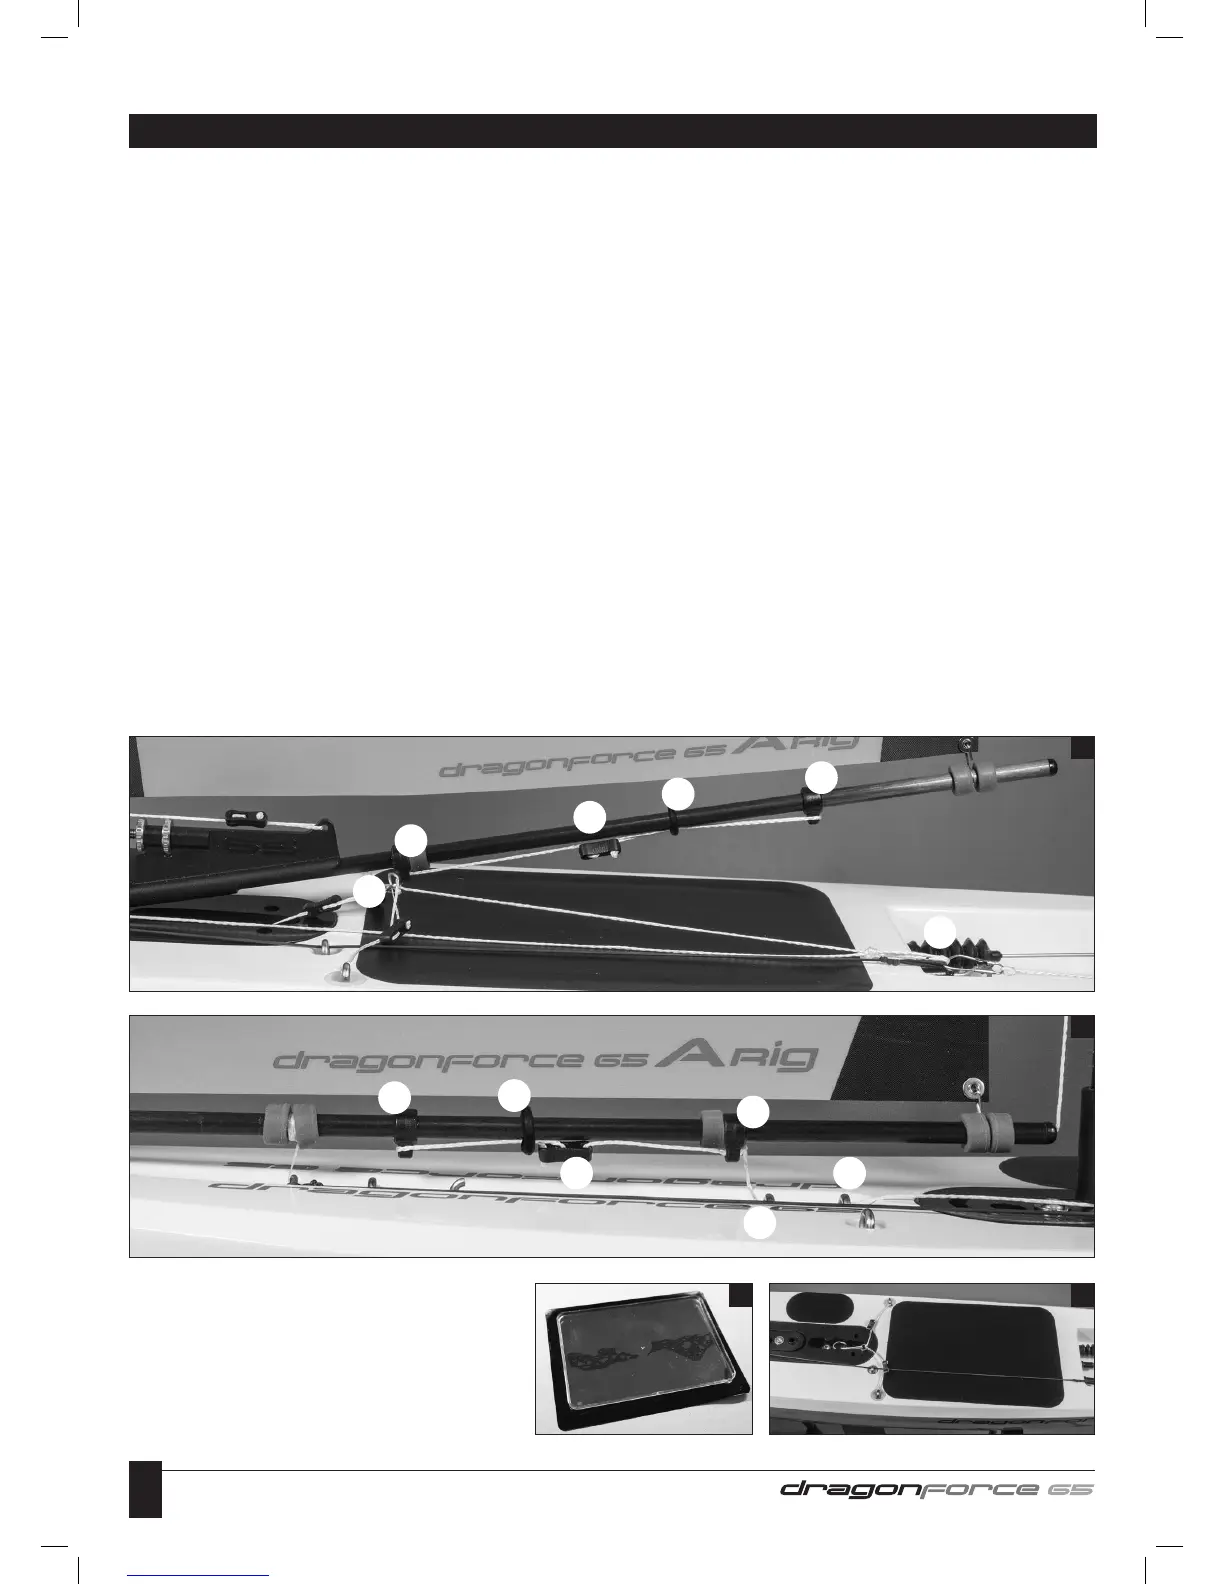
2 Cut a 500mm length of Dyneema for the Mainsheet. Tie a loop in one end and clip it in to the Winch Line Clip(A) (see photo 2), run it
forward and through the metal ring on the Mainsheet Bridle(B), up through the Mainsheet Guide(C) on the Main Boom, back along the
boom through the first two Holes in Bowsie(D), through the Rubber O Ring(E), through the Mainsheet Guide(F), forward through the
Rubber O Ring(E) again and then through the final hole in the Bowsie(D). With the Main Boom positioned on the hull’s centreline, position
the Bowsie approximately midway between (C) & (F), apply light tension to get rid of any slack and tie off the final knot to secure the Bowsie.
3 Cut an 700mm length of Dyneema to form the Jibsheet. Tie a loop in one end and clip it in to the Winch Line Clip(A), run it forward
underneath the Mainsheet Bridle(B), forward through Deck Eye 3(G) & Deck Eye 2(H) (see photo 3), up through Jib Sheet Guide(I),
run it forwards underneath the Jib Boom, through the first two holes of a Bowsie(J), forward through Rubber O Ring(K), through Jib
Sheet Guide(L), back through Rubber O Ring(K) again and back through the final hole in the Bowsie(J). Hold the back end of the Jib
Boom over the inner edge of the Hull (Gunwhale), position the Bowsie(J) approximately midway between (I) & (L) apply light tension to
get rid of any slack and tie off the final knot to secure the Bowsie.
4 With the Winchline still in its fully sheeted in position adjust the Bowsies on the Jibsheet and Mainsheet so the boom rear ends are
in the positions shown in Diagram 4 (opposite page). If you have the 115mm of winchline travel set up when you sheet out the booms
should be approximately in positions shown.
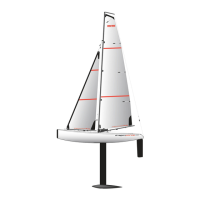
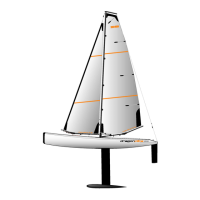
You should now almost have a fully set up rig. The only trimming left to do is to adjust the amount of twist in the leeches (back edges) of
both sails. The twist in the Mainsail can be controlled by adjusting the Boom Vang angle, the Jib twist is controlled by adjusting the Bowsie
at the bottom of the Topping Lift. It’s hard to define the amount of twist in figures, but the photos on the opposite page show a well adjusted
rig with correct twist and boom sheeting angles. If you can match this rig setting you will have a well balanced and easy to sail boat.
5 Before you put the boat on the water fit the clear Deck Hatch and seal with one of the supplied adhesive Deck Patches. An easy
method to do this is to lay the adhesive Deck Patches face down on a smooth, hard surface, peel back the backing paper and place
the clear Deck Hatch upside down in the centre of the patch. Turn over and locate in the Deck Hatch Opening in the deck, make sure
the adhesive patch is pressed down to form a waterproof seal around the hatch. Fit the smaller Deck Patch over the hatch opening next
to the Keel Box (which is an alternative battery position if using appropriate sized rechargeable battery packs).
You are now ready to sail!
5 5
2
3
A
B
C
D
E
F
G
H
I
J
K
L
 Loading...