11
POWERING UP THE BOAT
If you’ve bought the ‘Ready To Race’ version (8815) of the boat you will have the Joysway Transmitter and Receiver. The transmitter (Tx)
and Receiver (Rx) will already be ‘bound’ and full operating instructions for this radio set are supplied.
If you are using your own Tx/Rx equipment we will assume you will be familiar with all it’s functions and the following guide covers the setup
of the boat only.
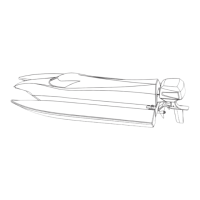
1 Connect up the Servo, Winch and Battery Switch cables up to the Receiver as follows:
- Rudder Servo plugs into Channel 1 socket.
- Sail Winch plugs into Channel 3 socket
- On/Off Switch plugs into Channel 5 socket (check your own Tx manual for this connection)
2 Install four, AA batteries into the Battery Holder and secure into the tray as shown in photo 2. Plug the batteries into the spare
lead from the On/Off Switch.
3 Install four, AA batteries into the Tx. With both Tx control sticks in their central positions switch on the Tx and the boat’s On/Off Switch
by pushing the wire switch arm forwards in the cockpit.
Note: At this stage check that the control sticks on your Transmitter operate in the correct direction. Looking forward from the back of the
boat when the rudder control stick is moved to the right, the Rudder should turn to the right. When the Sail Winch control stick is moved
down, the clip on the Winch Line should move to its furthest back position (sheeted in). If either of these actions is reversed, consult your TX
manual for instructions on how to reverse the stick actions.
4 With the rudder control stick and fine adjuster on the Transmitter set in their central position, check to see if the Rudder Blade is centred
in line with the Keel when viewed directly from behind. If not, use the Allen Key to adjust the top grub screw on the Rudder Arm.
Using your Tx (see manual), adjust the rudder throw to approximately 40 degrees from the centreline in either direction when the rudder
control stick is moved to it’s maximum throws.
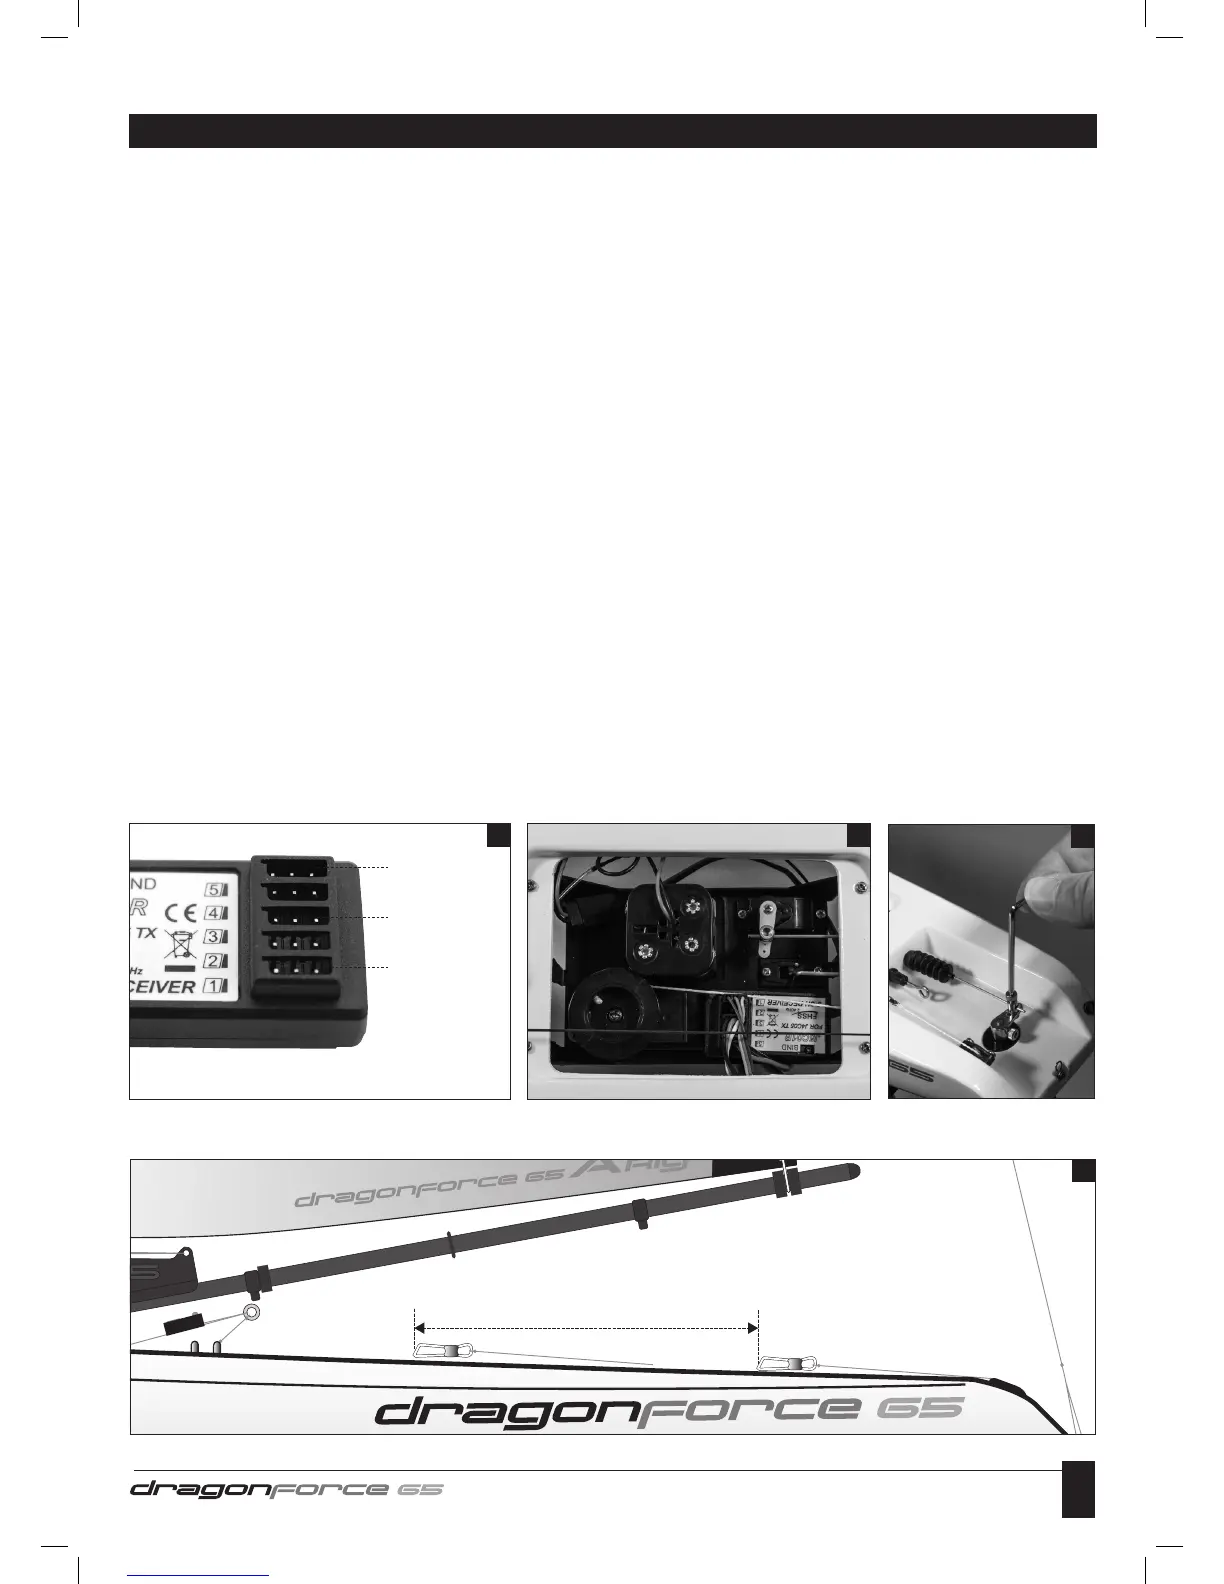
5 Now set the required Winch Line travel of 115mm between the fully sheeted in position (for sailing ‘close hauled’ - close to the wind)
and fully sheeted out position (for sailing on a ‘run’ - sailing in the same direction as the wind with the sails fully out) (see diagram 5
below). Refer to your Tx manual on how to make this adjustment. Check that the elastic tensioner on the Winch Line is still under light
tension in the ‘sheeted out’ position, if not, shorten the elastic until this is achieved (this tension stops the Winch Line from jumping off
the Winch Drum).
Note: It’s a good idea to mark these two positions on the deck as a permanent reference points for consistent sheeting adjustment. The
sheeting points shown are not too critical but what is important is the amount of travel between the two points of 115mm. On computerised
Transmitters you will be able to adjust the sheeting end points individually through their software menus.
5
115mm Winch Line travel
Close Hauled
(sheeted in position)
Running
(sheeted out position)
1 2
4
Channel 5 socket:
Switch lead.
Channel 3 socket:
Sail Winch lead.
Channel 1 socket:
Rudder Servo lead.
Note: The darker
wire on each
lead needs to be
adjacent to the
edge of the receiver.
(see photo 2)
 Loading...